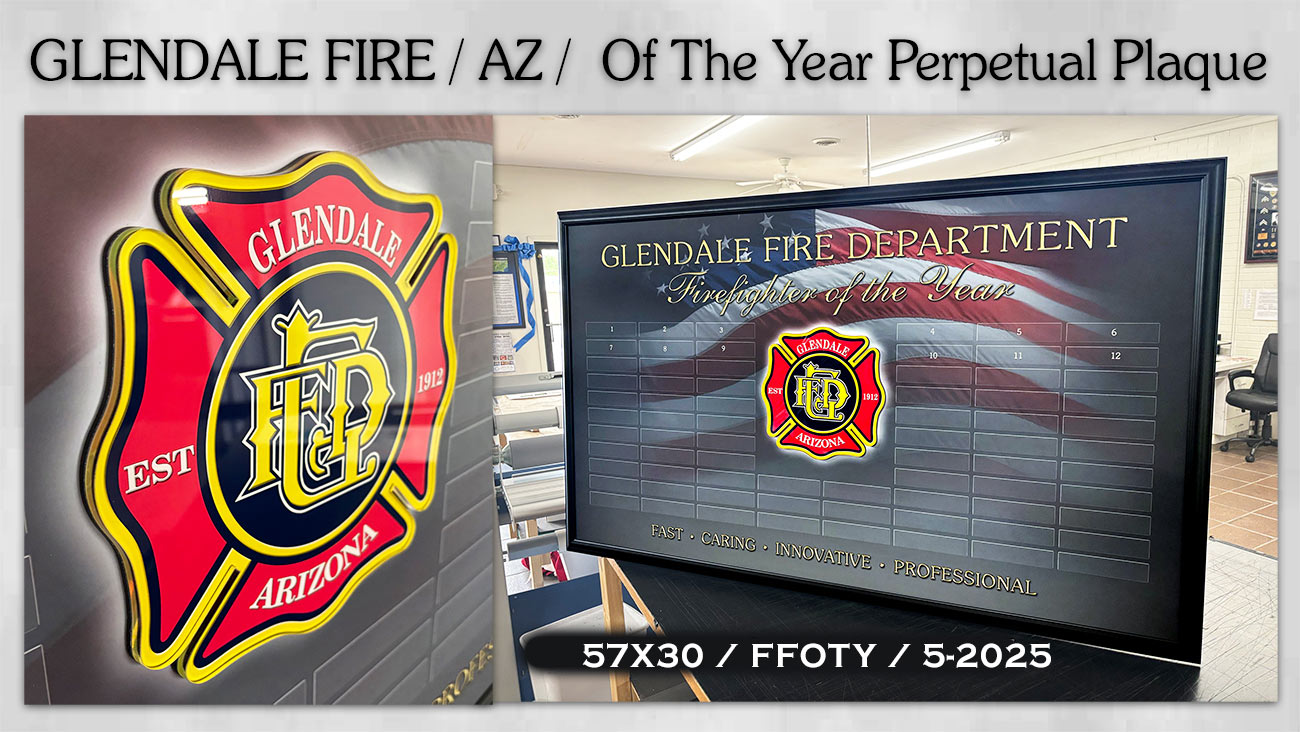
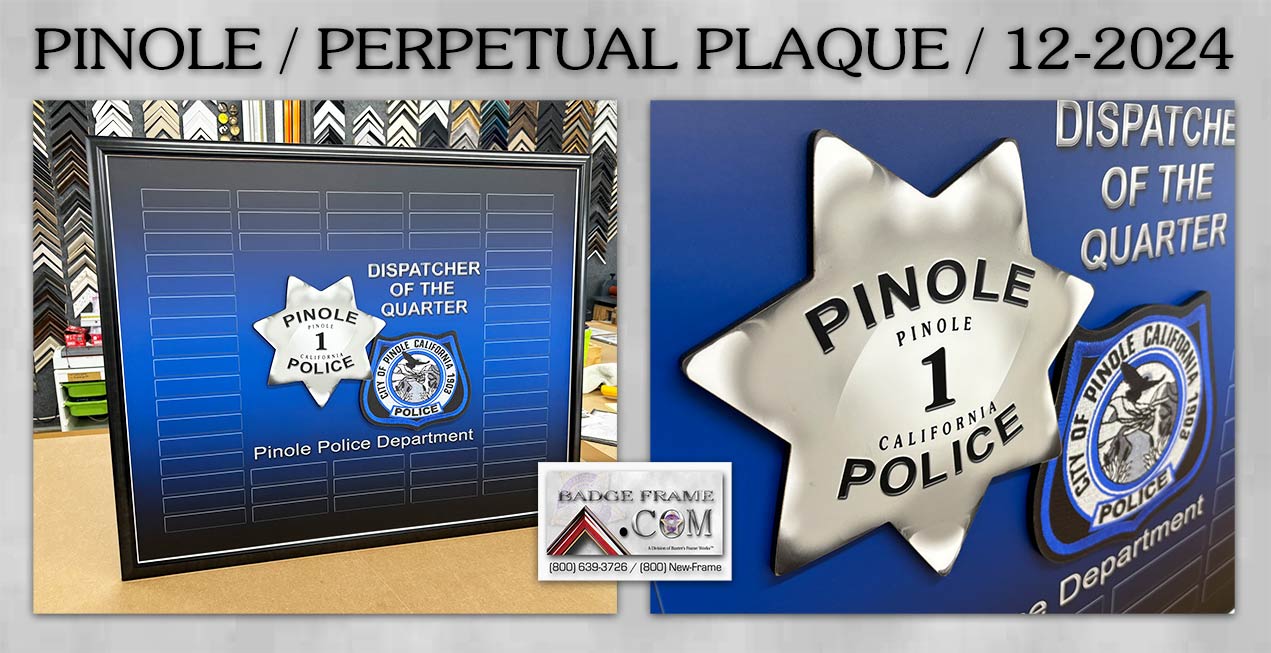
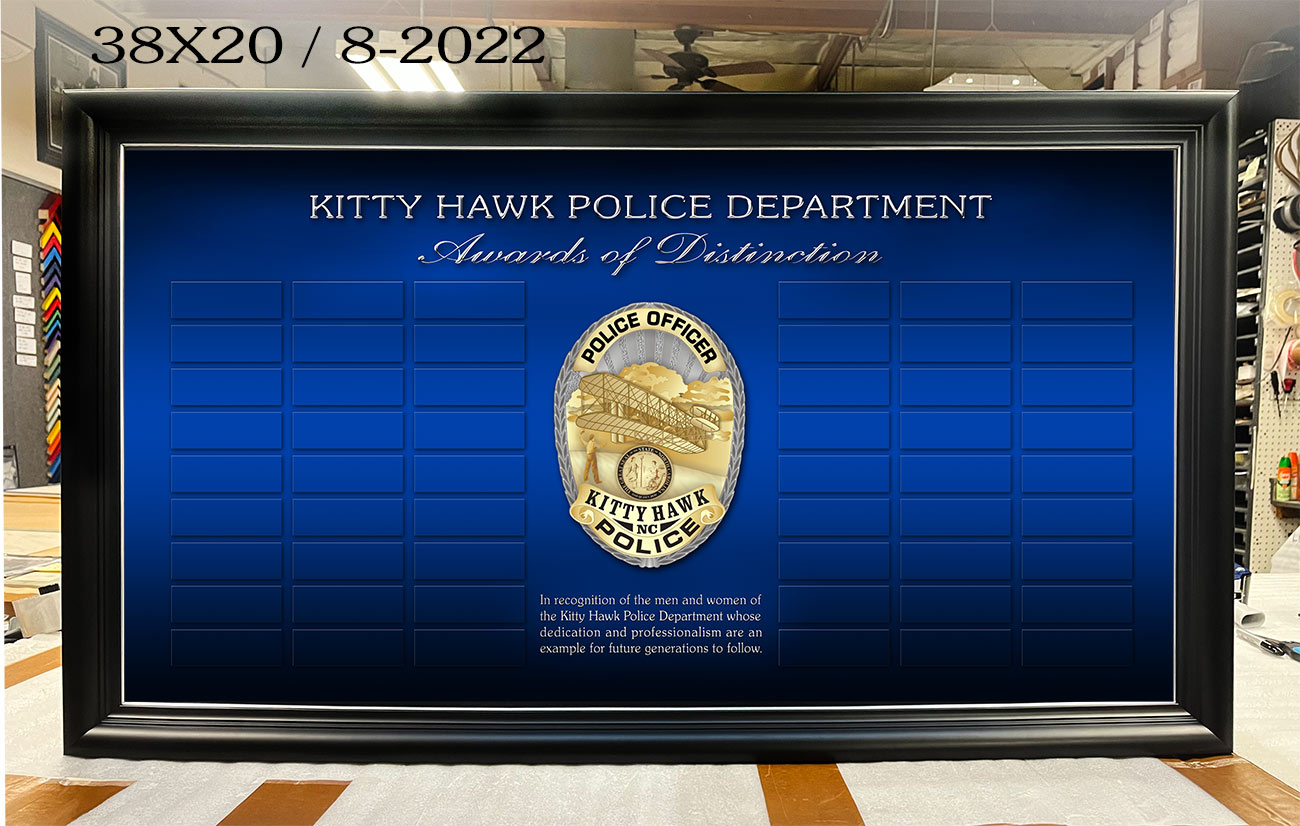
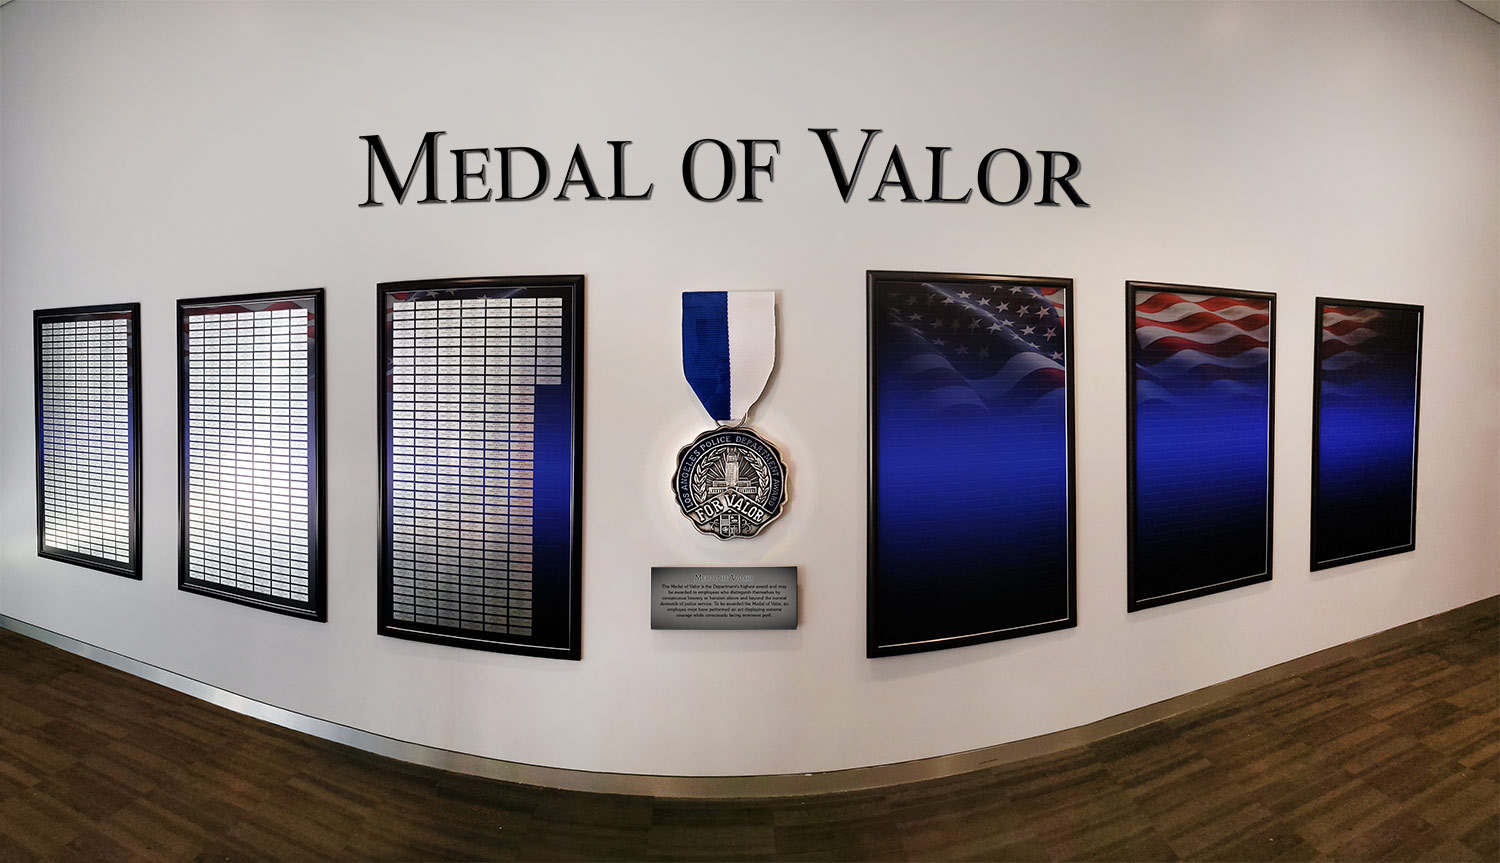
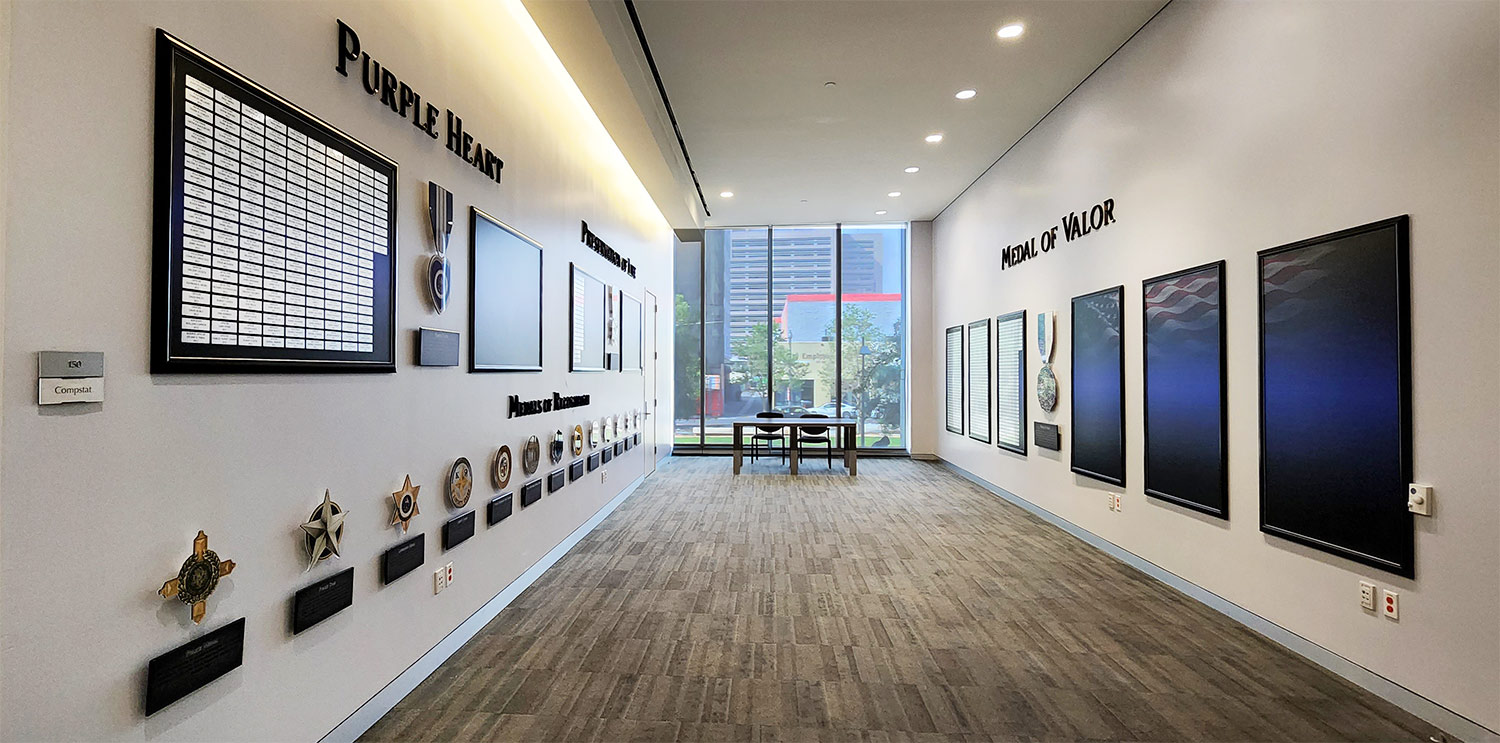
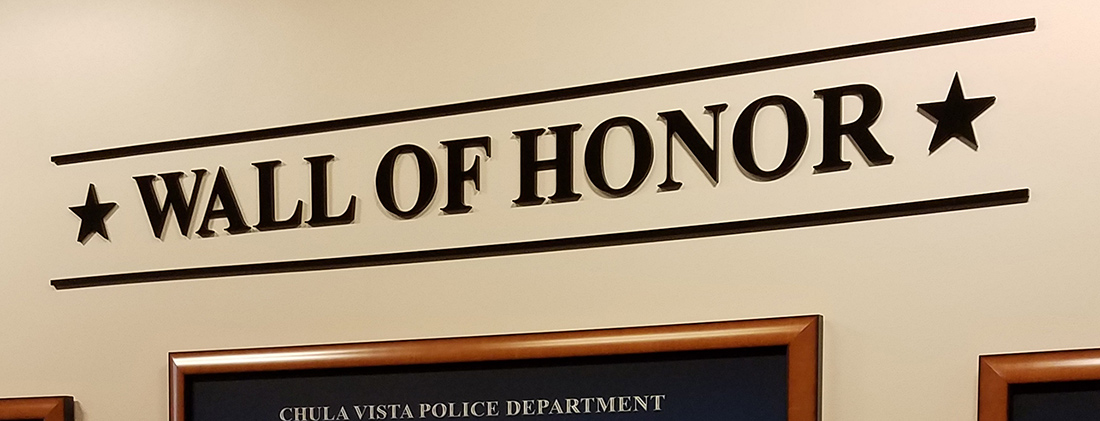
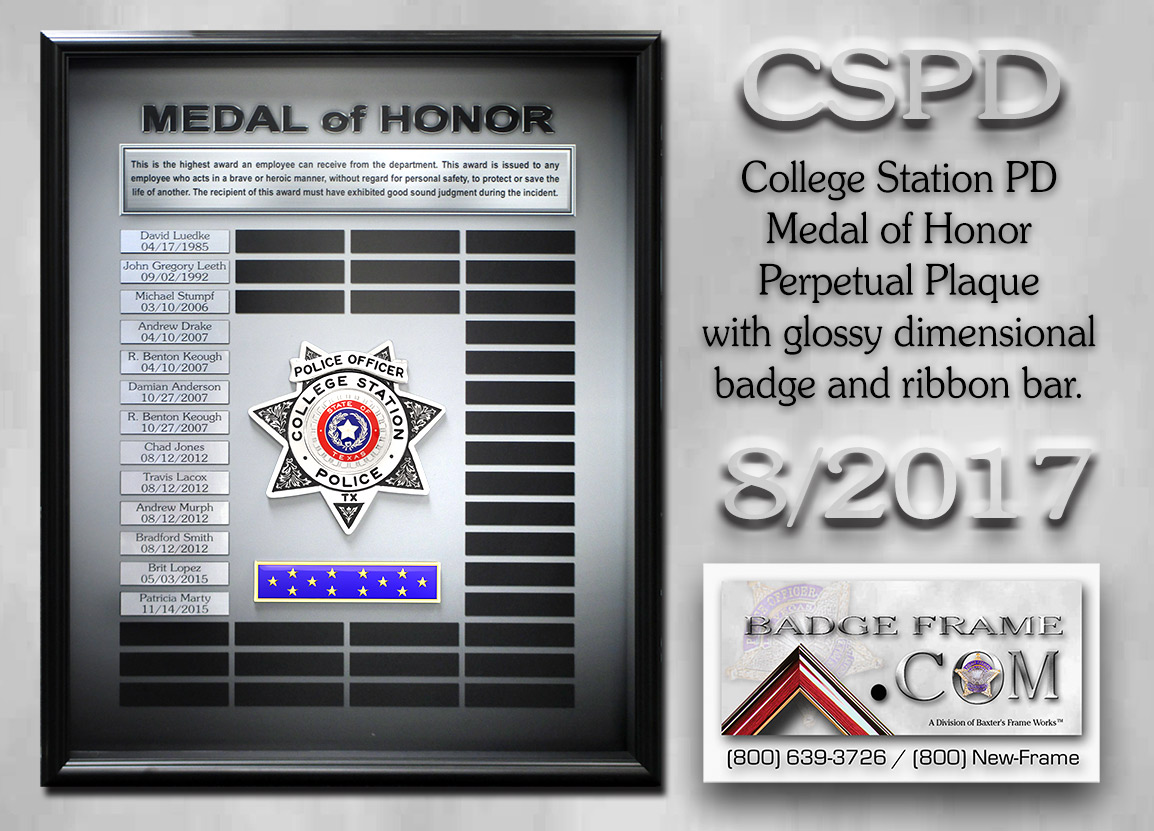
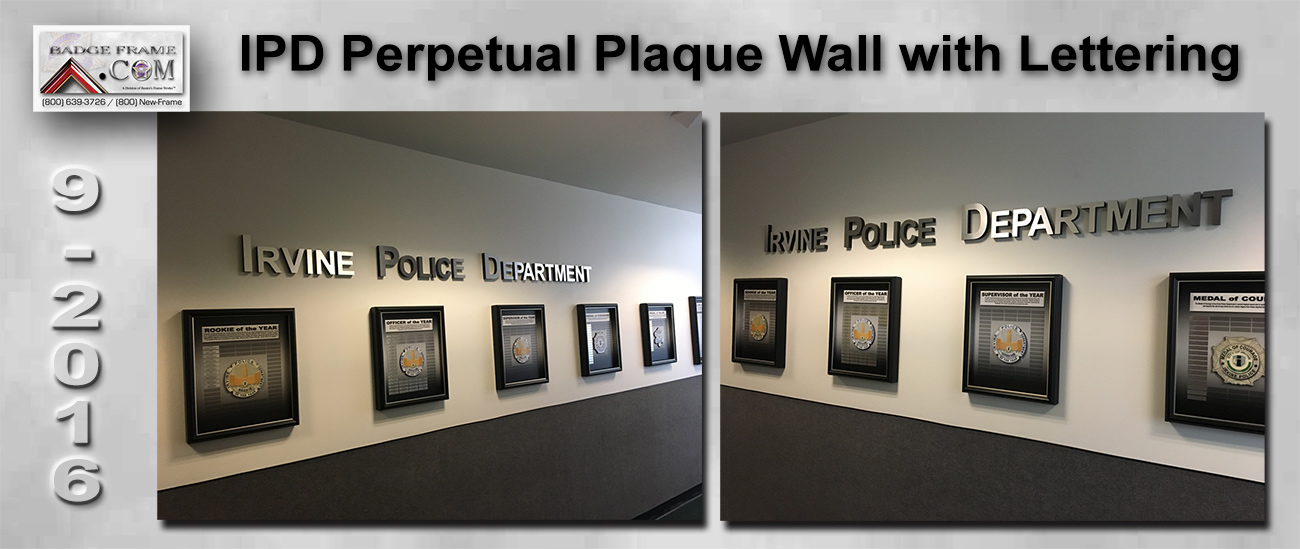
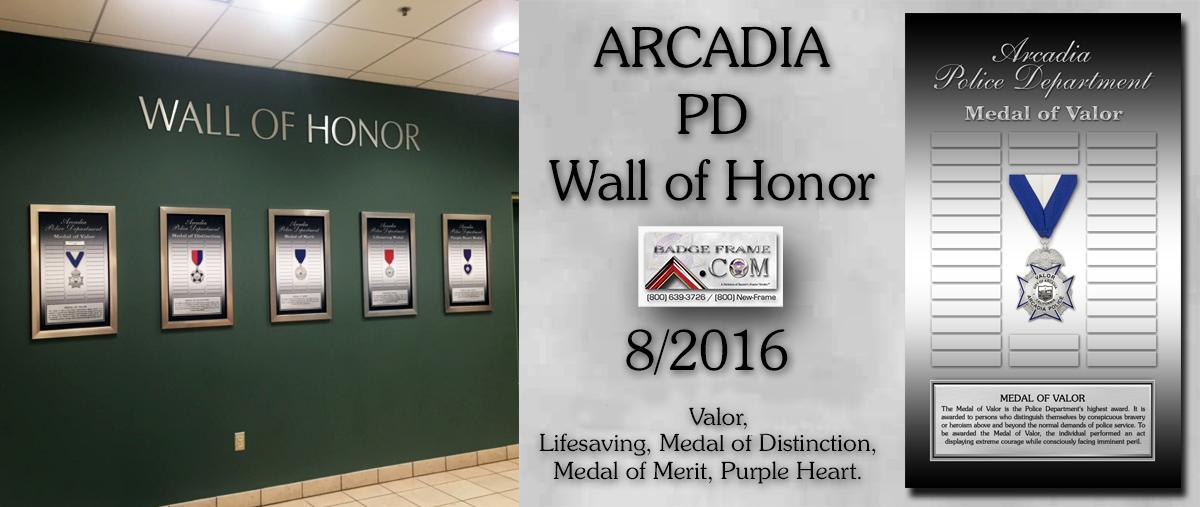
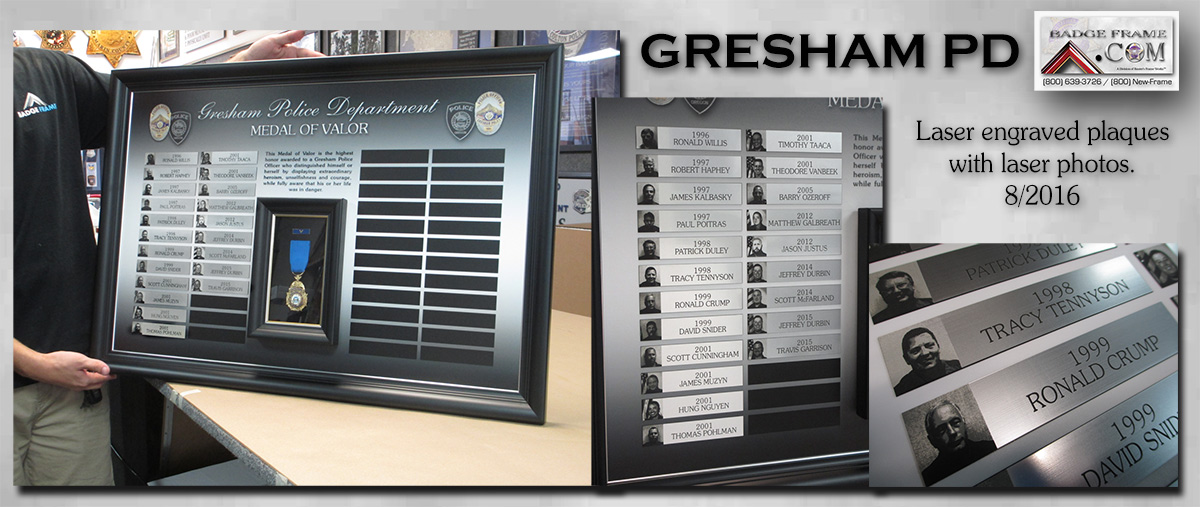
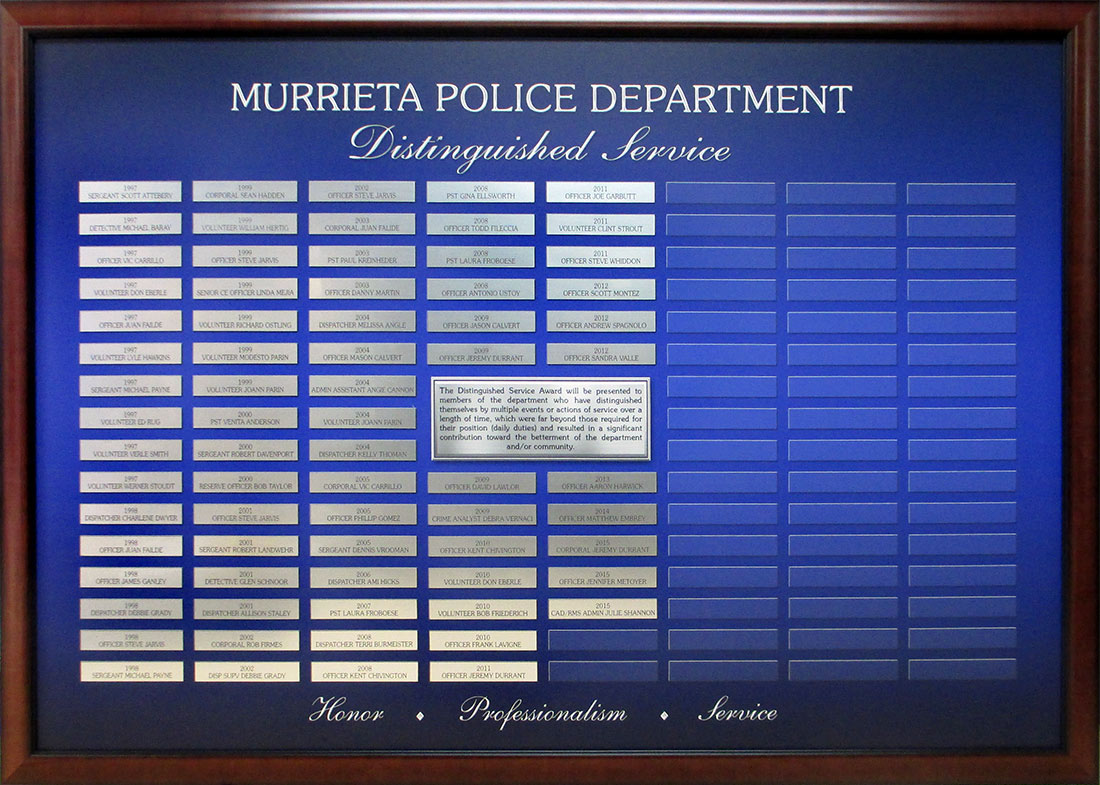
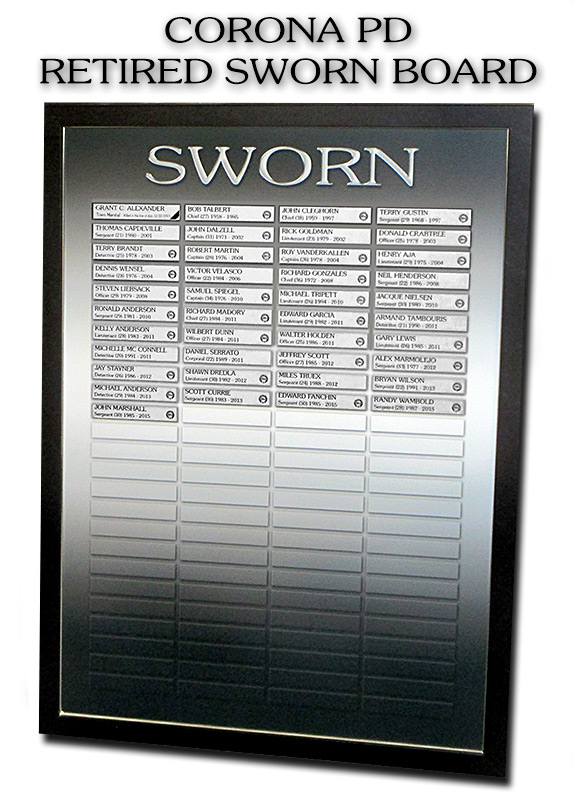
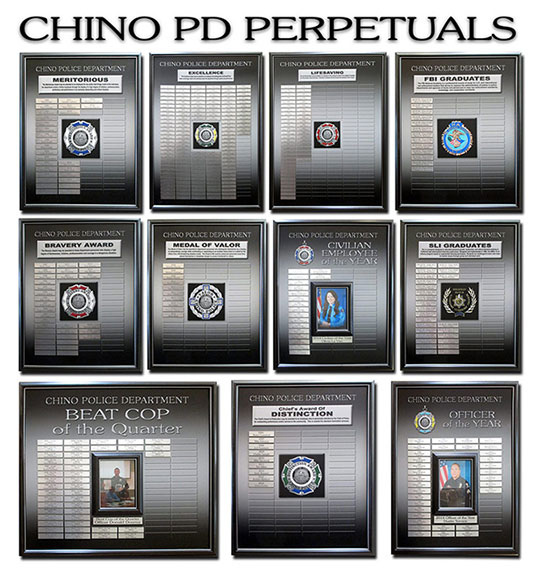
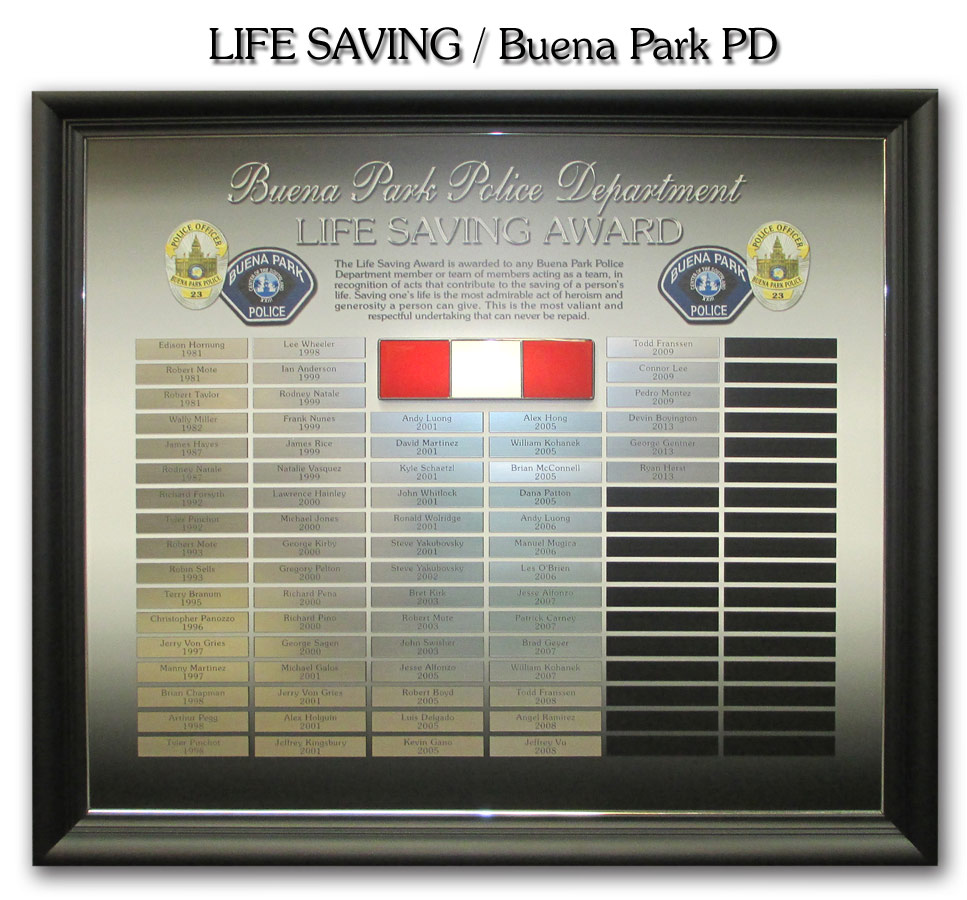
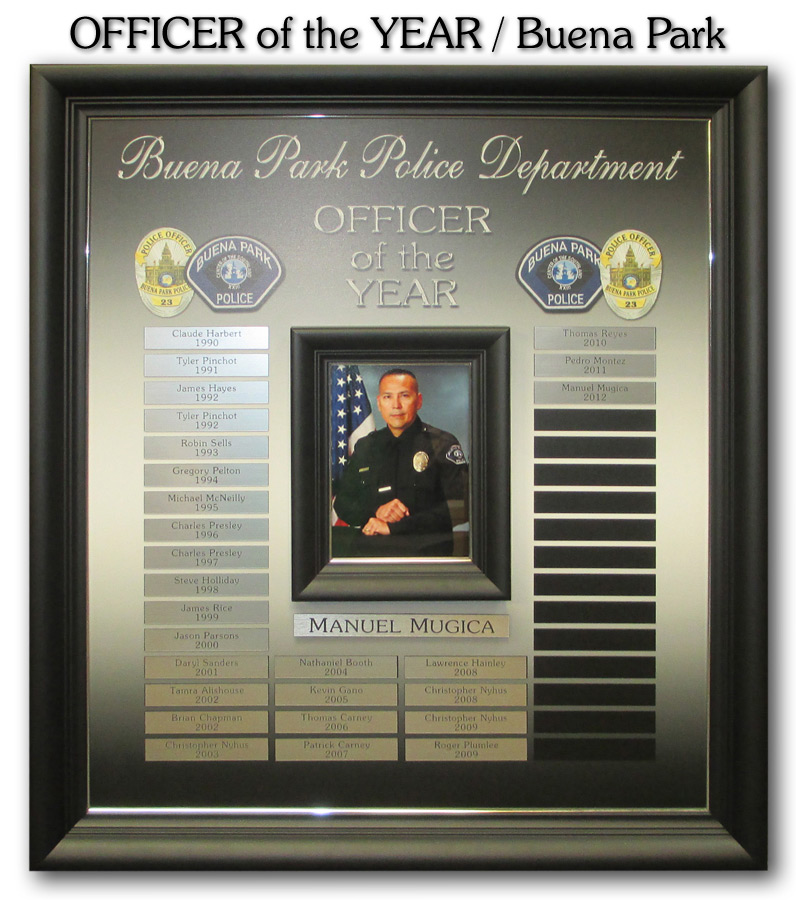
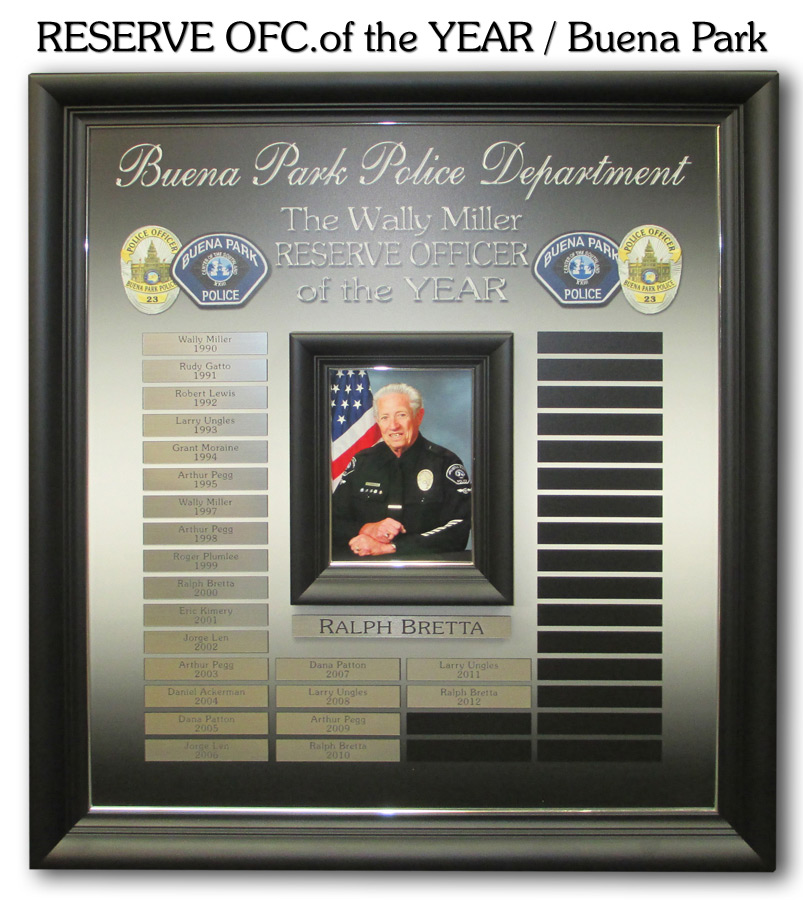
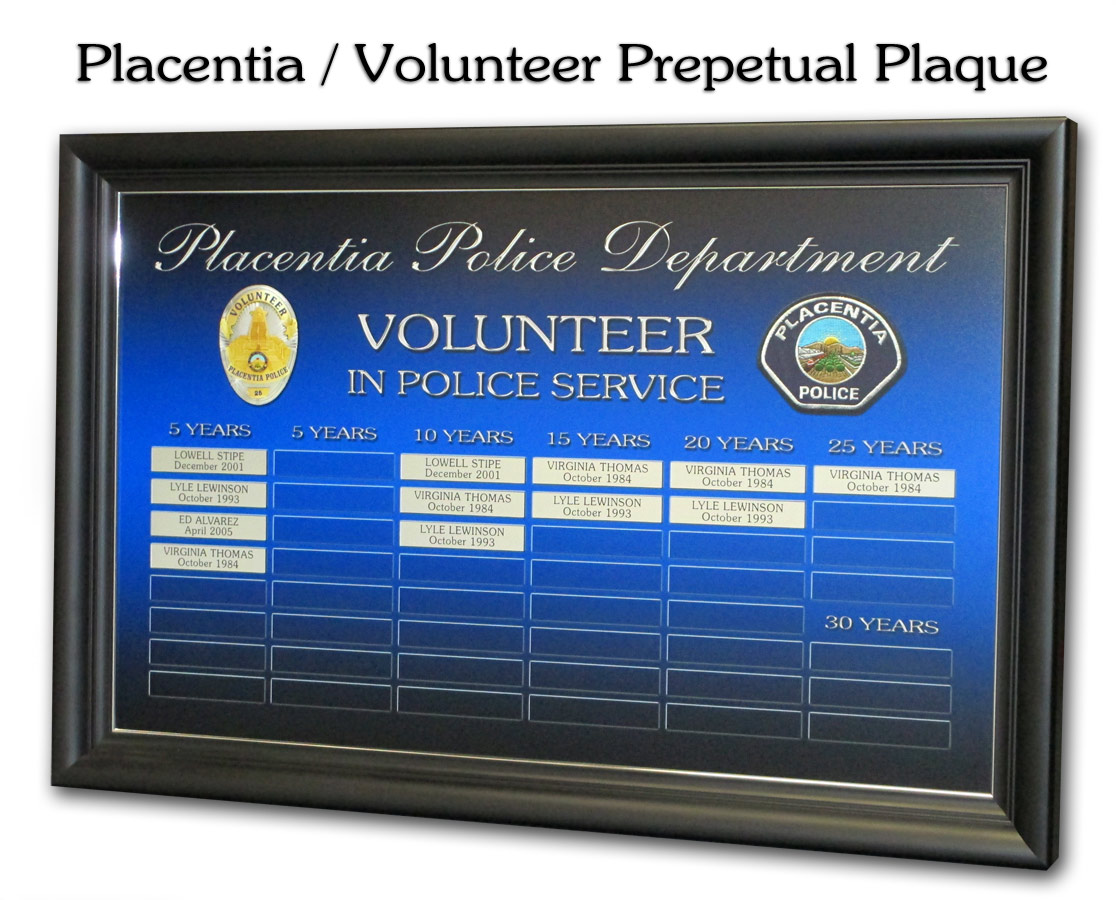
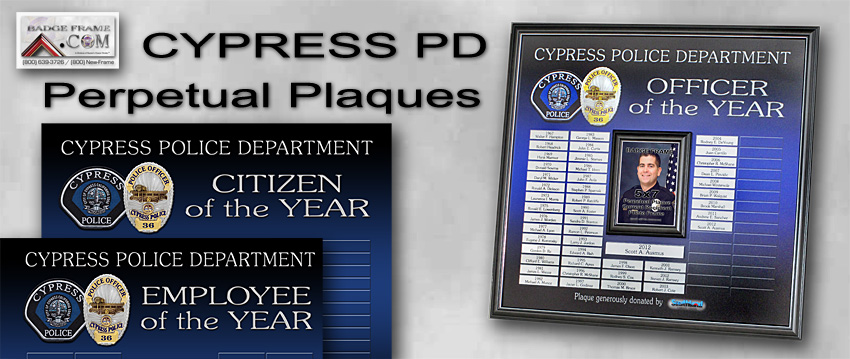
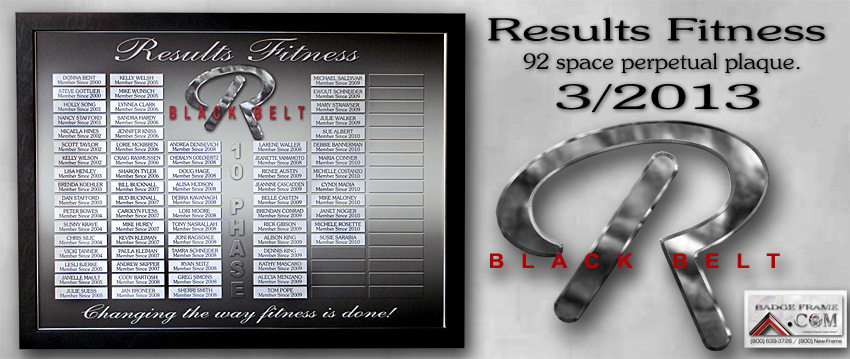
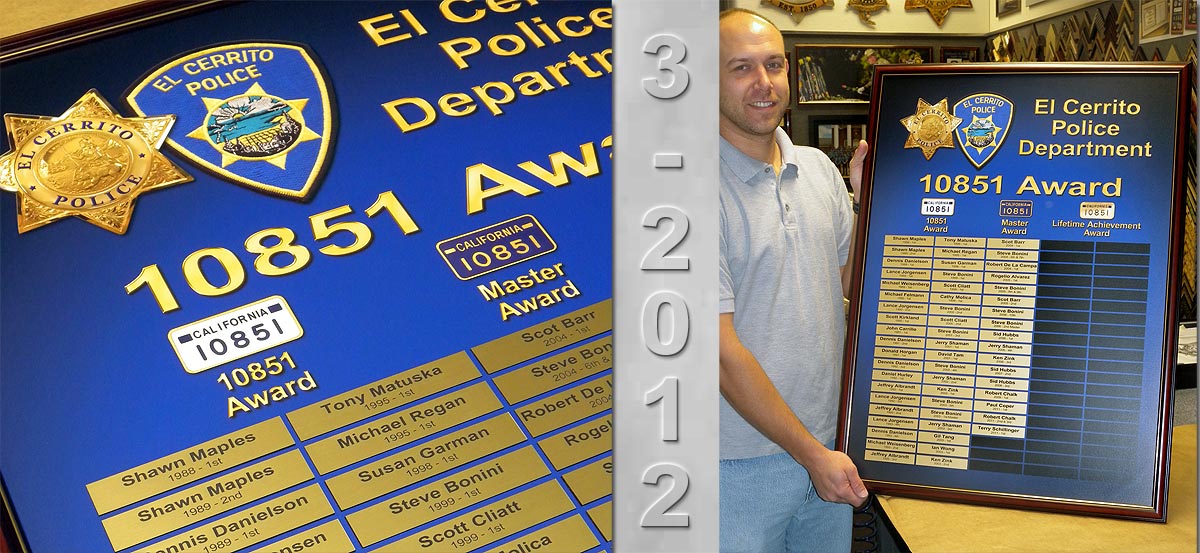
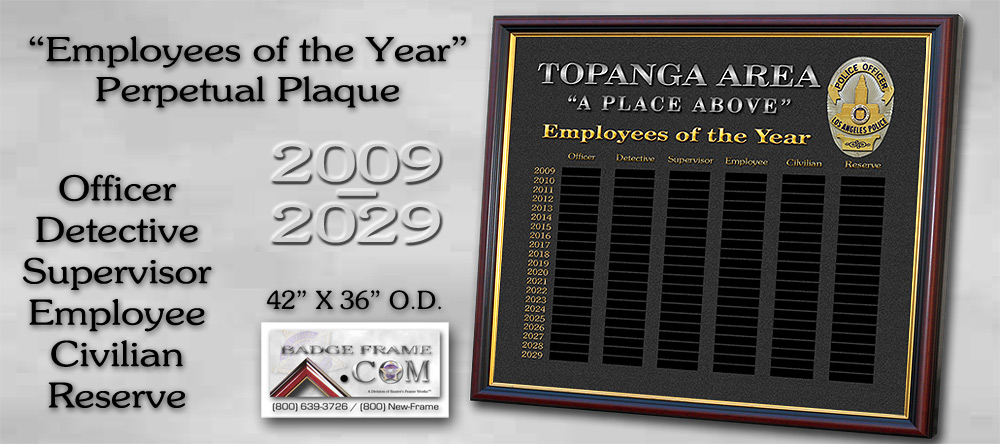
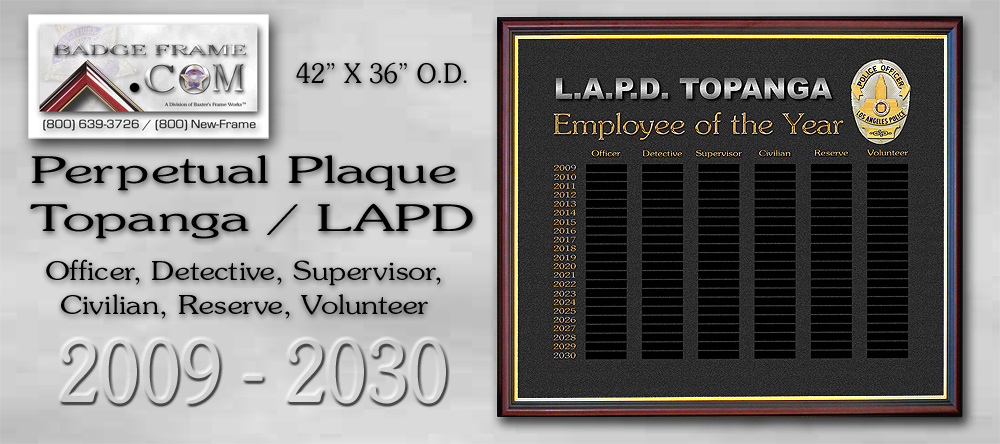
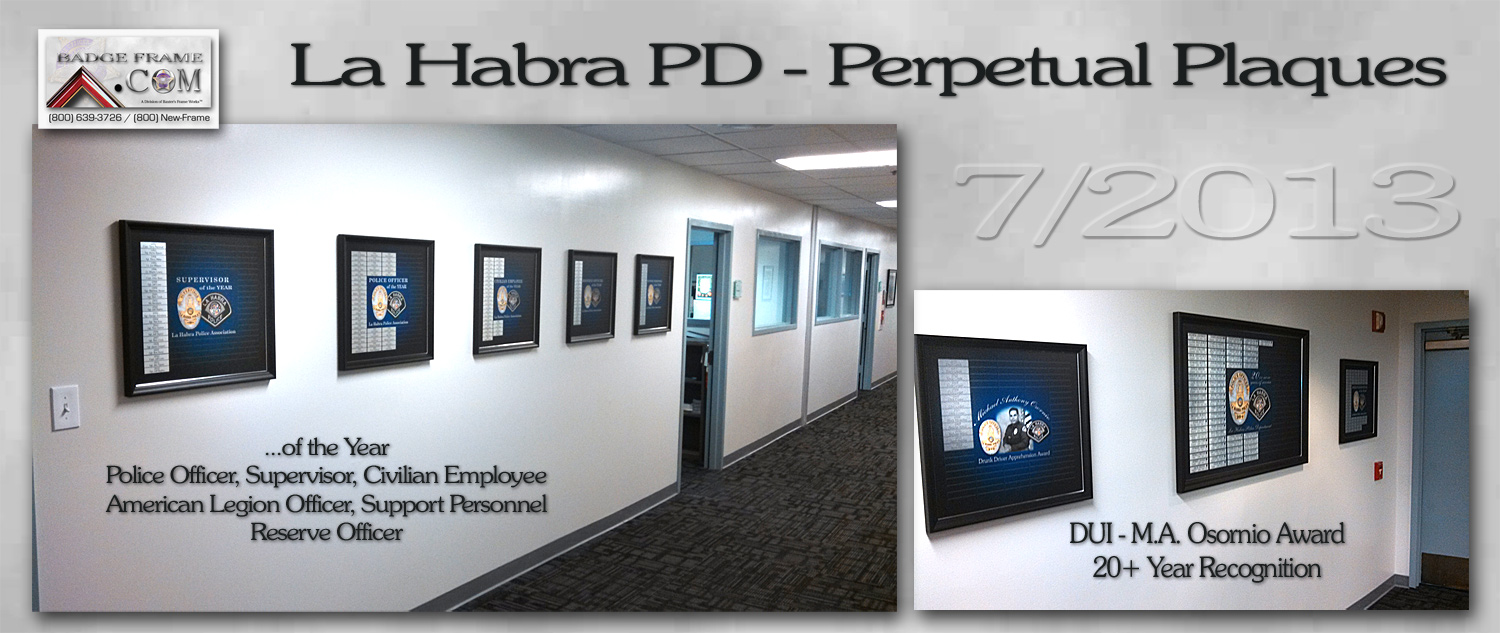
Badge Frame brings perpetual plaques to a whole new
level. Forget your trophy shops and take a fresh look at
these beauties!
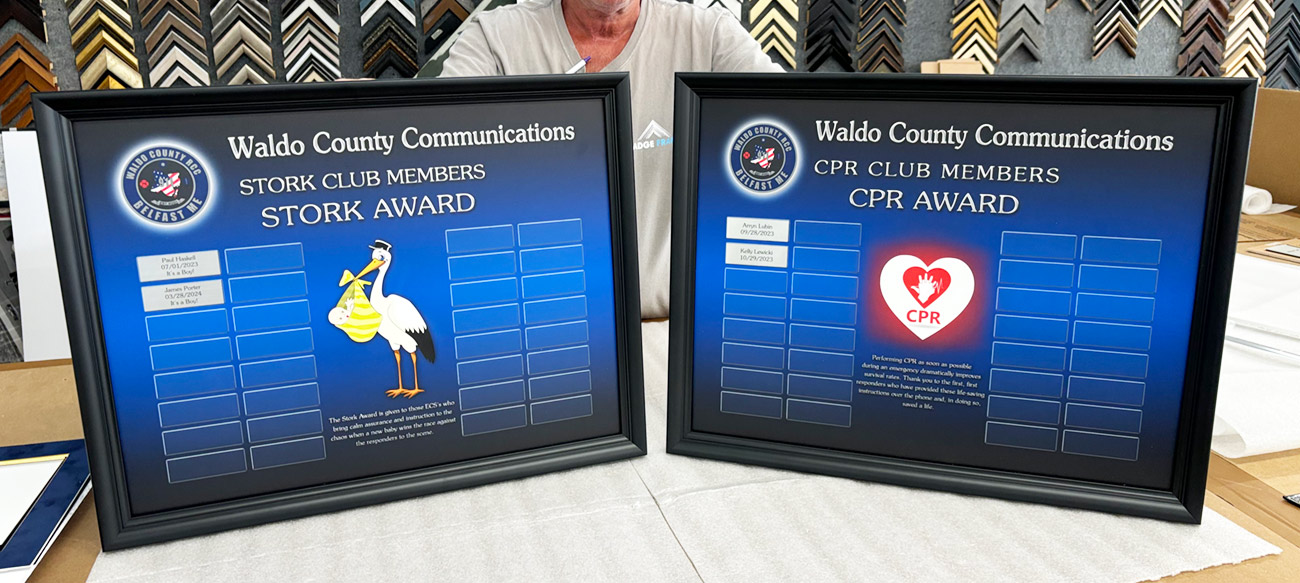
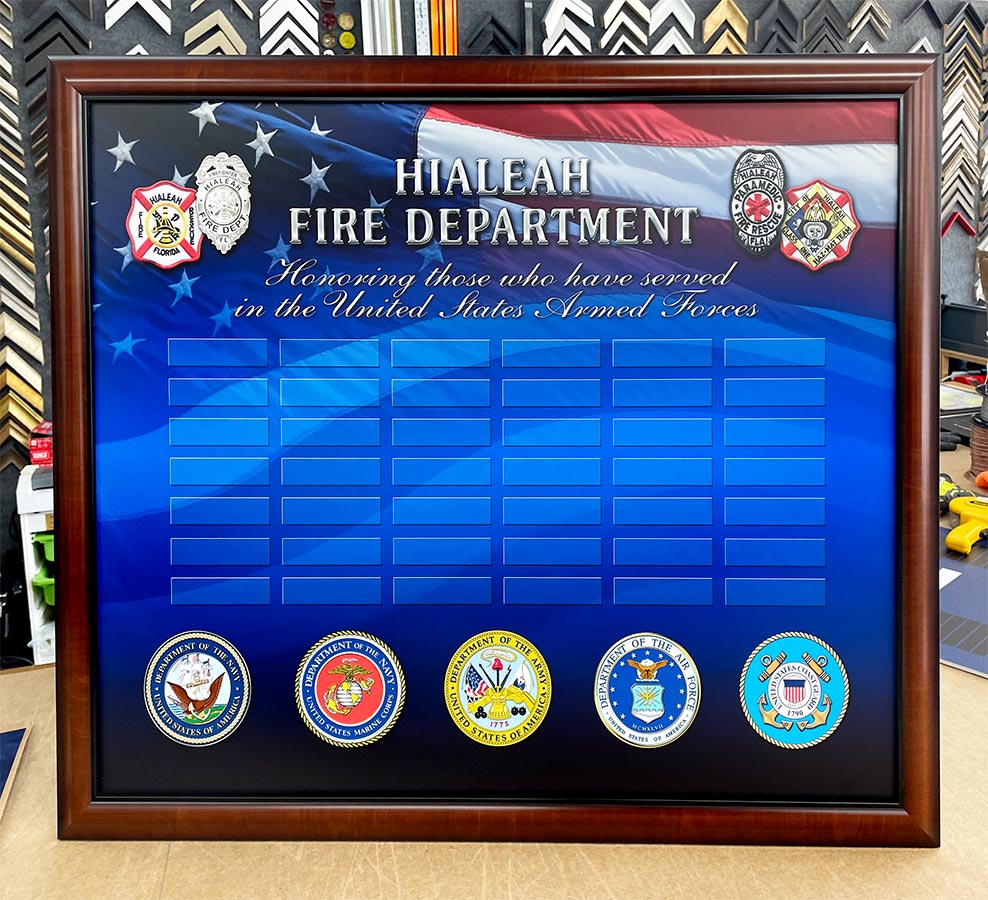
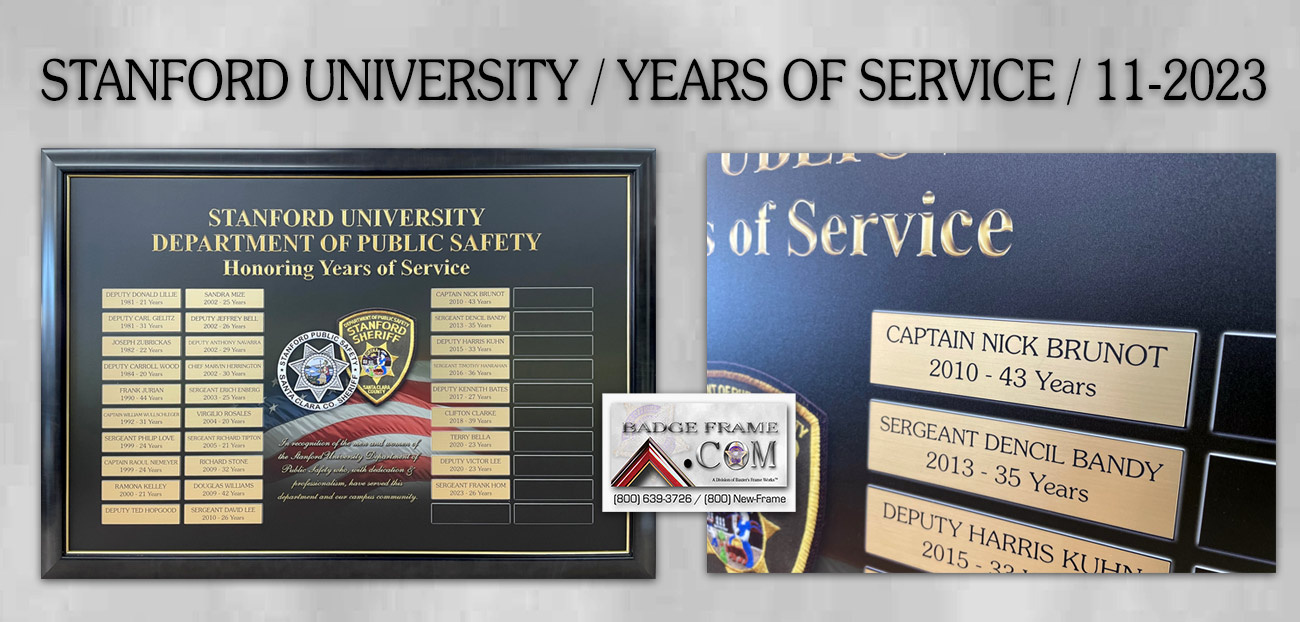
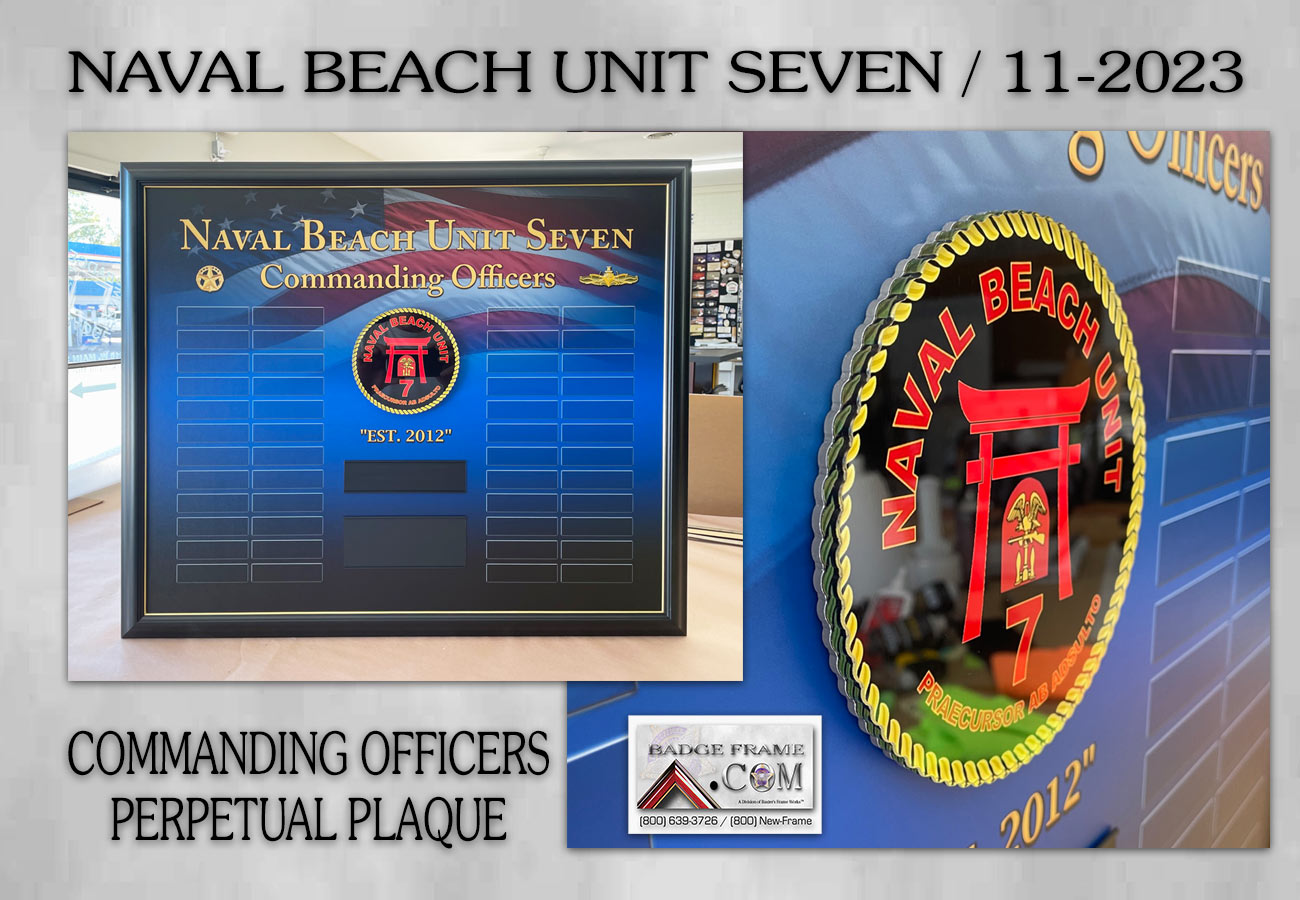
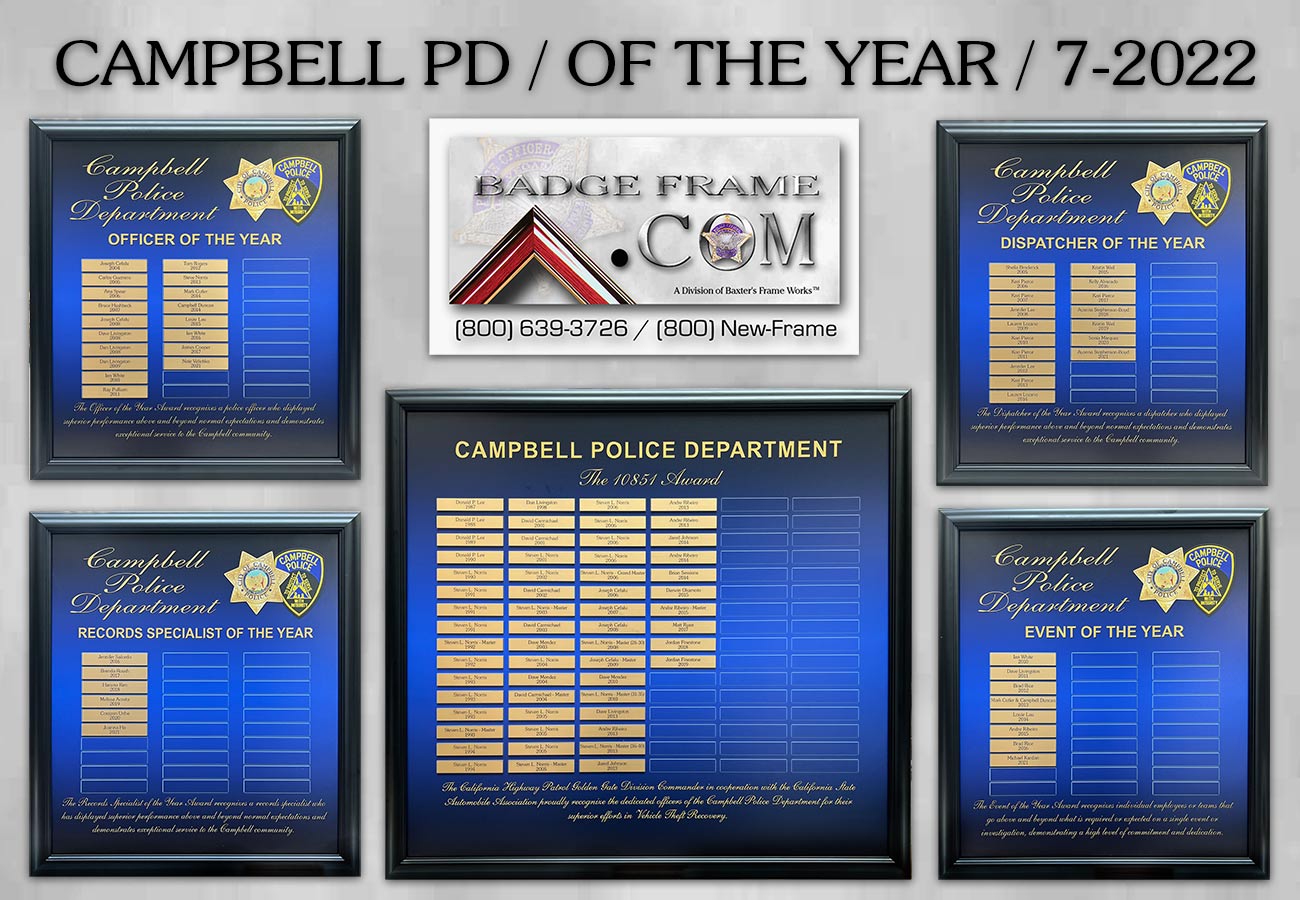
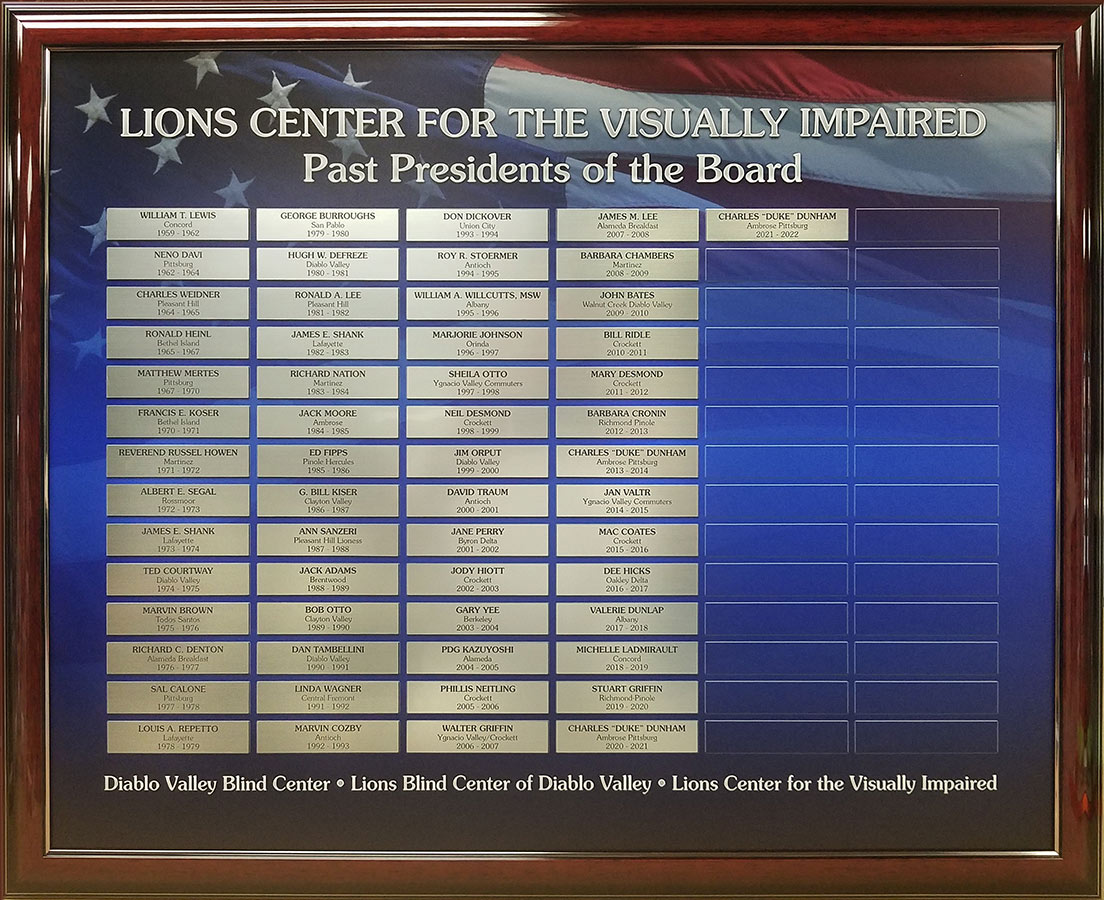
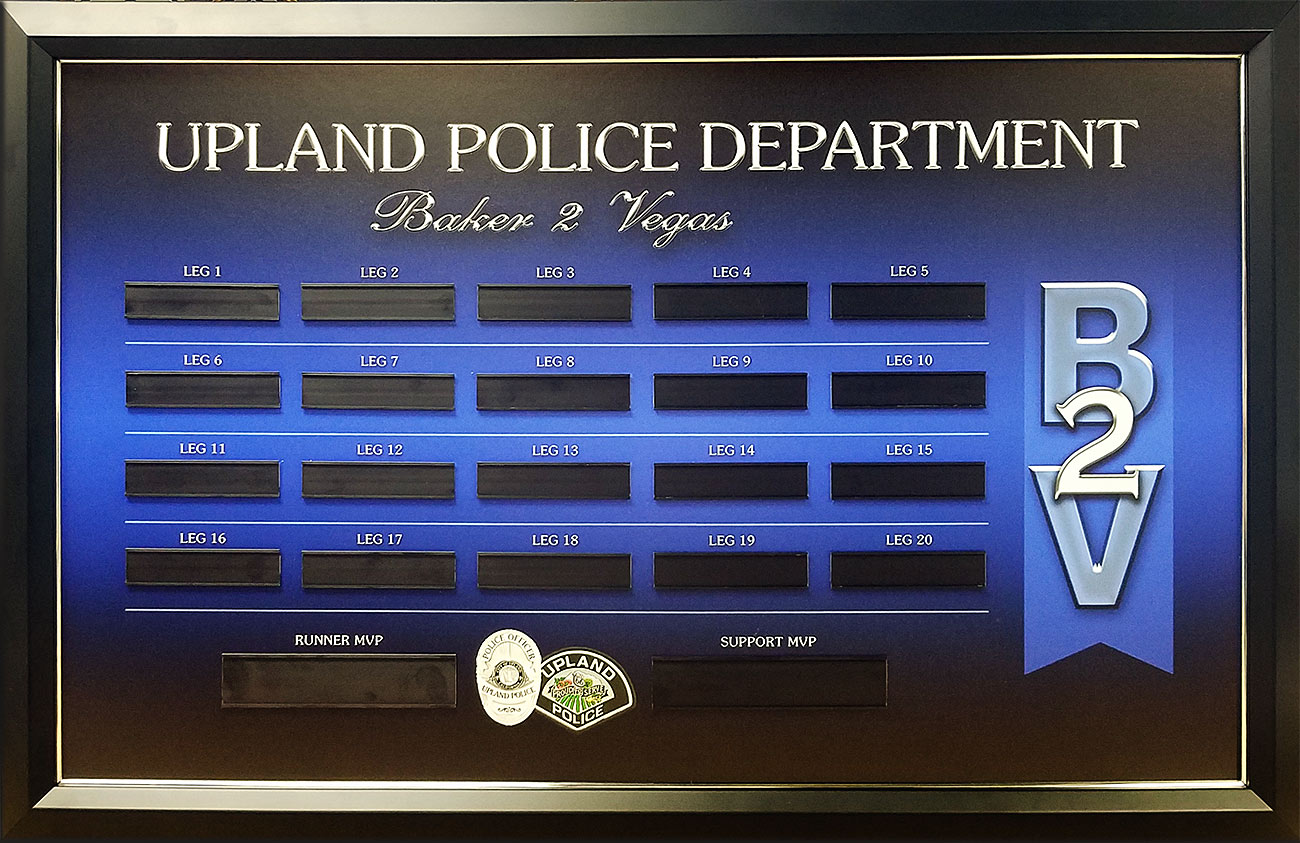
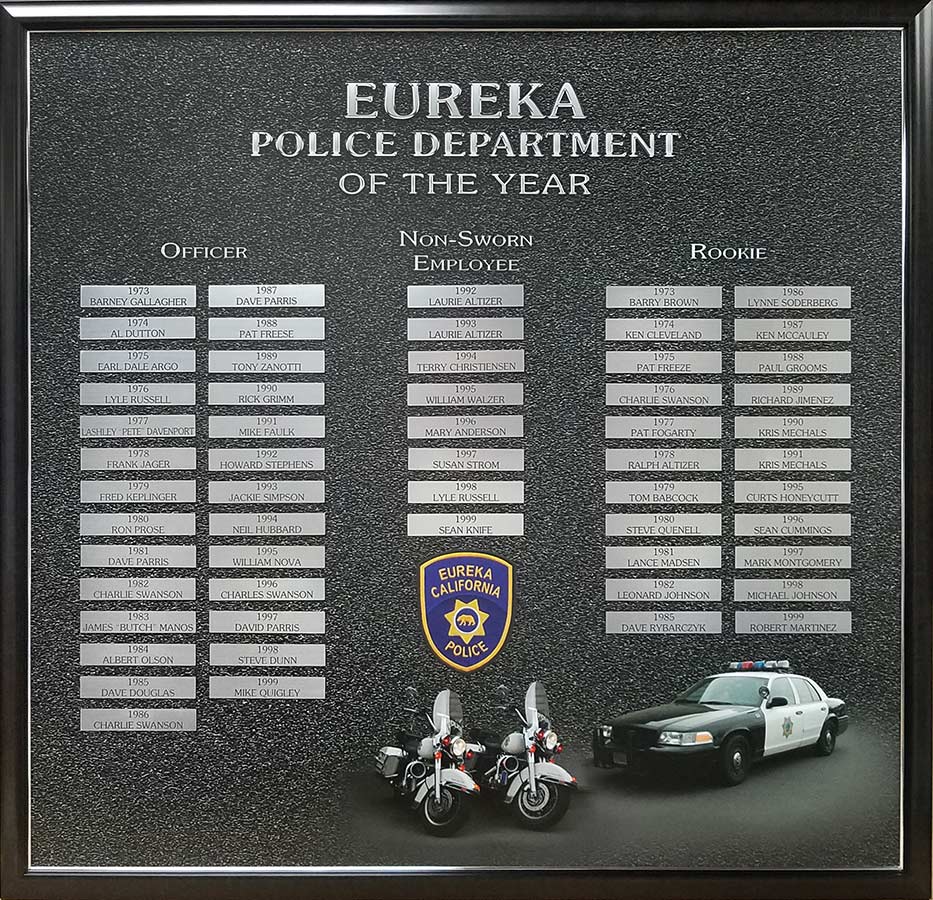
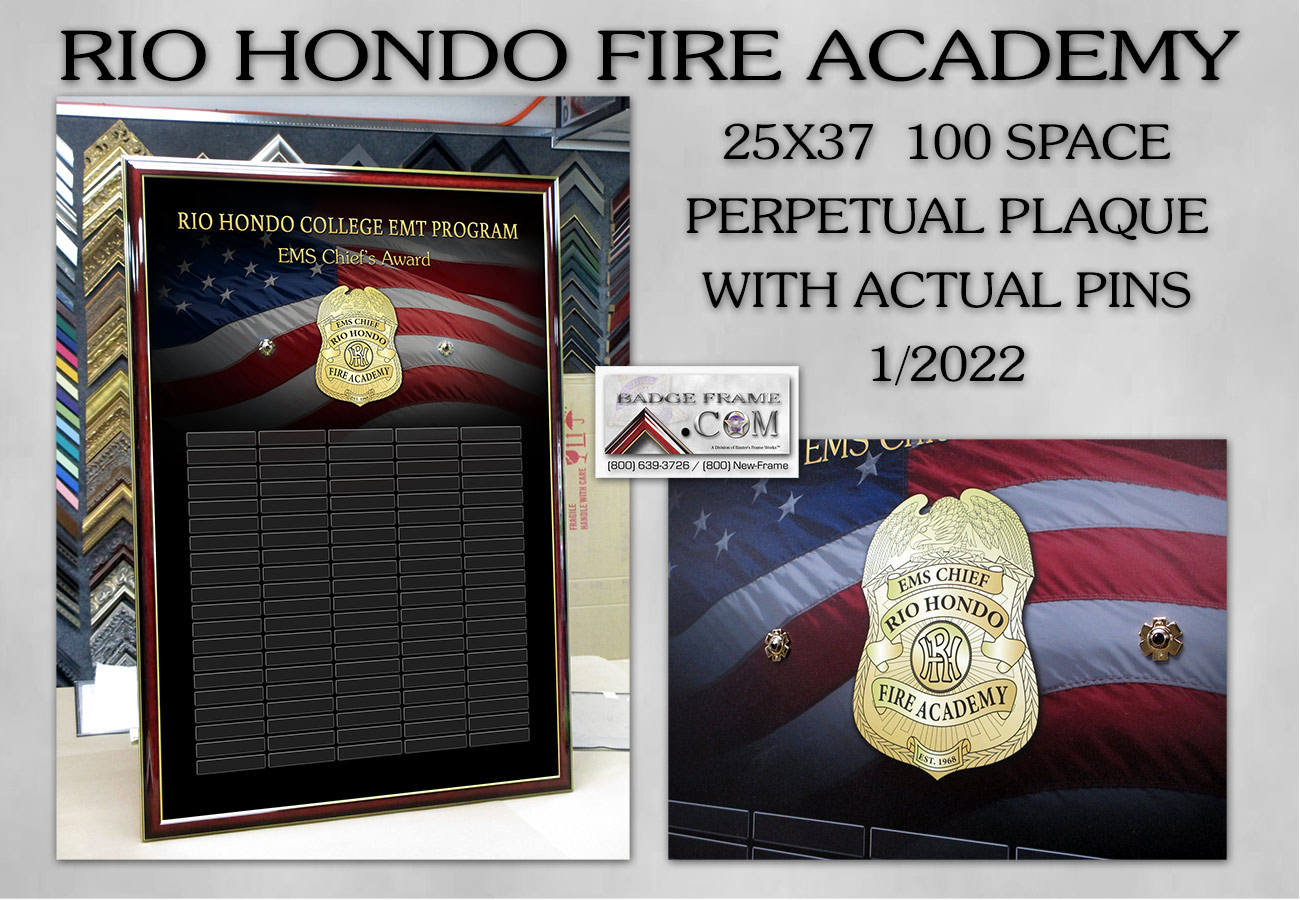
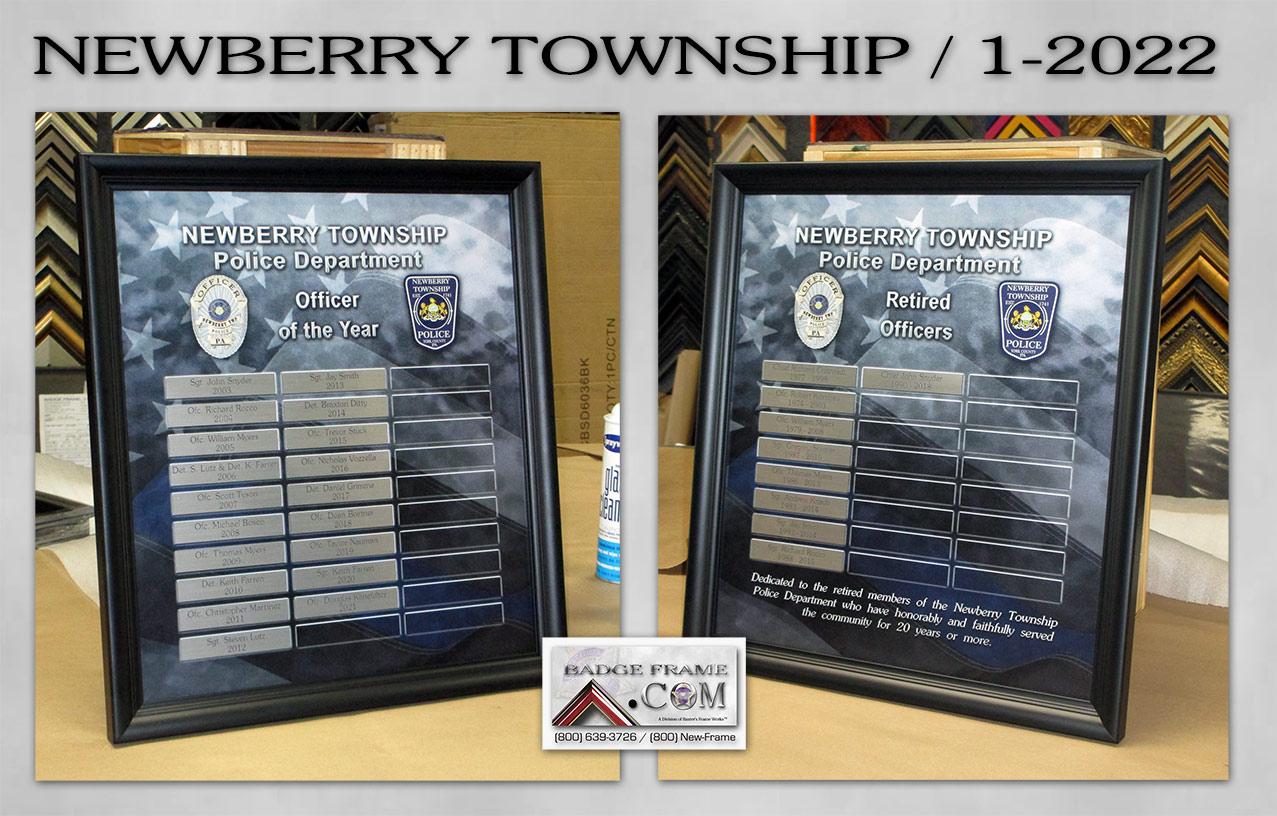
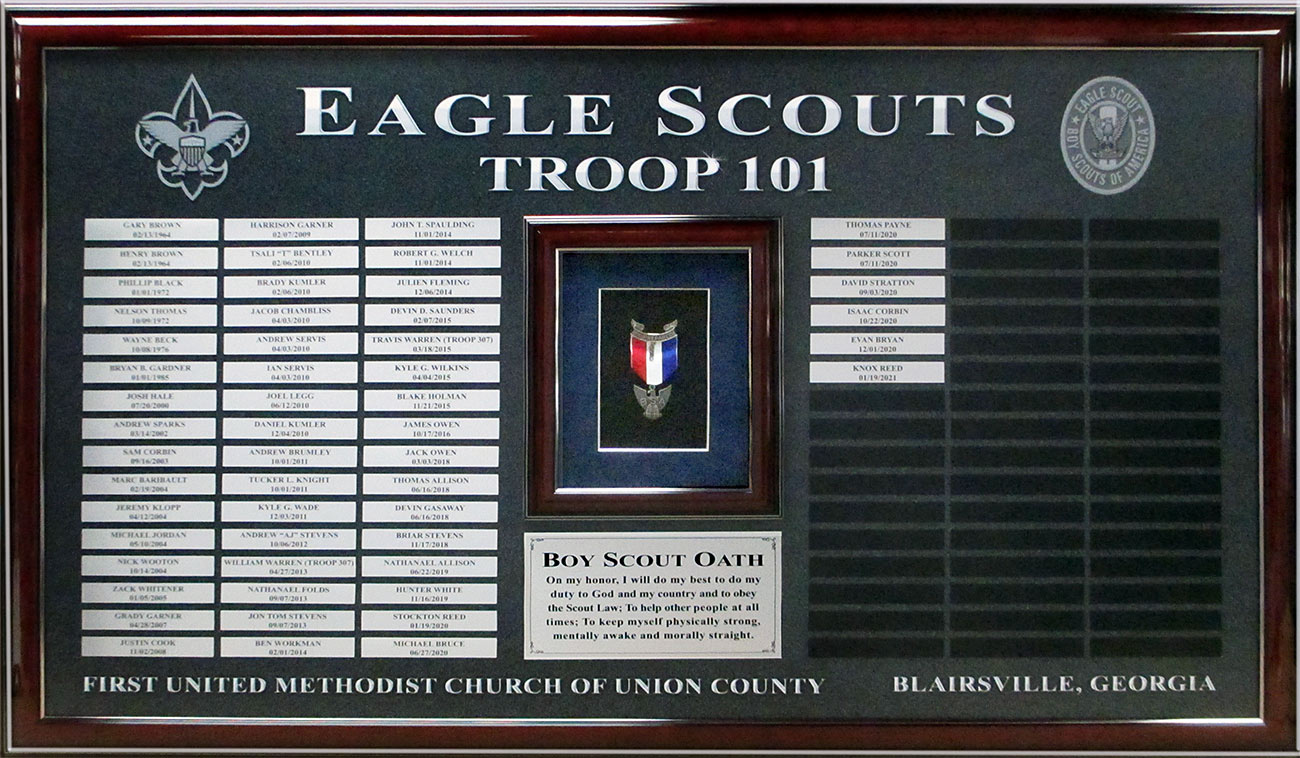
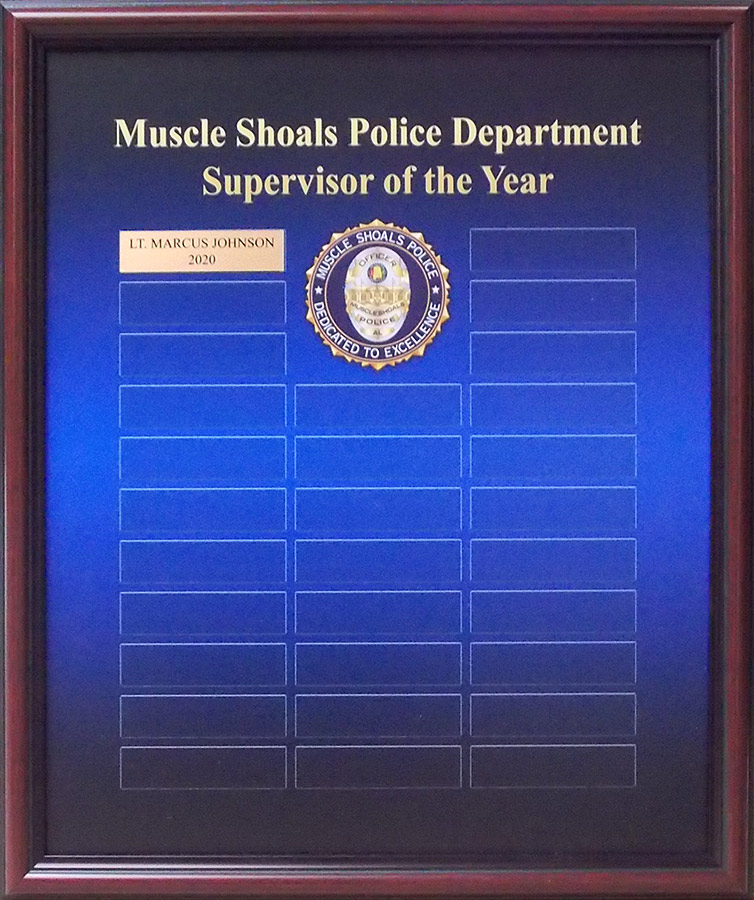
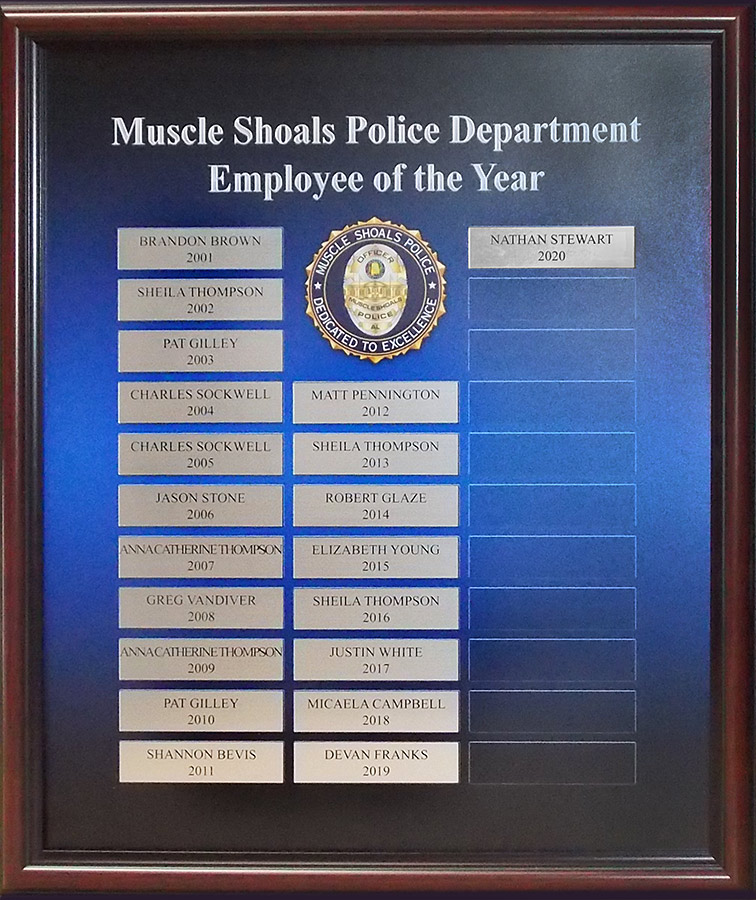
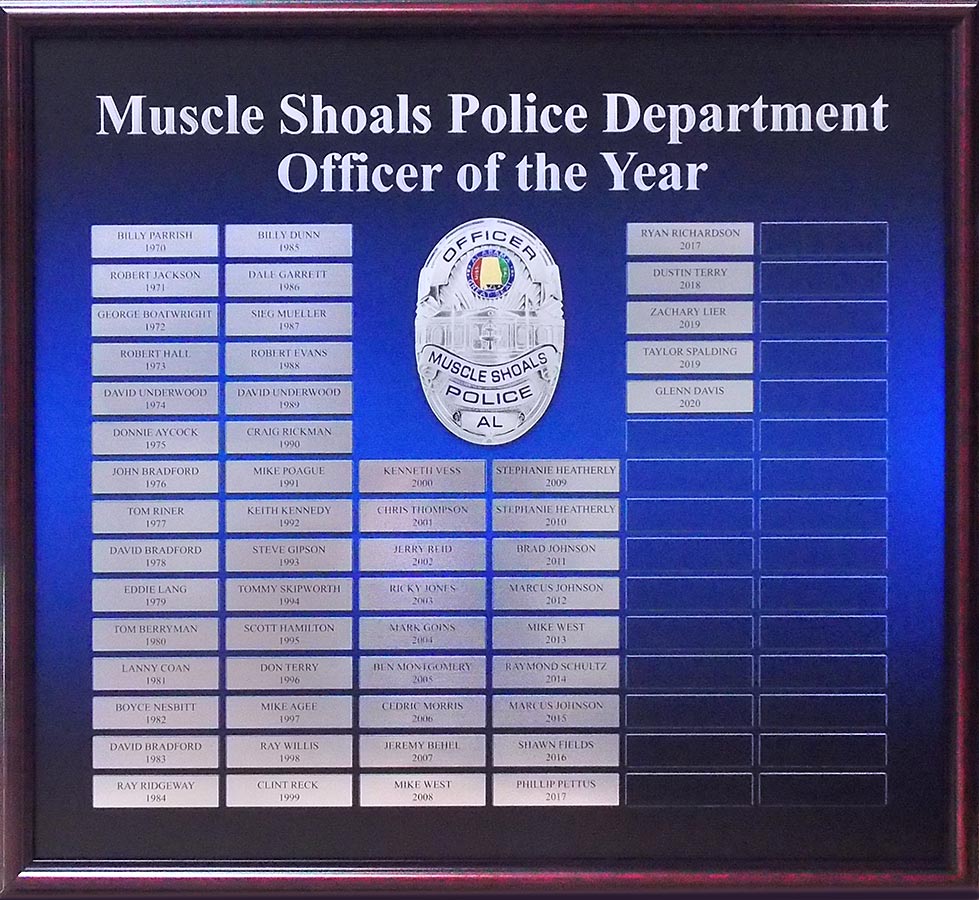
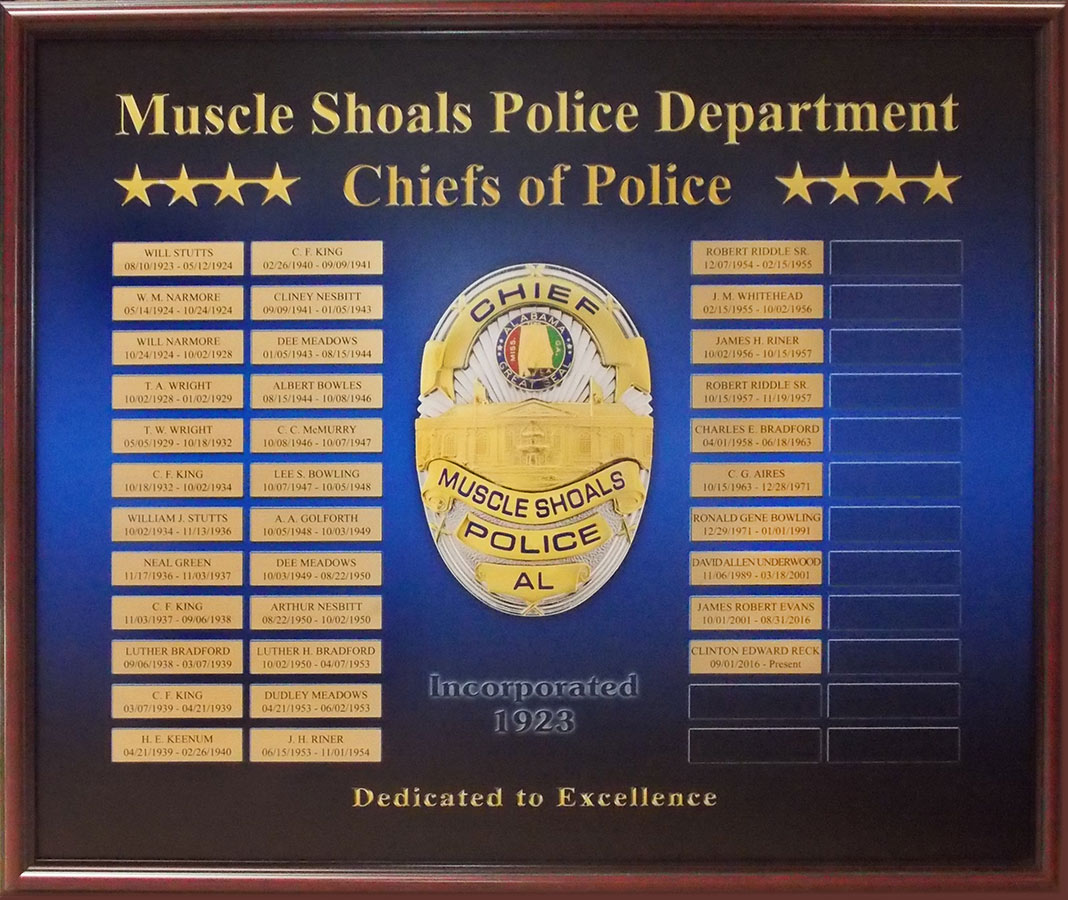
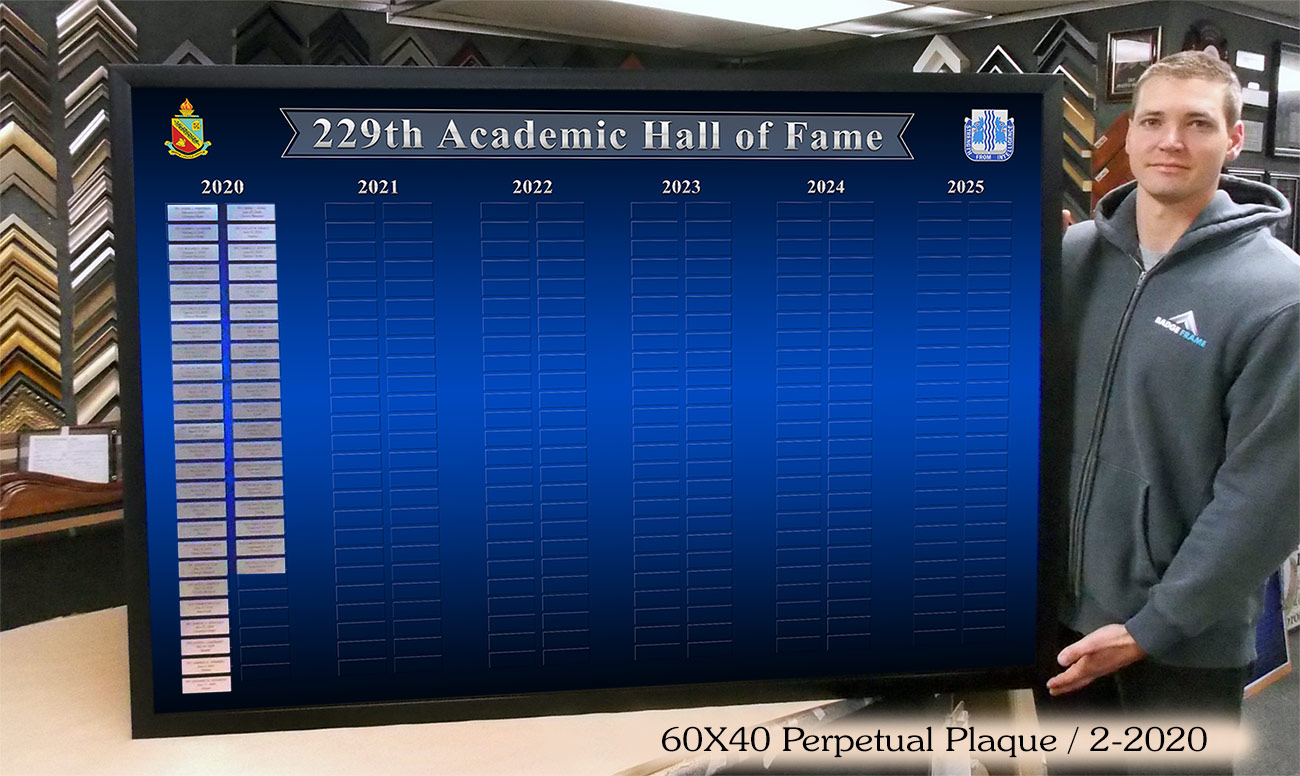
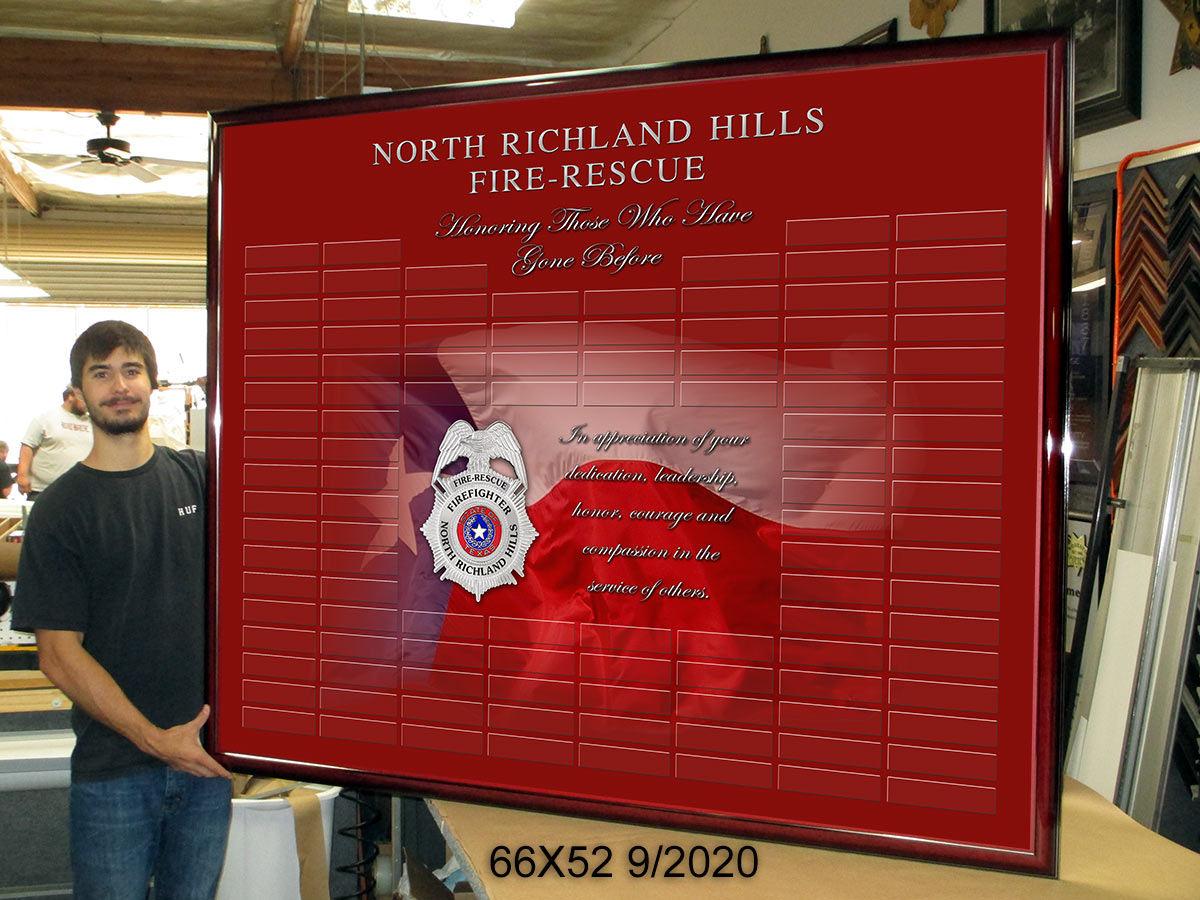
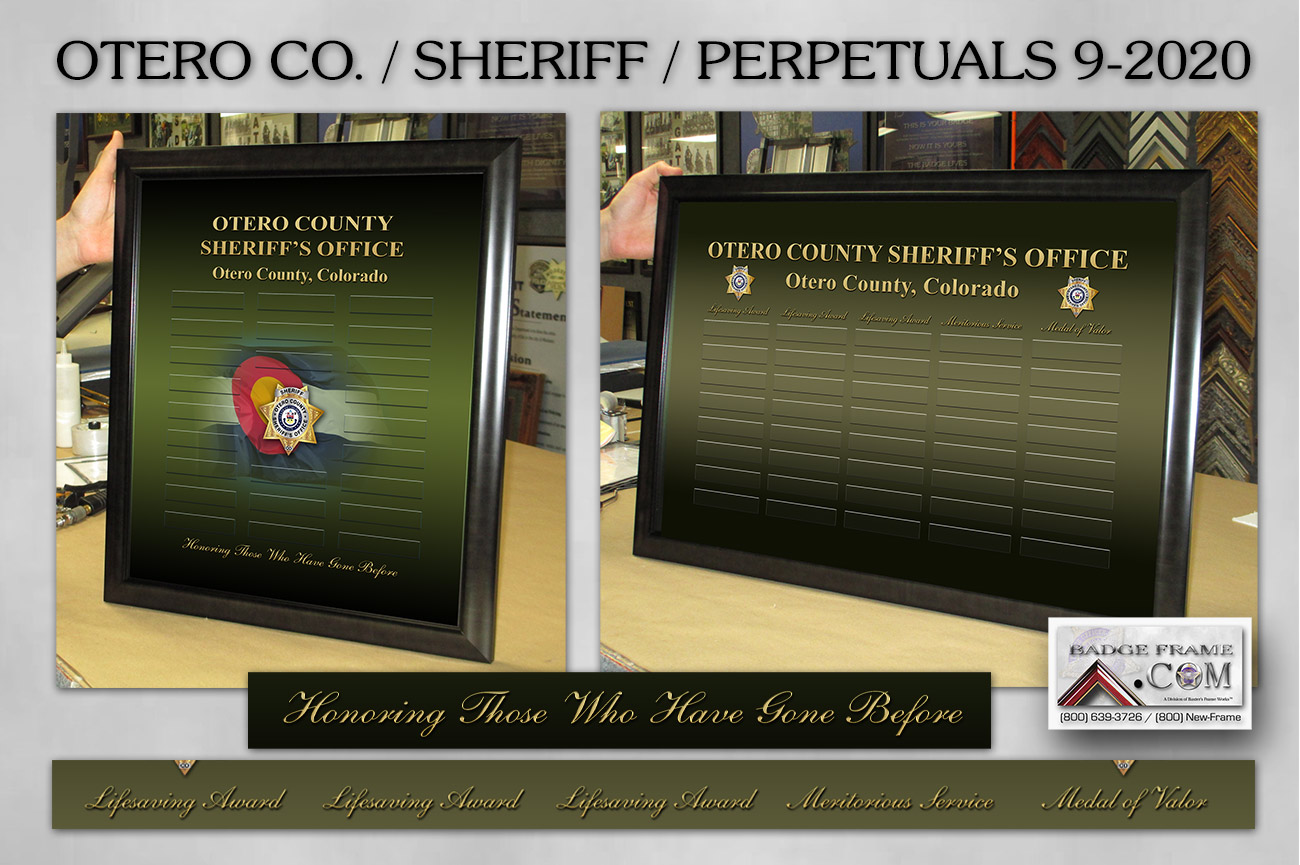
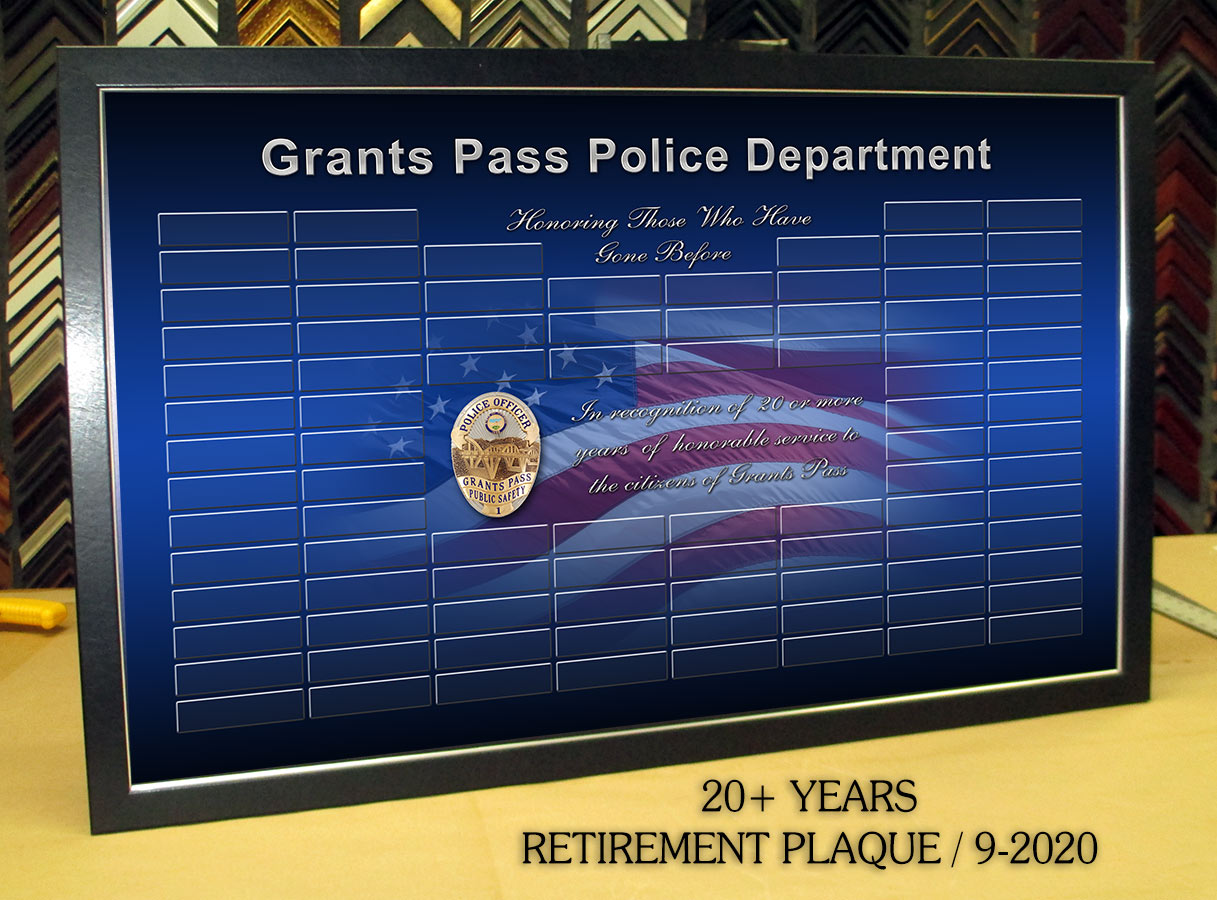
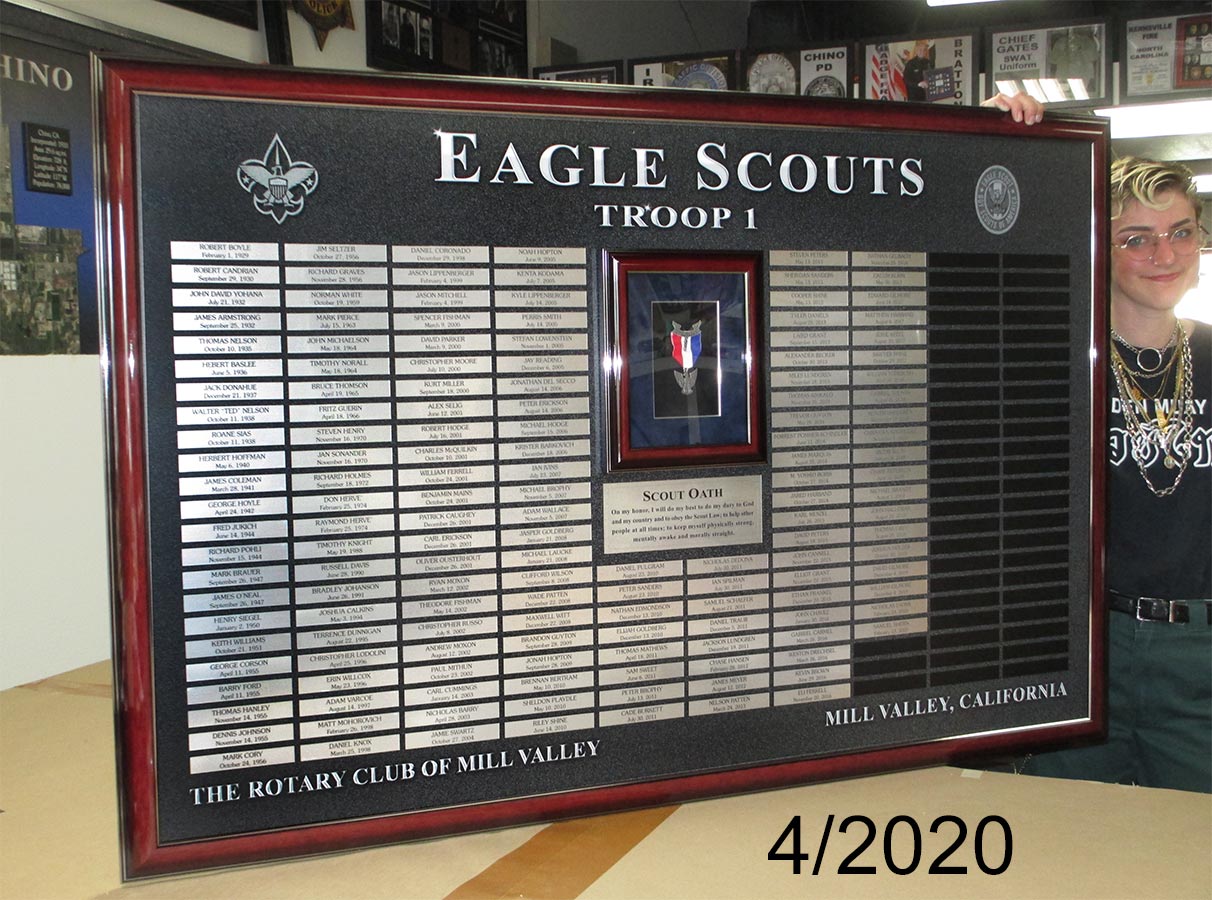
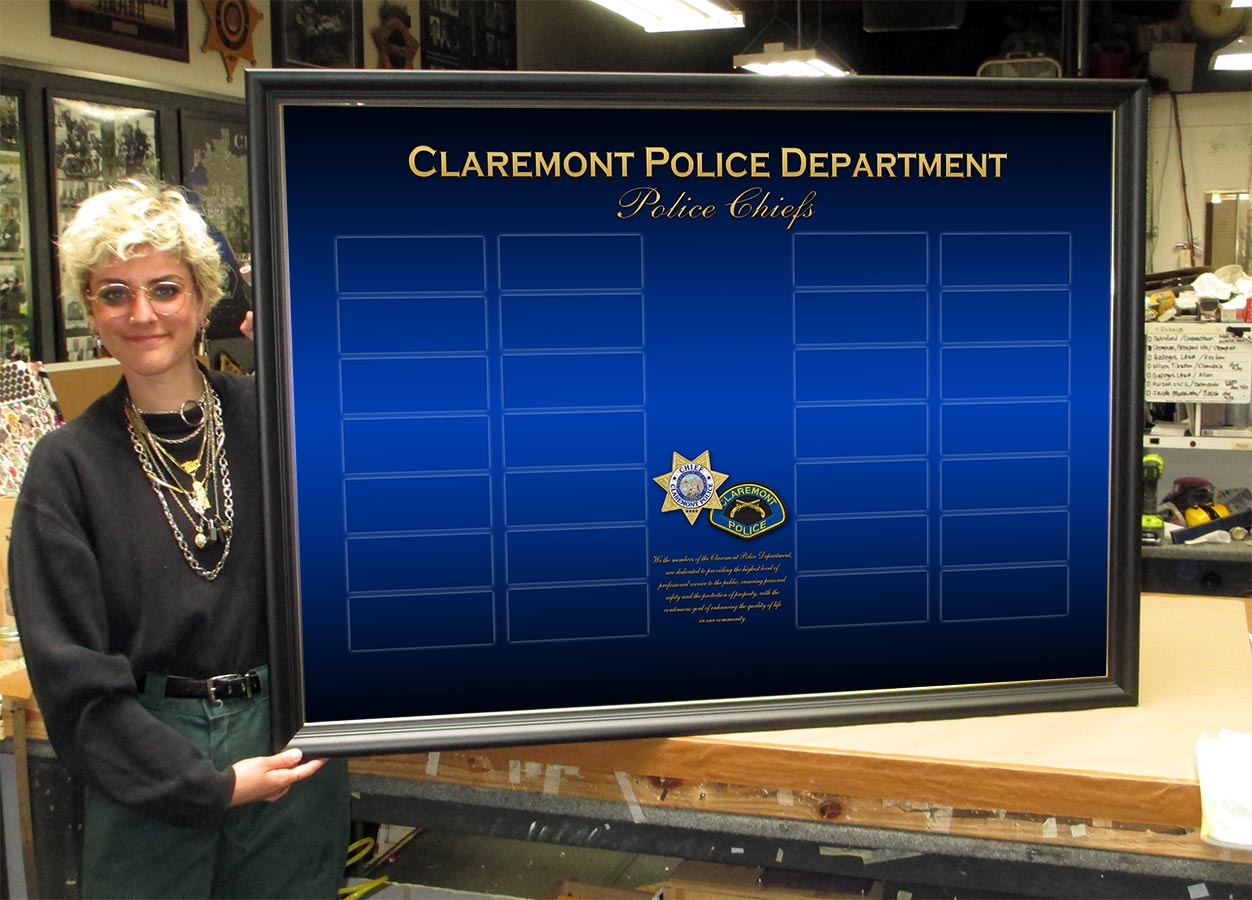
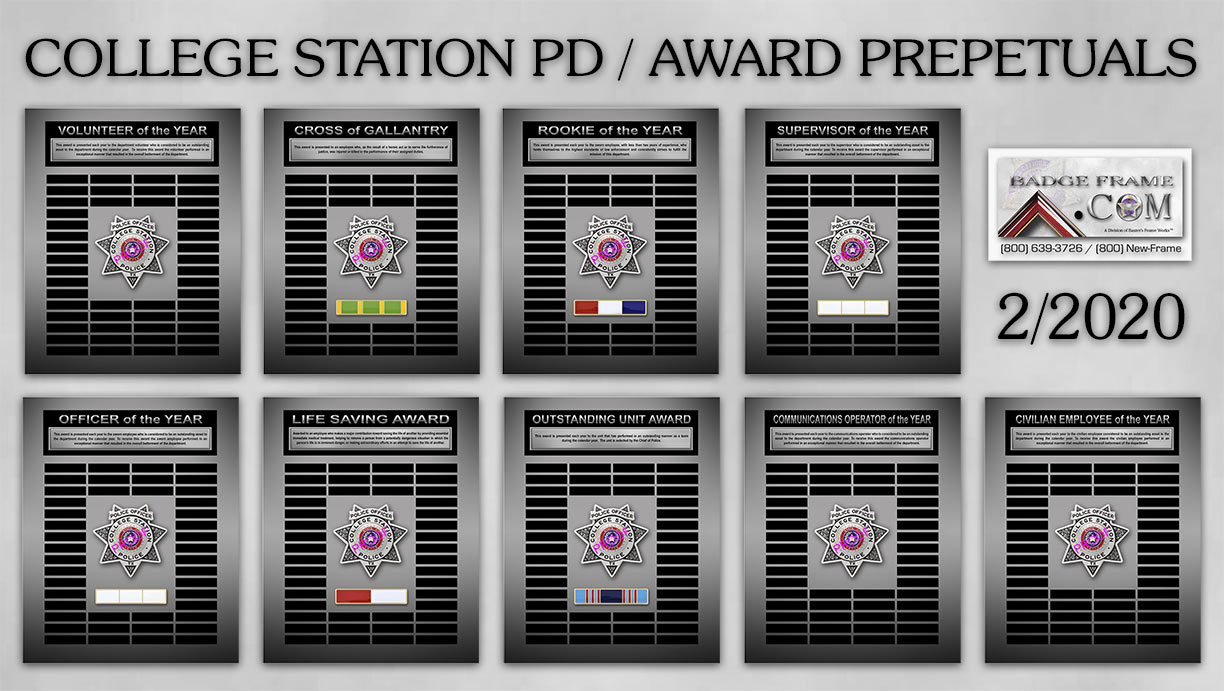
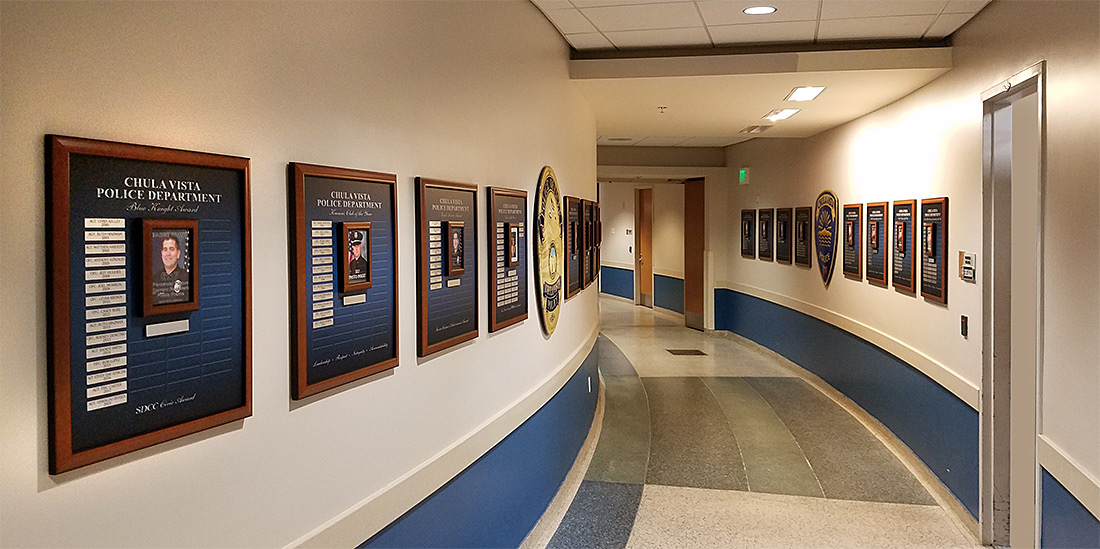
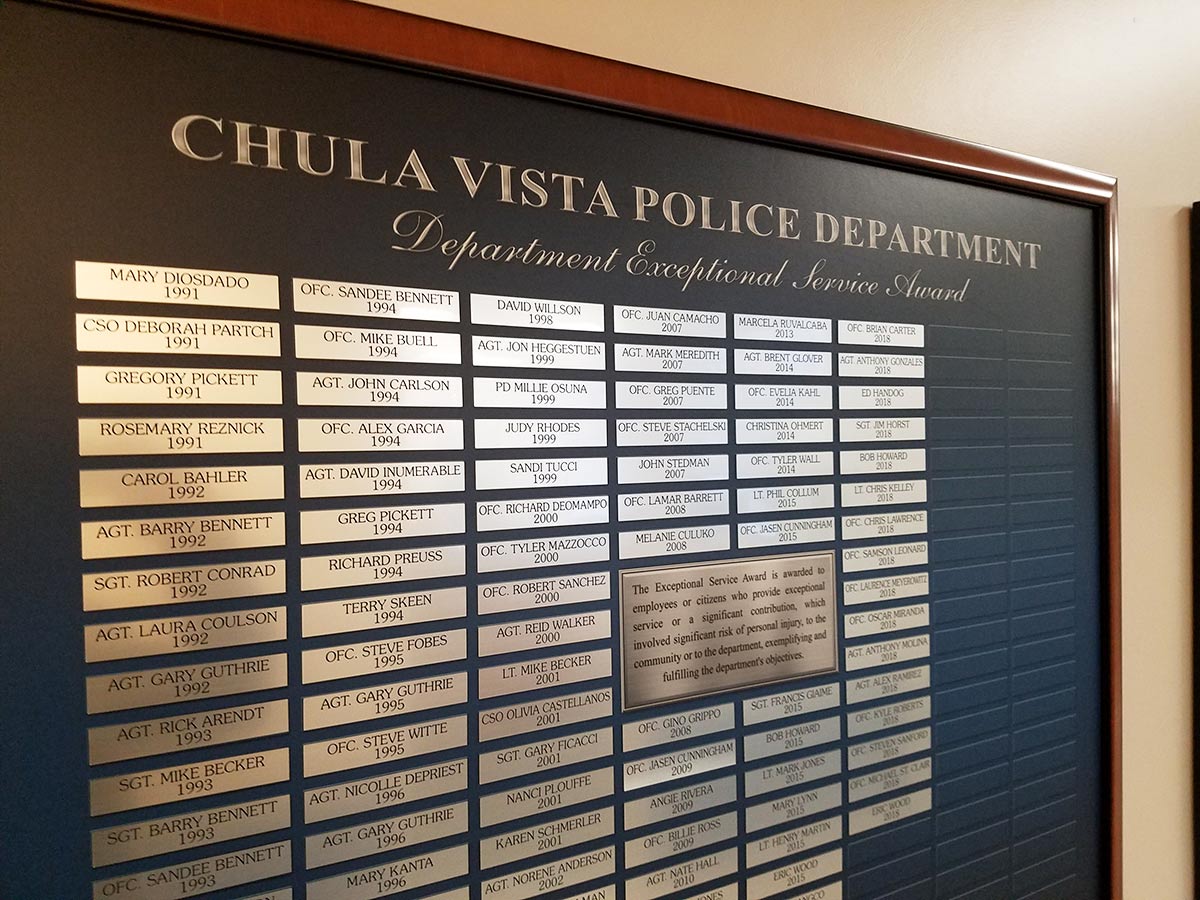
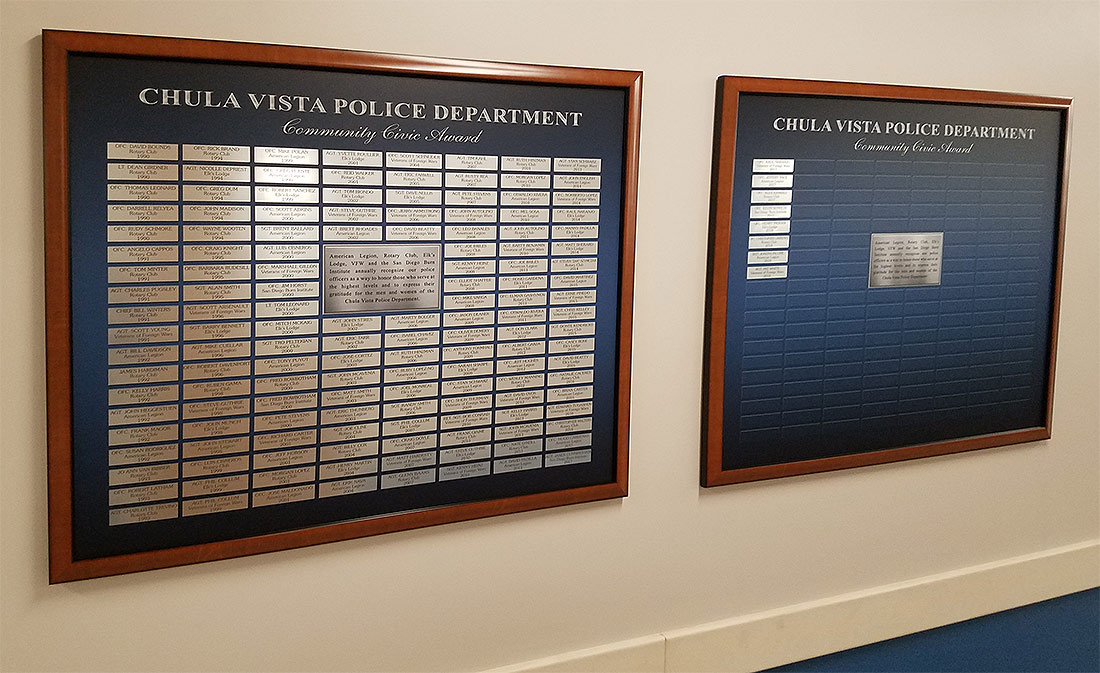
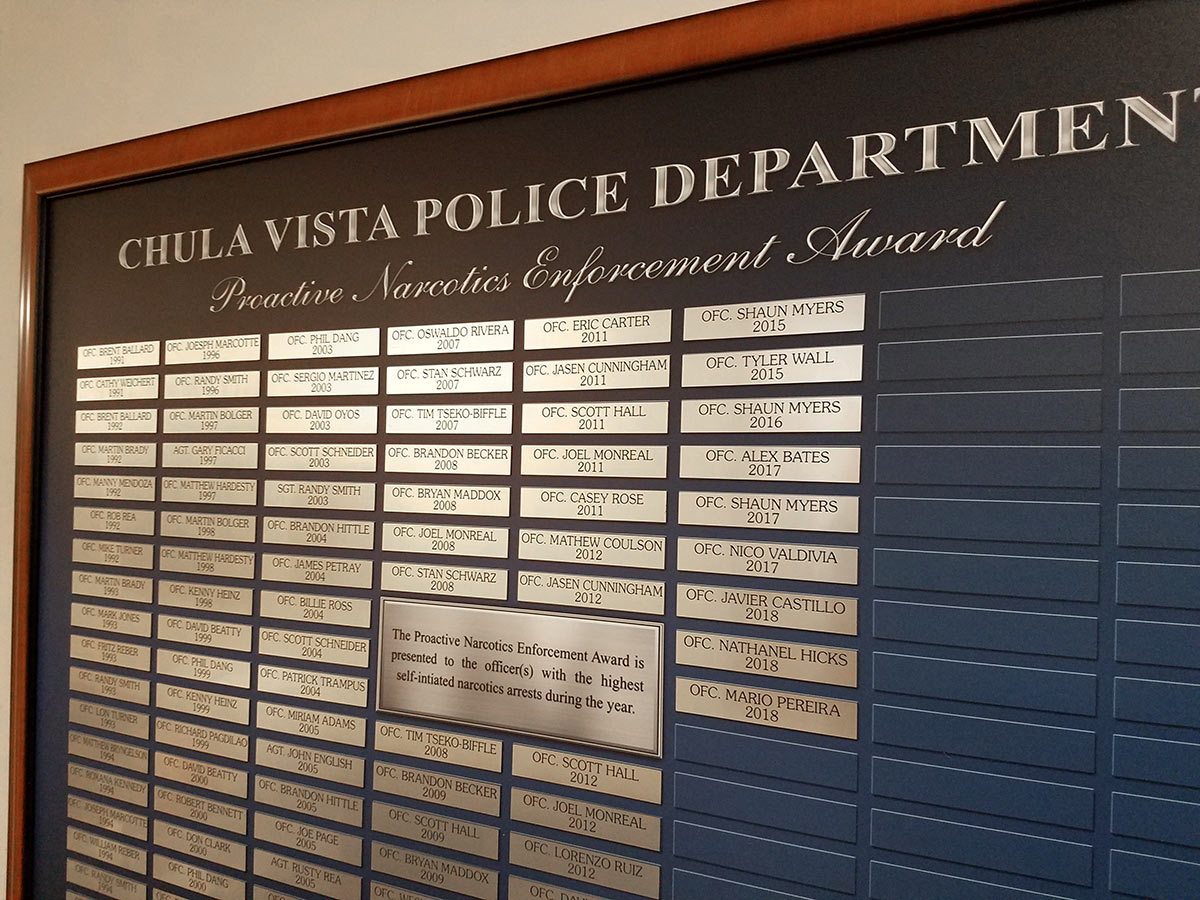
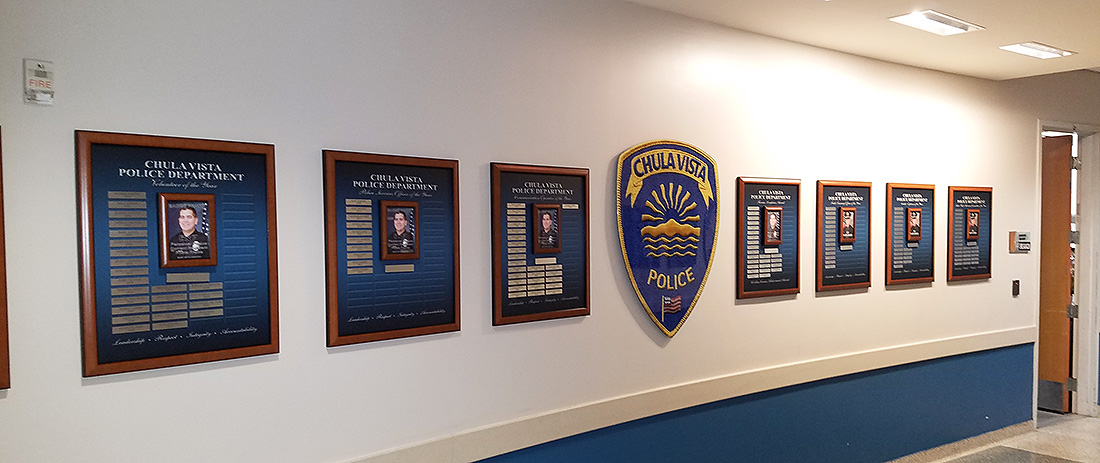
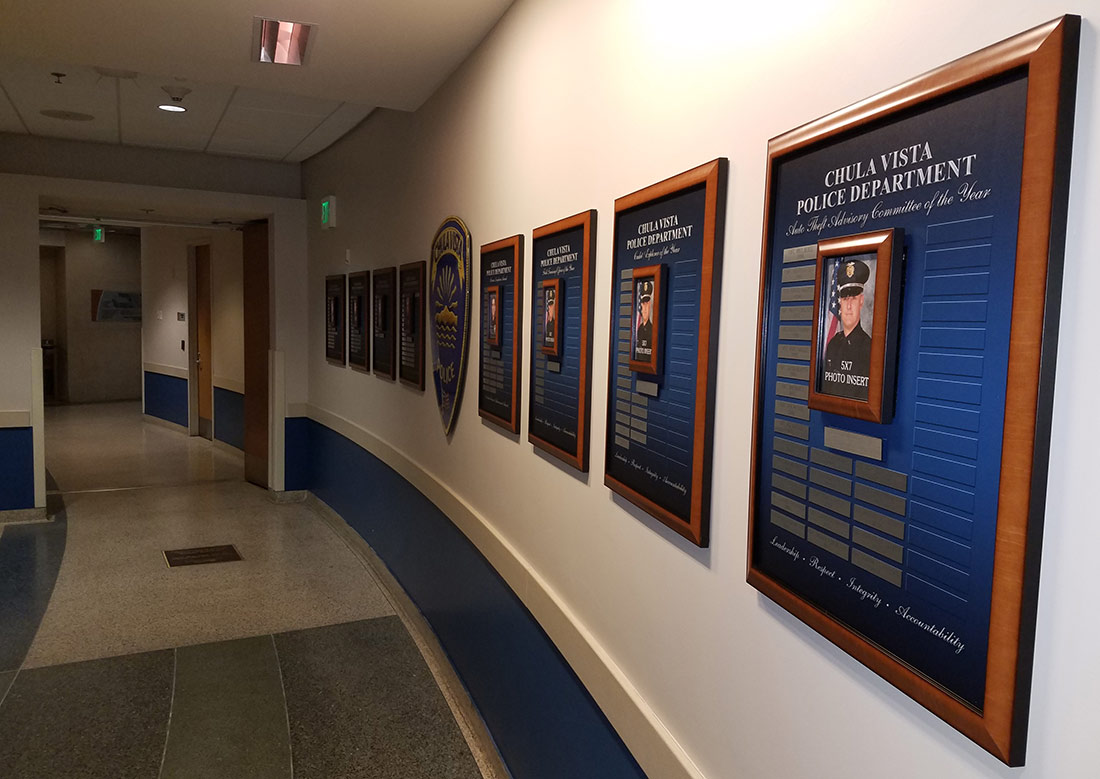
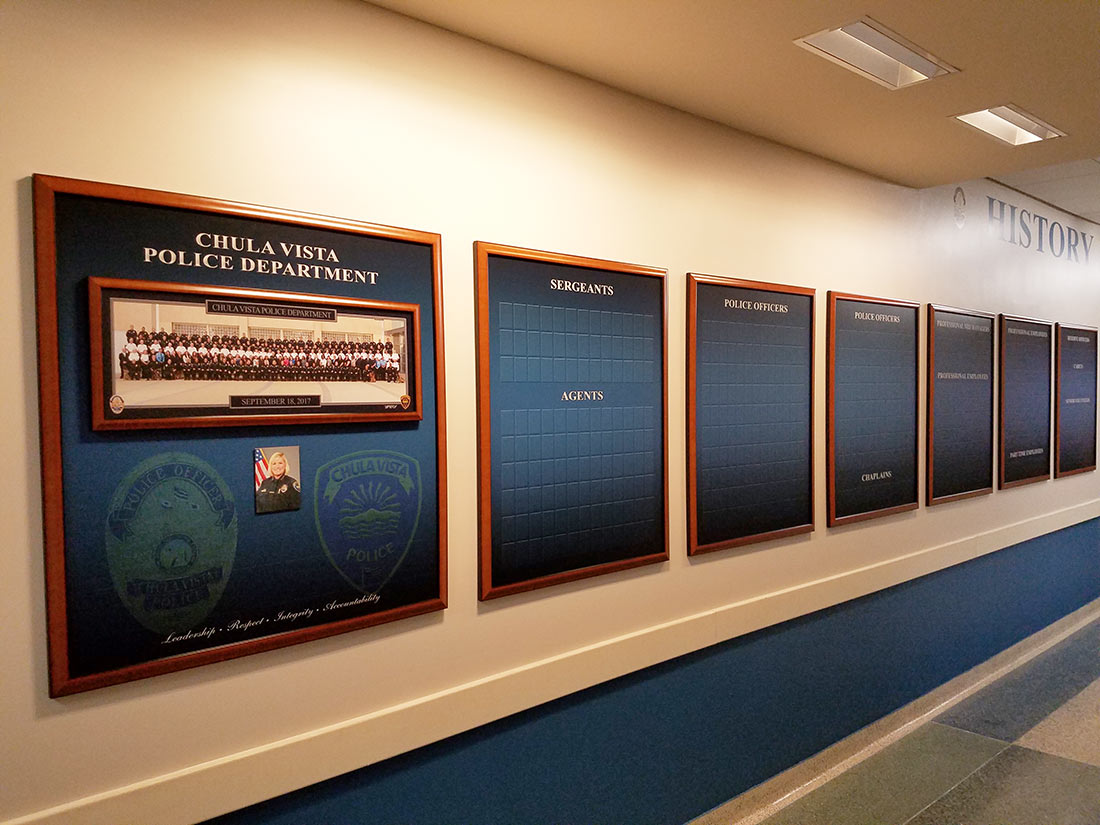
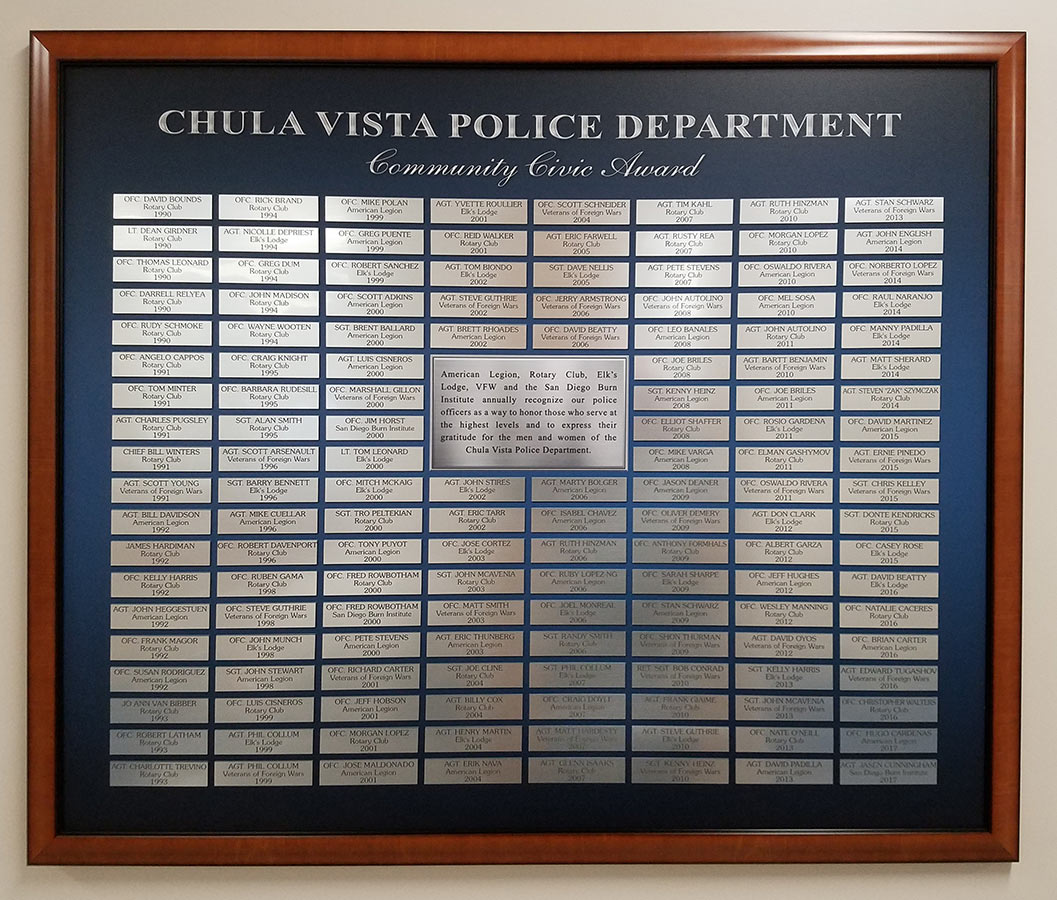
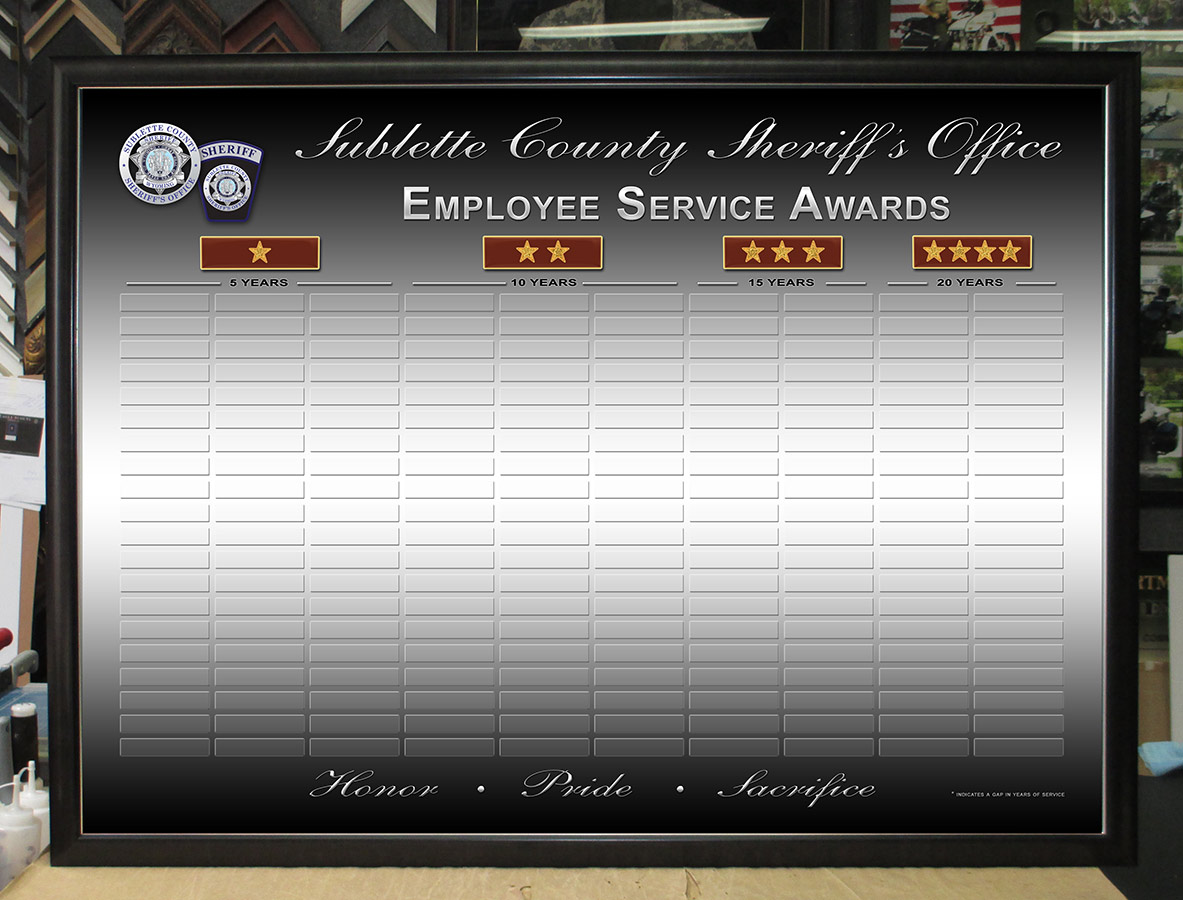
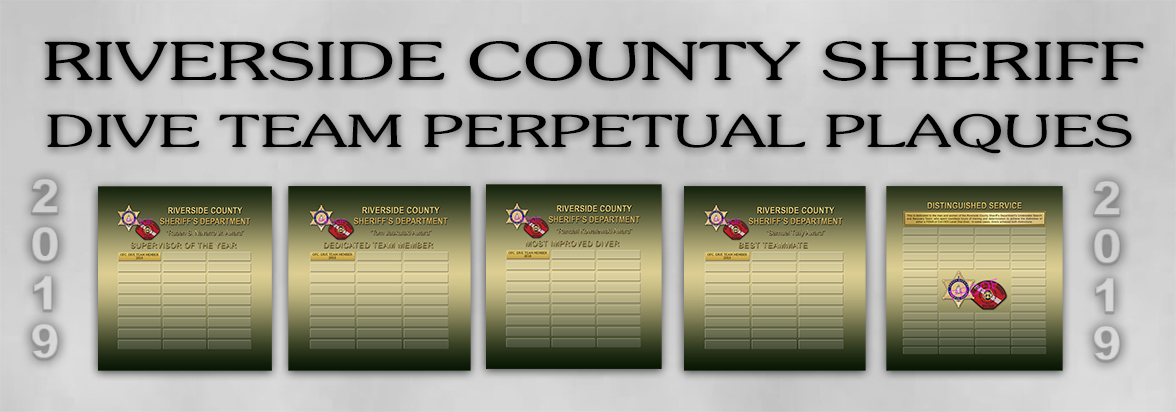
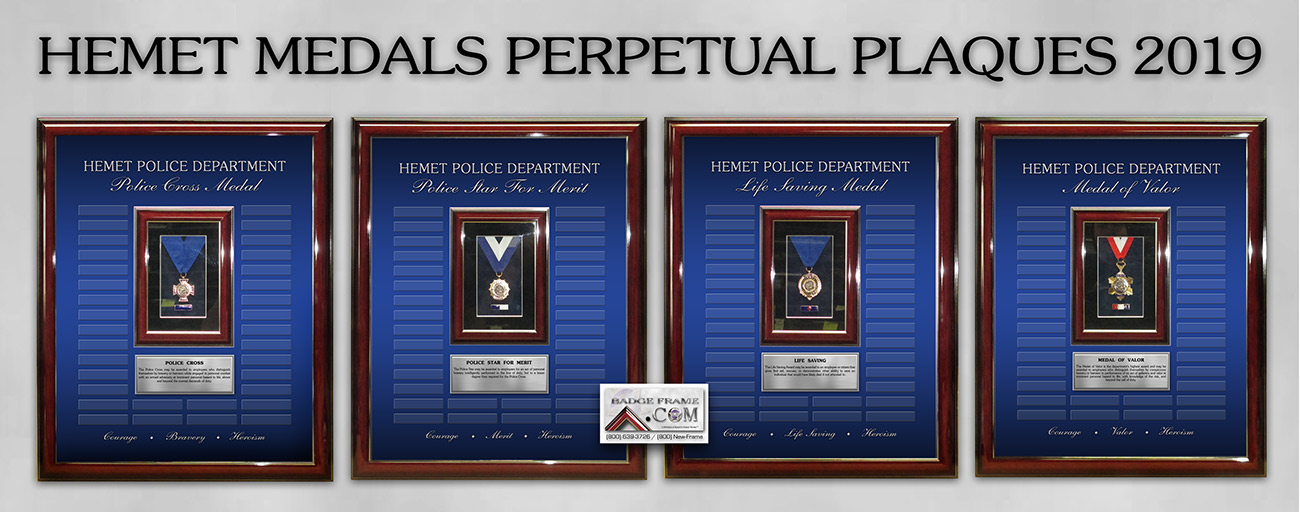
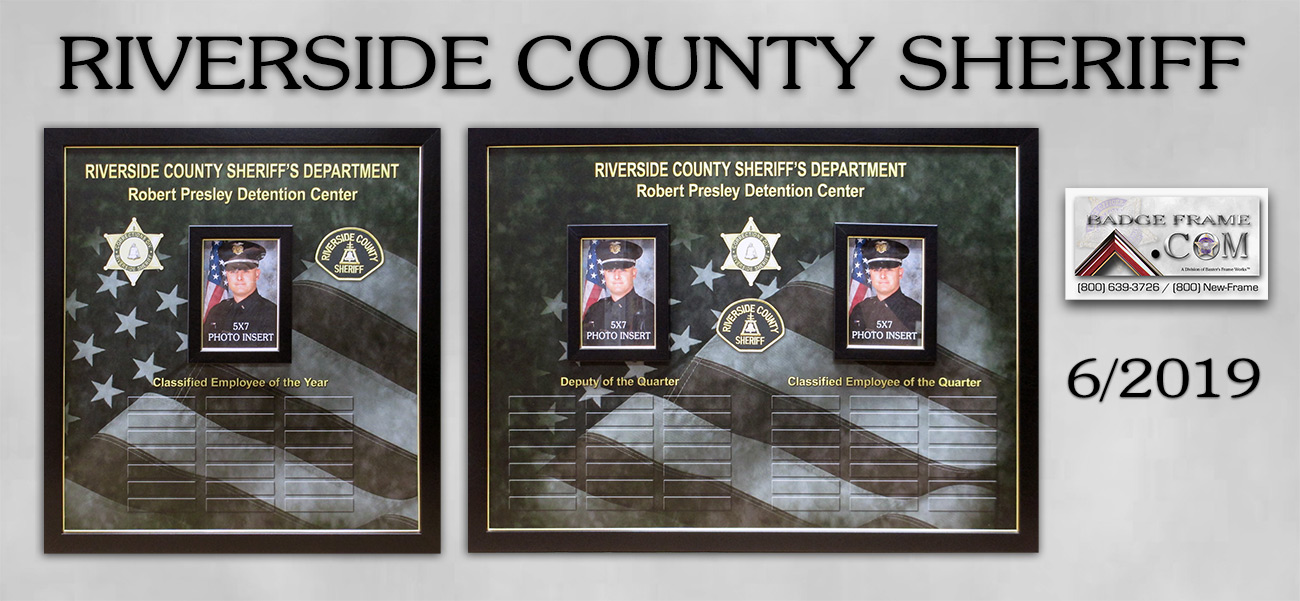
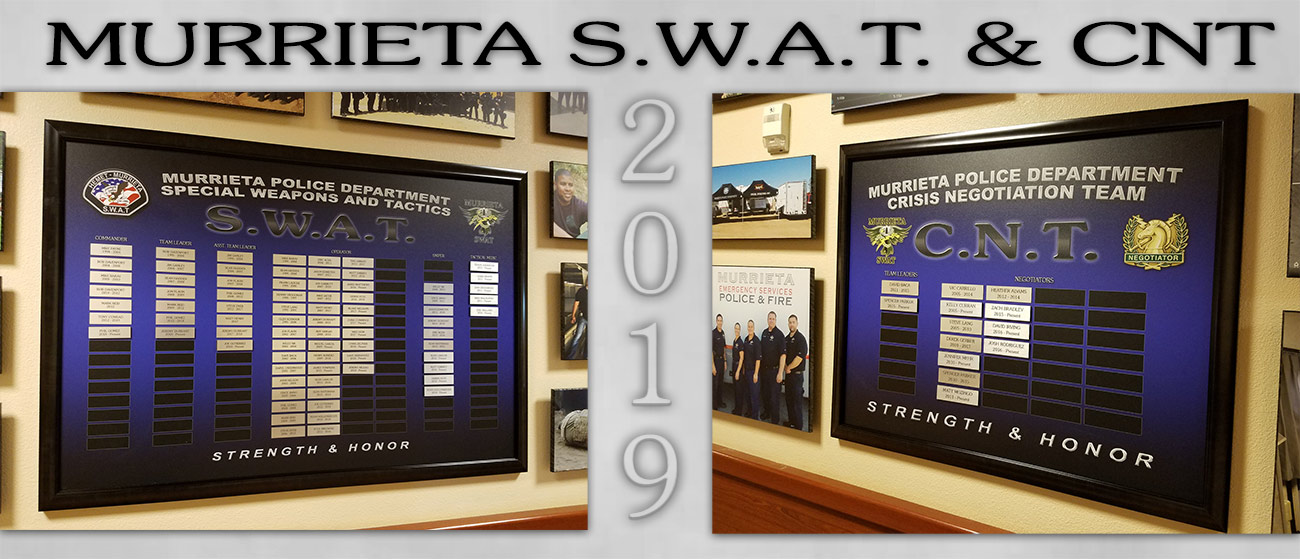
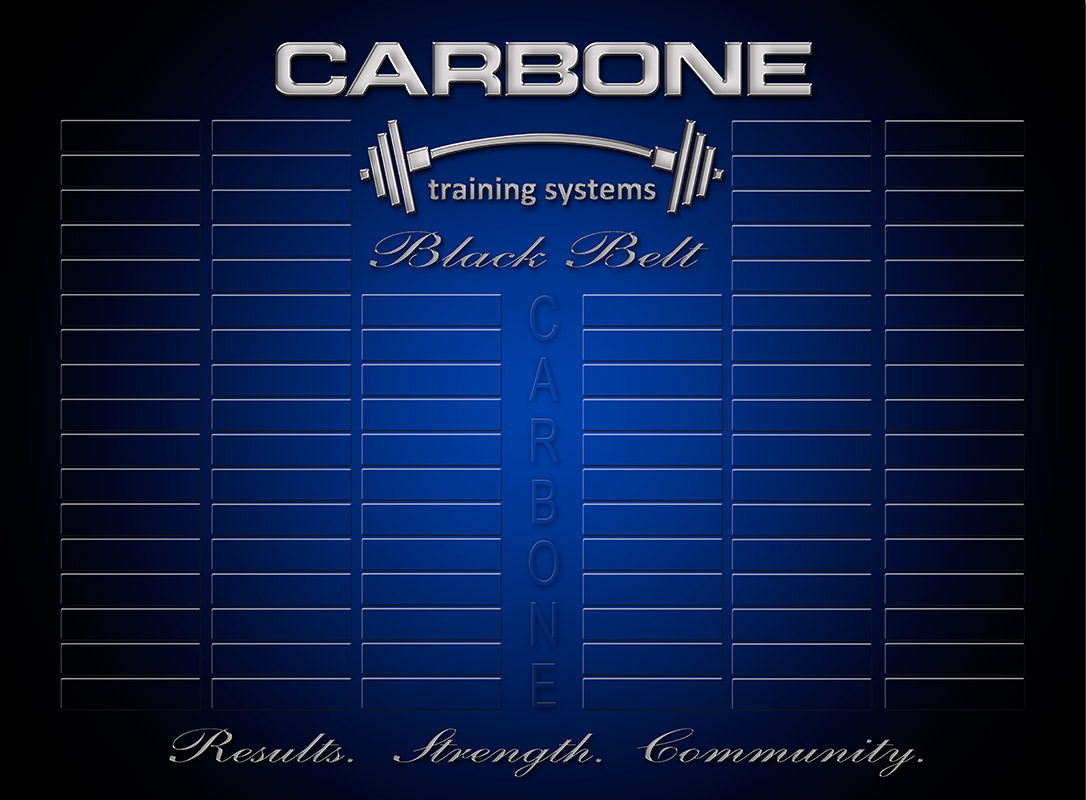
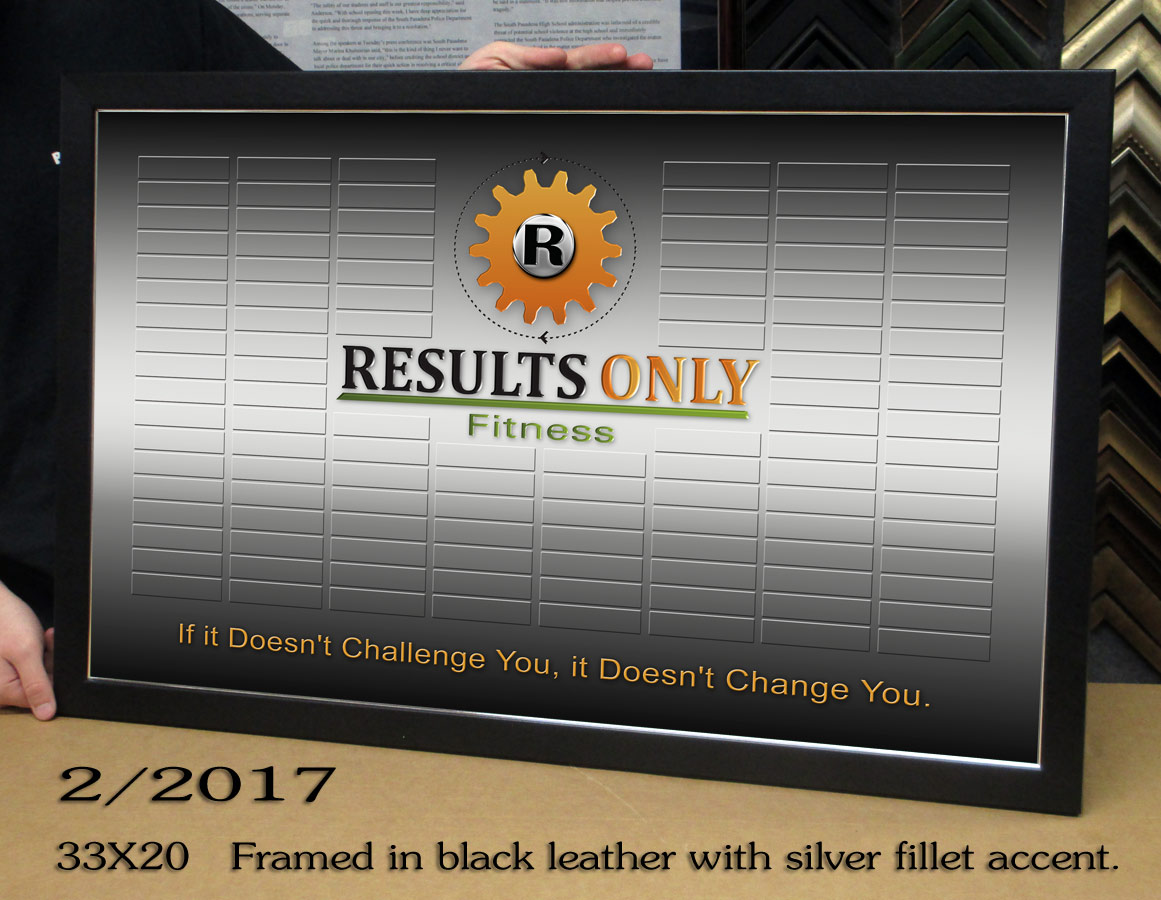
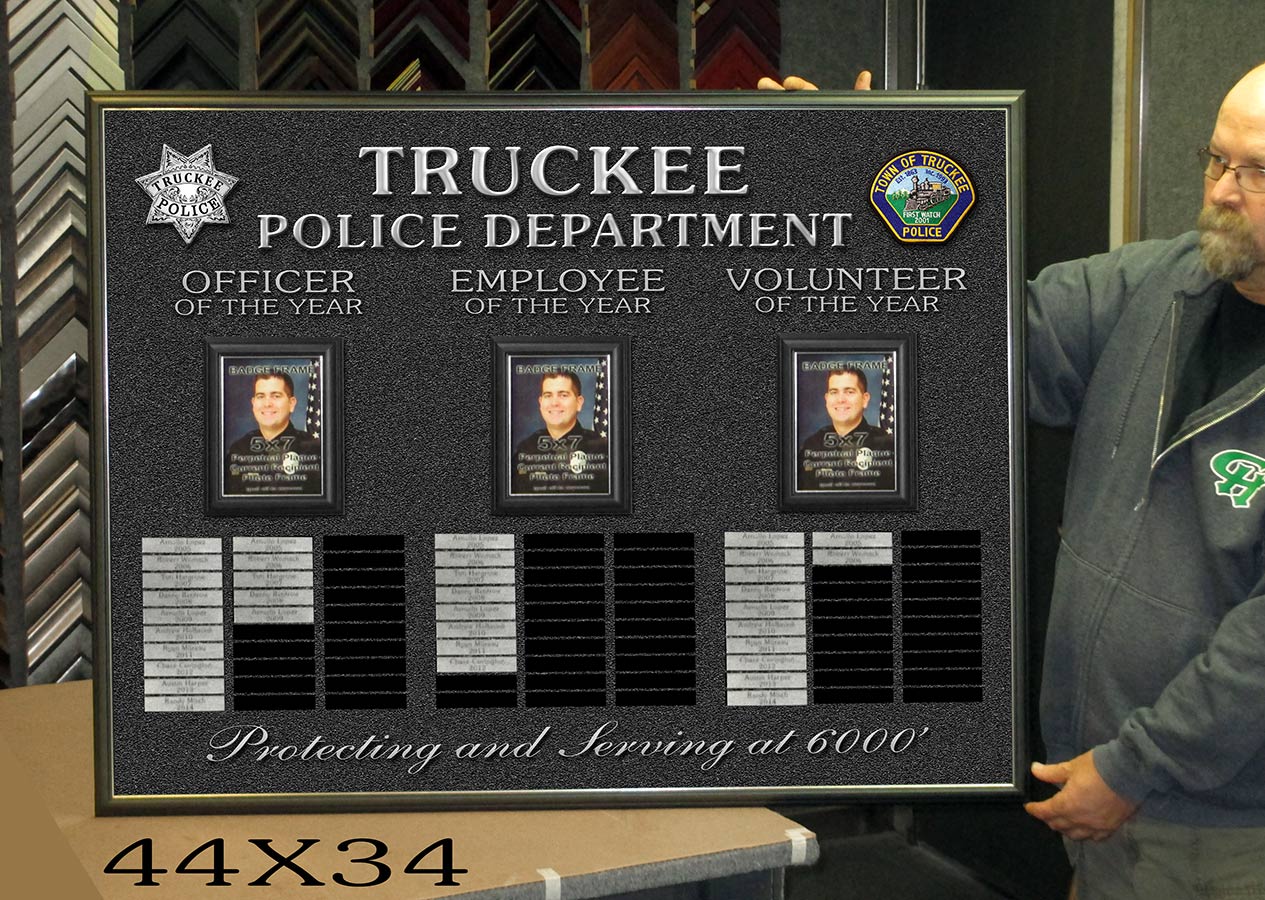
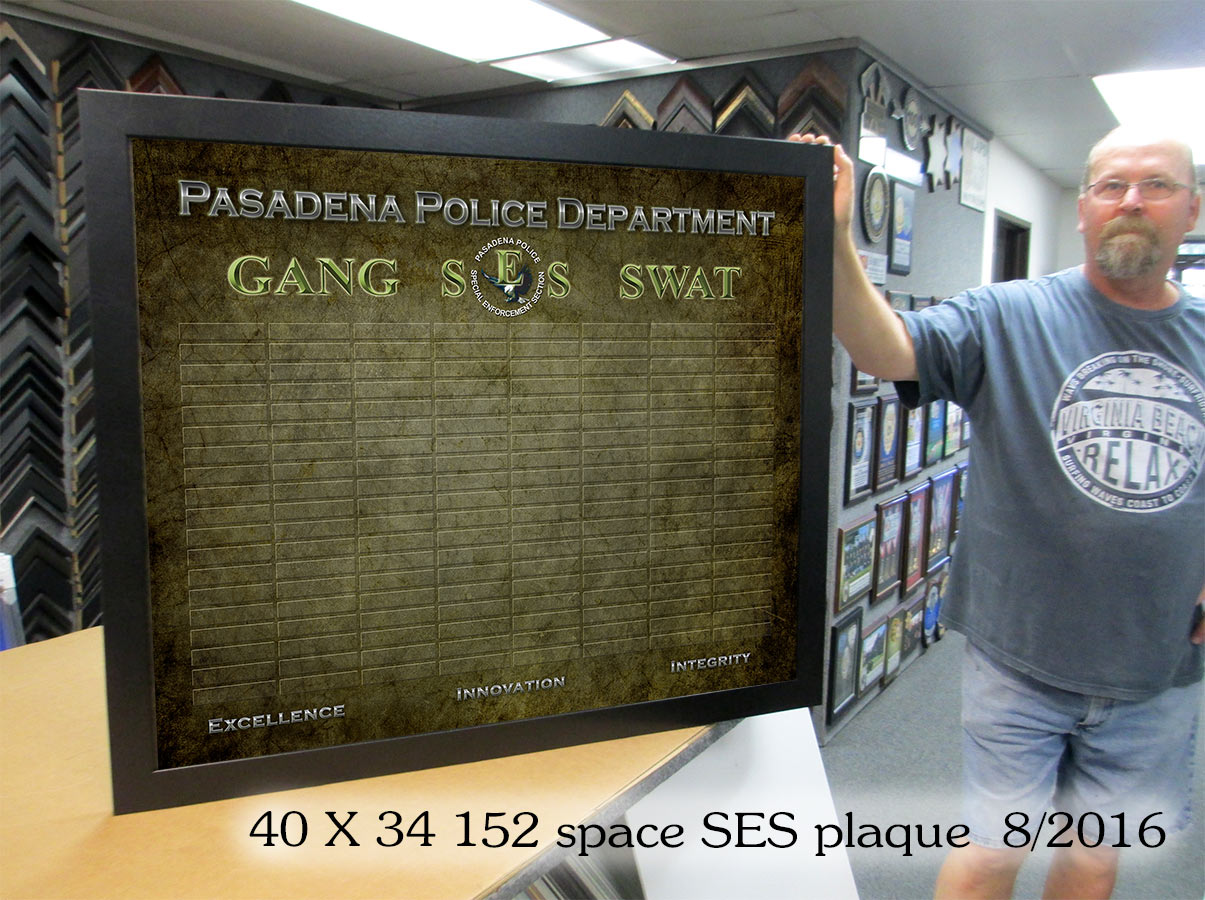
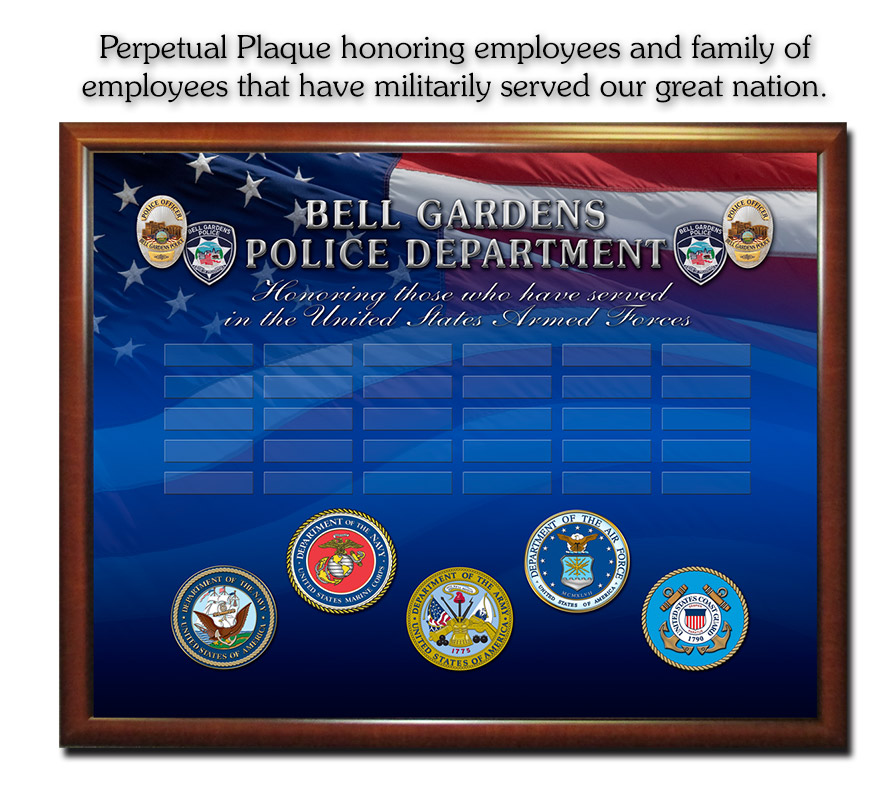
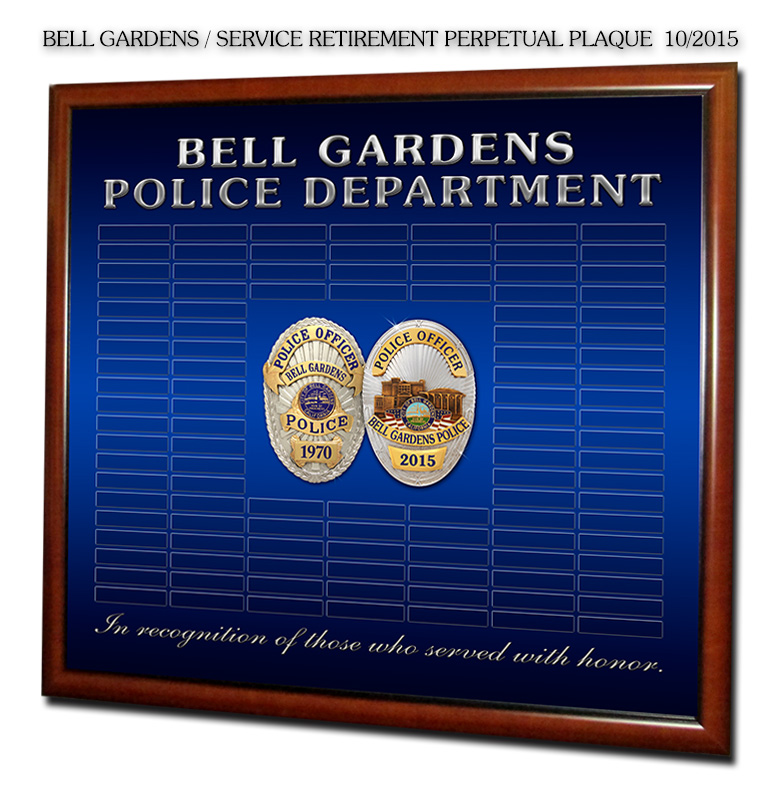
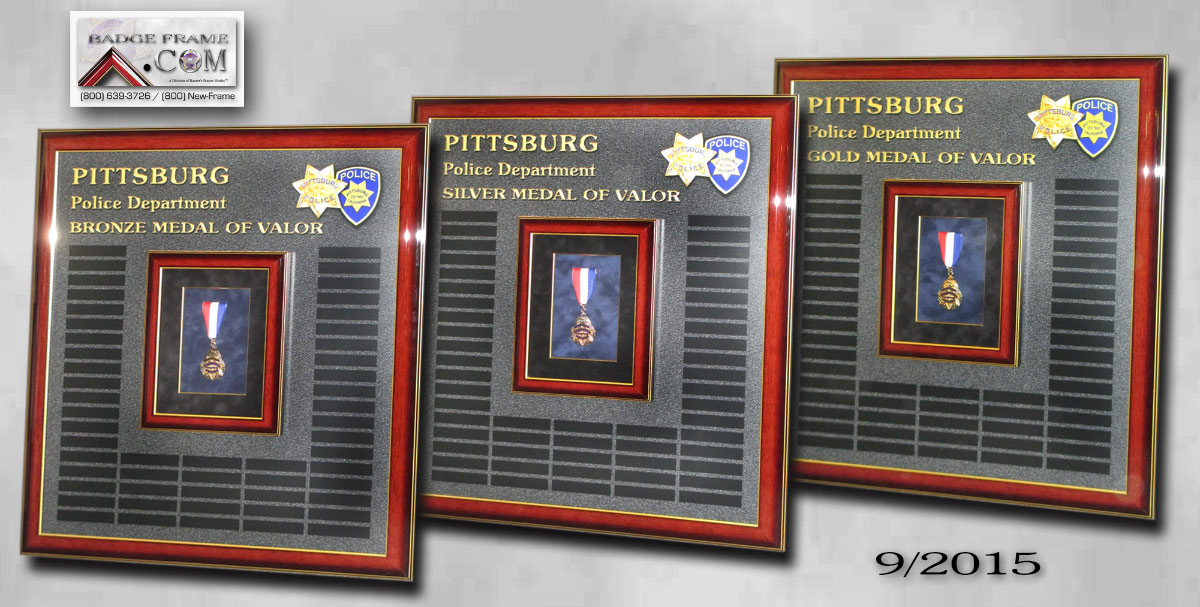
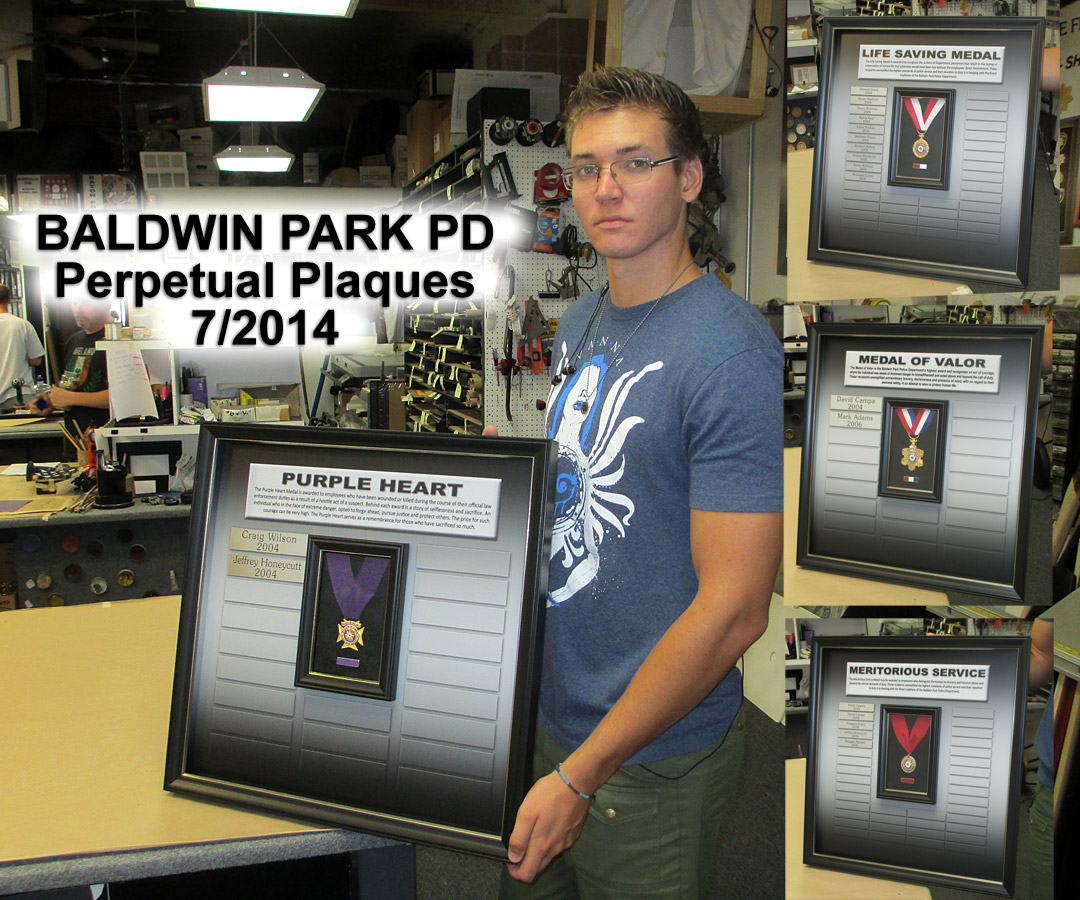
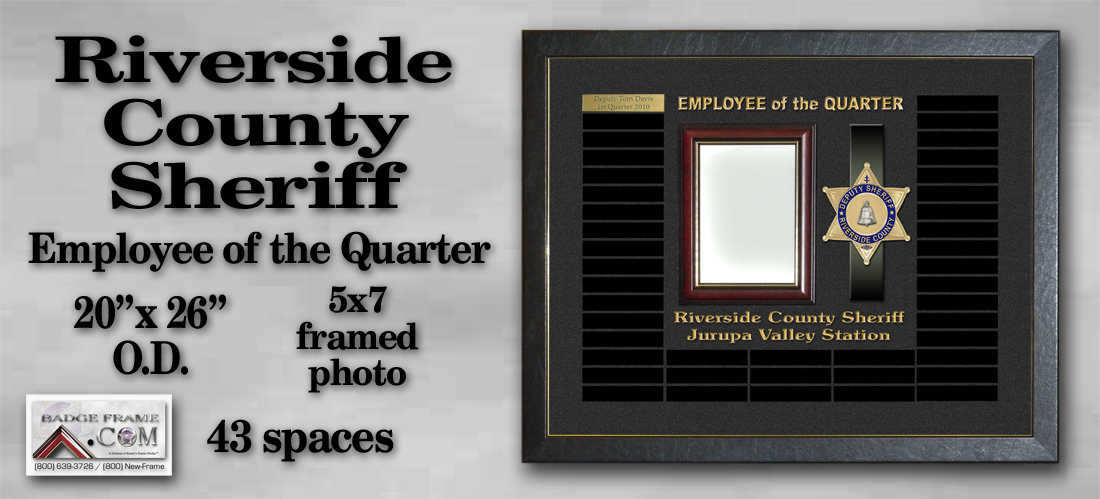
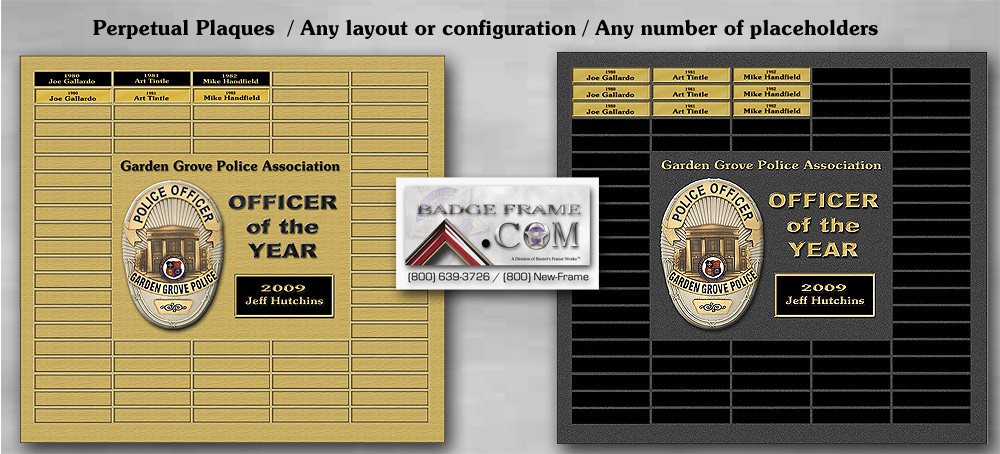
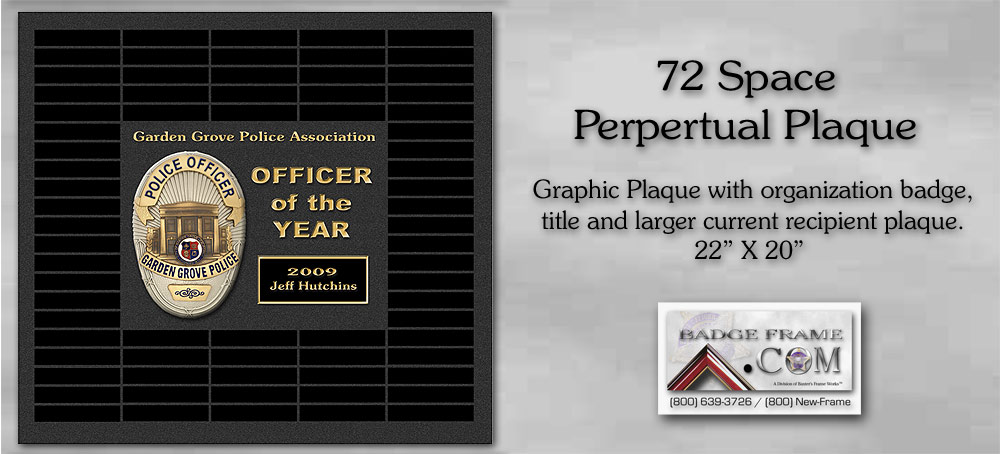
Plaques are sized depending on the number of recipients
anticipated.
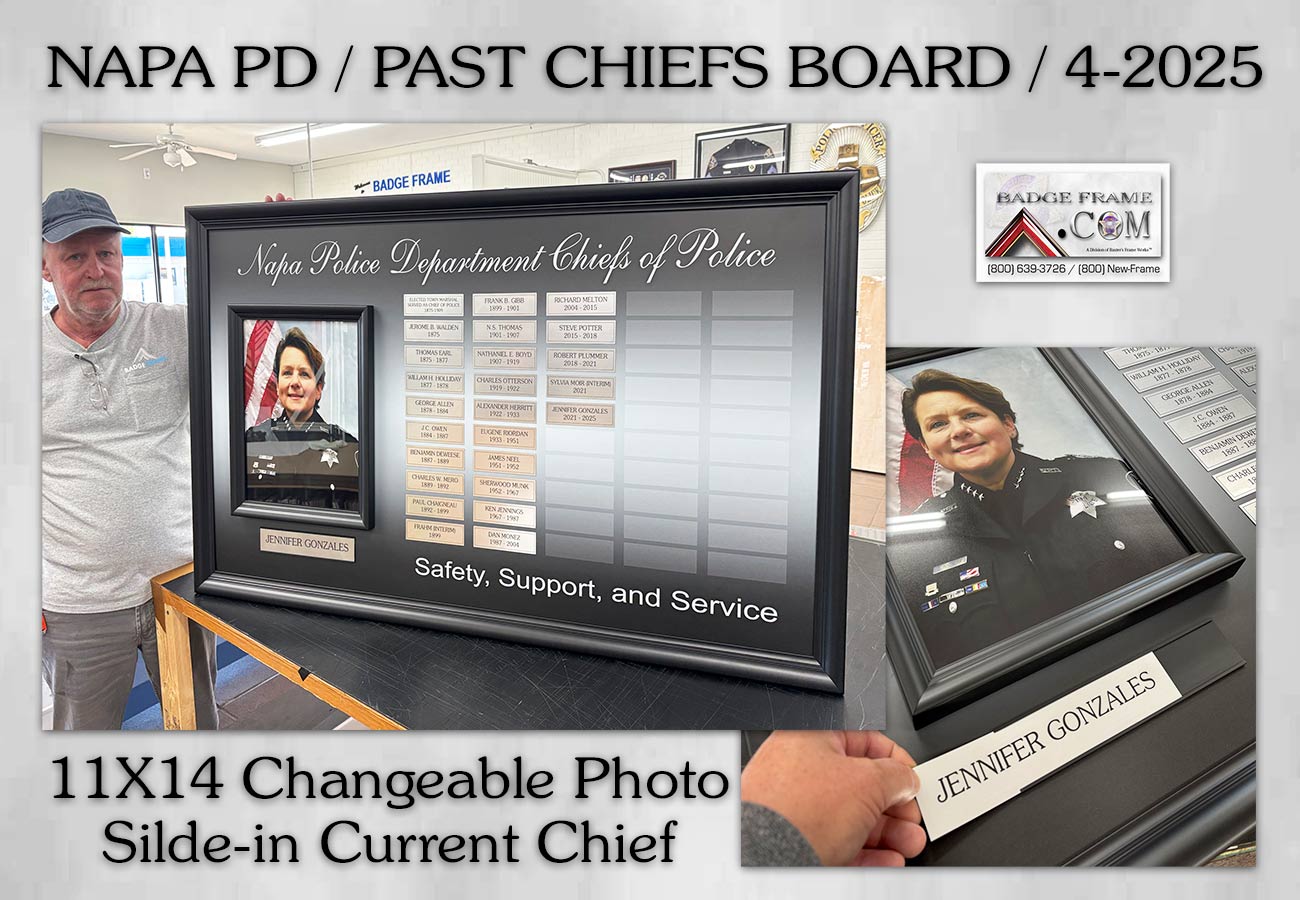
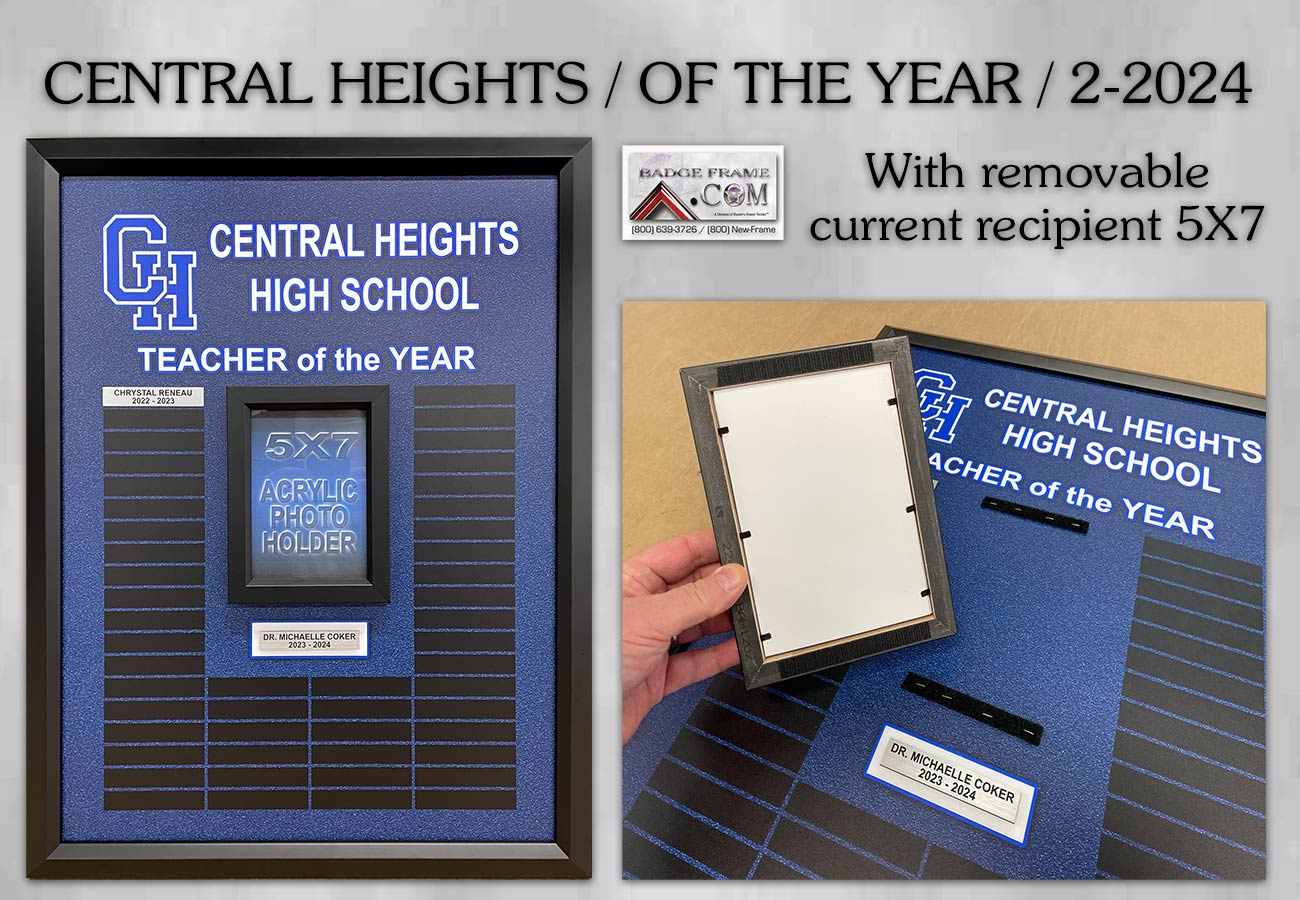
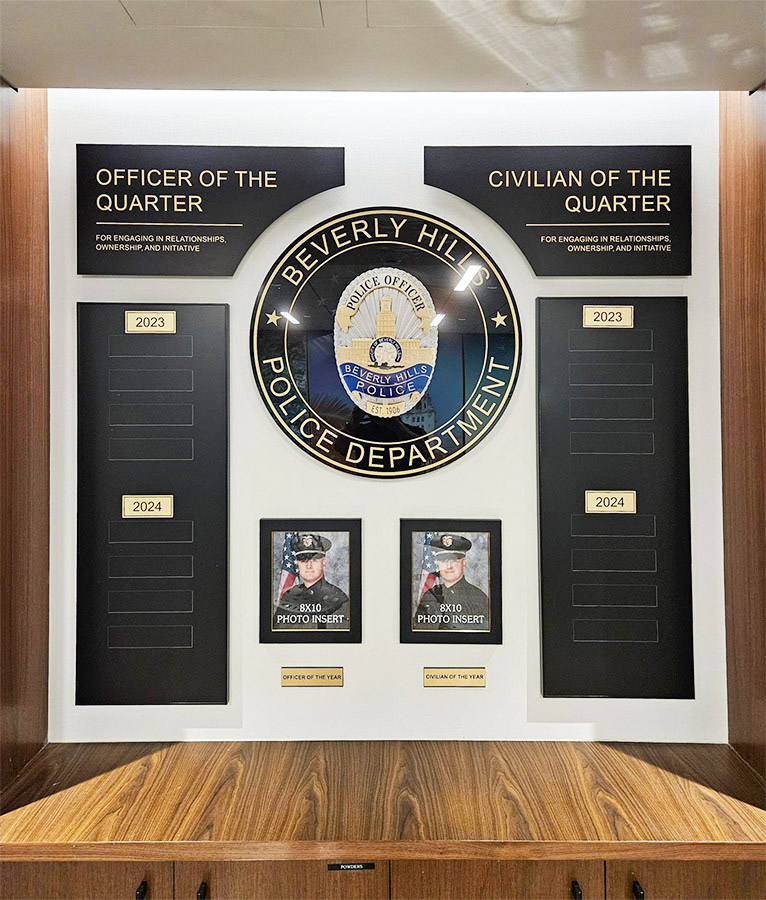
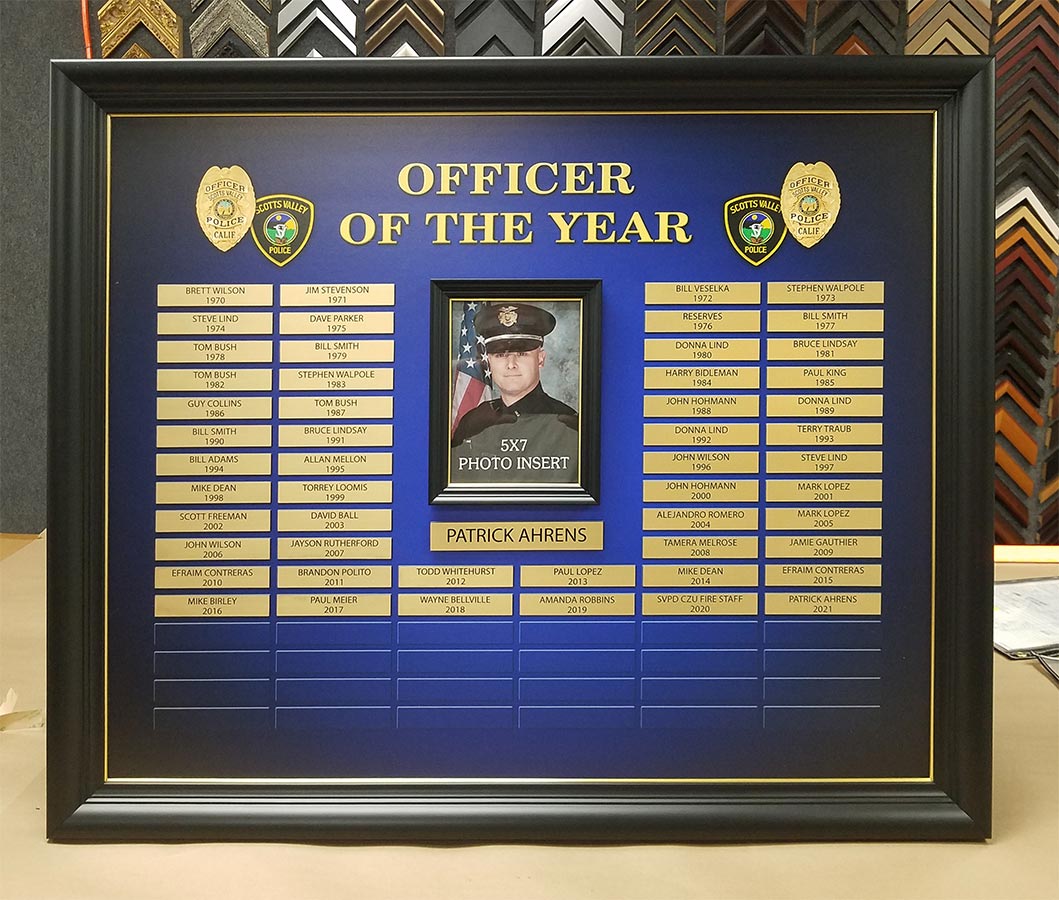
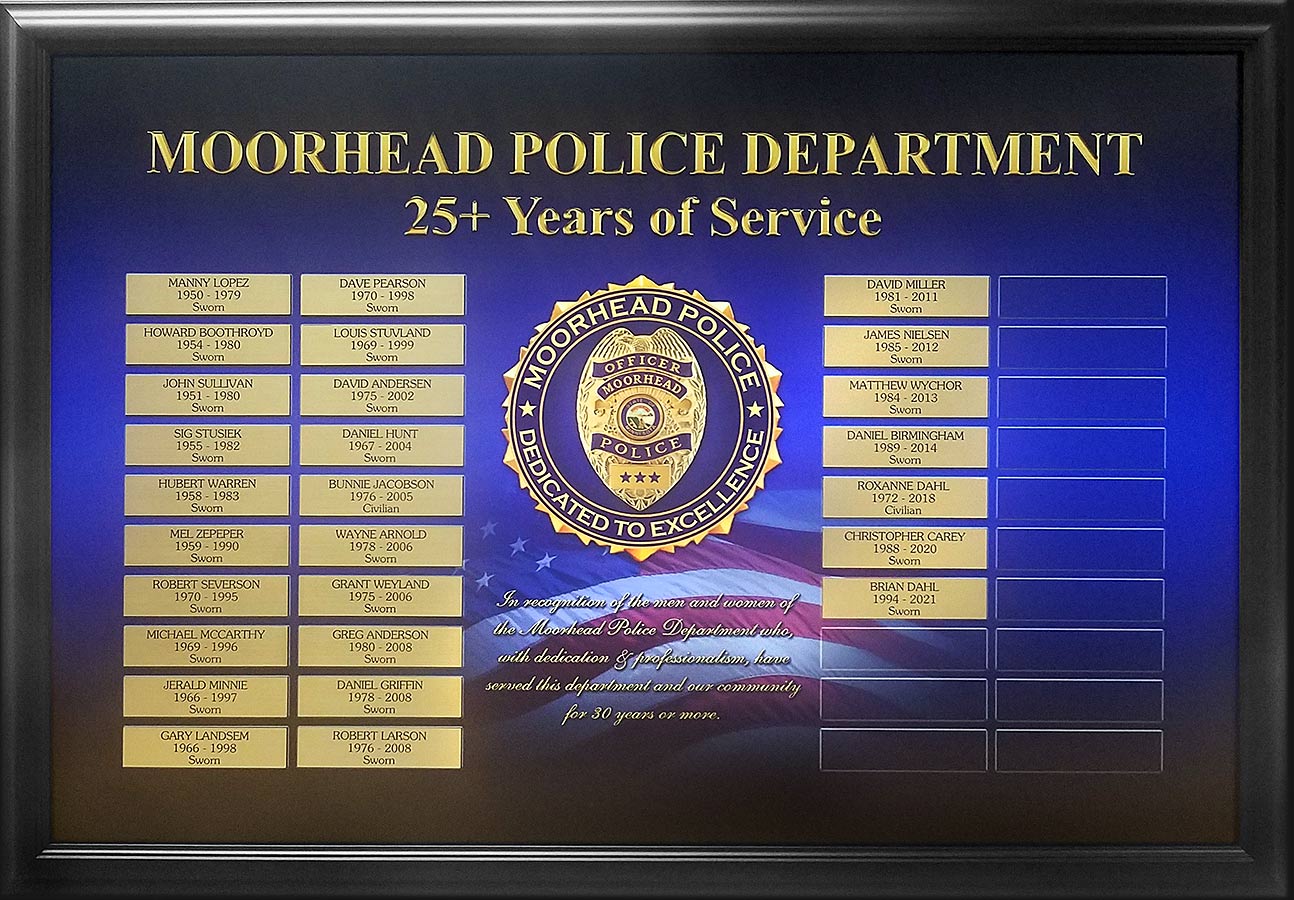
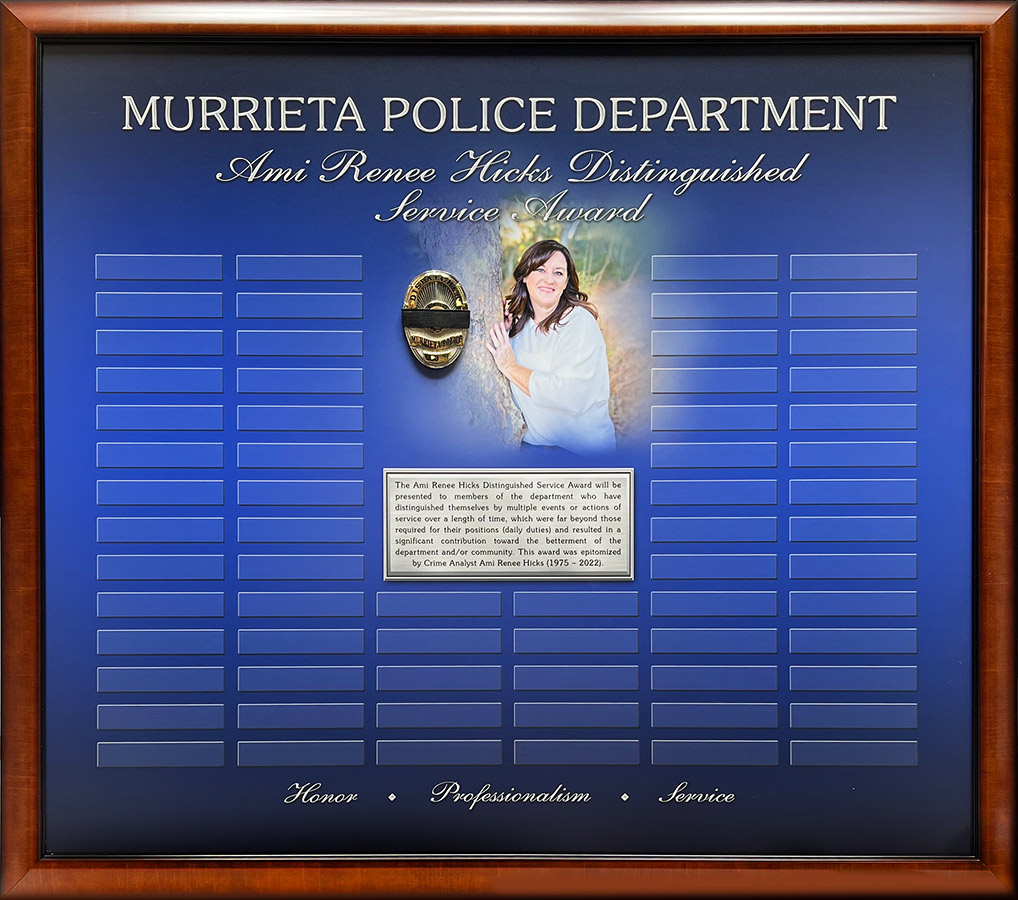
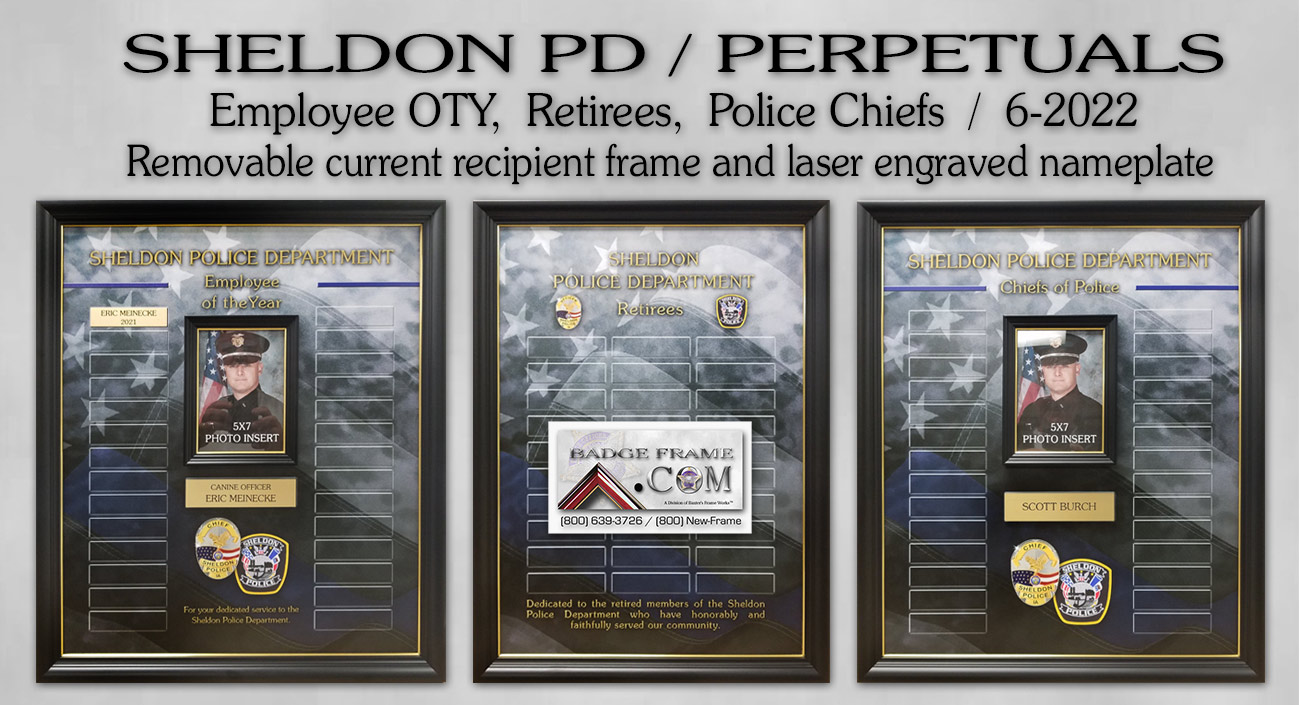
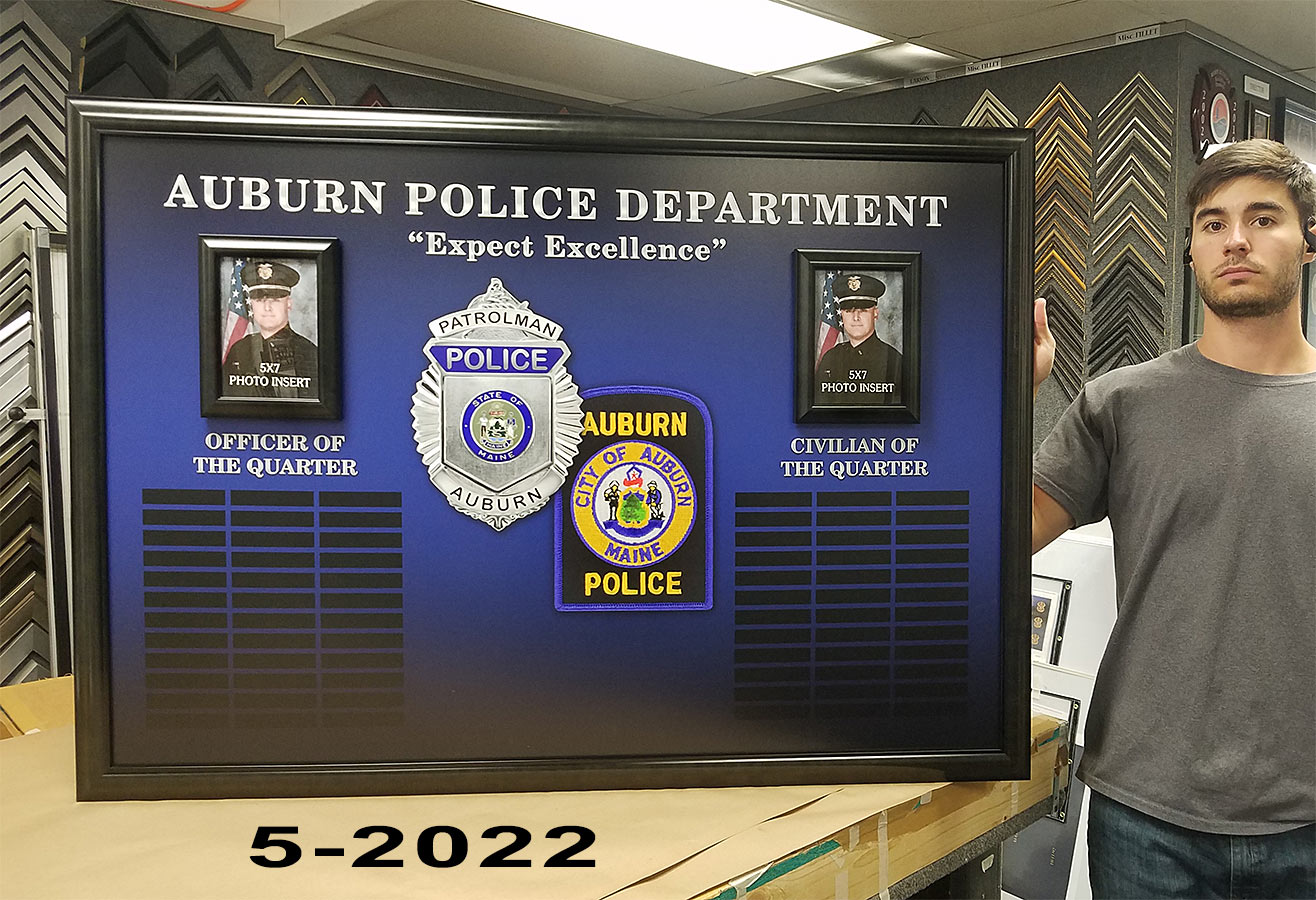
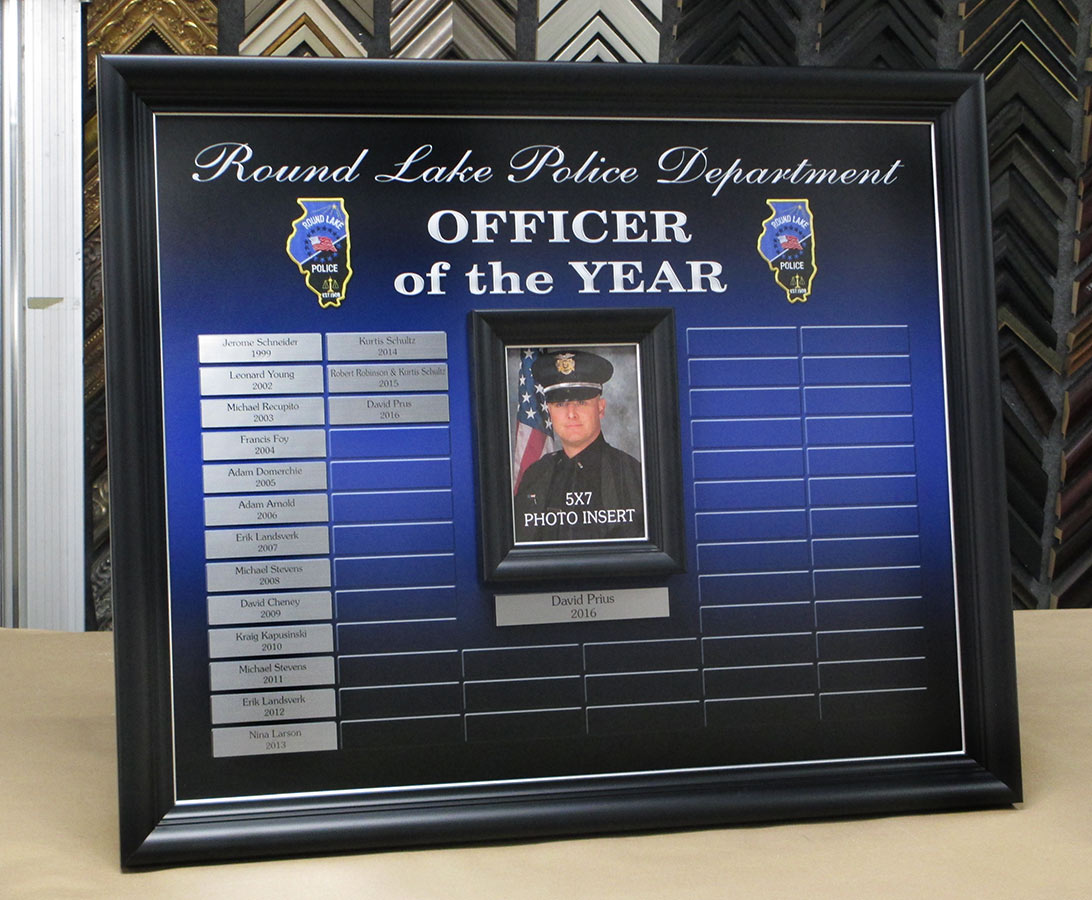
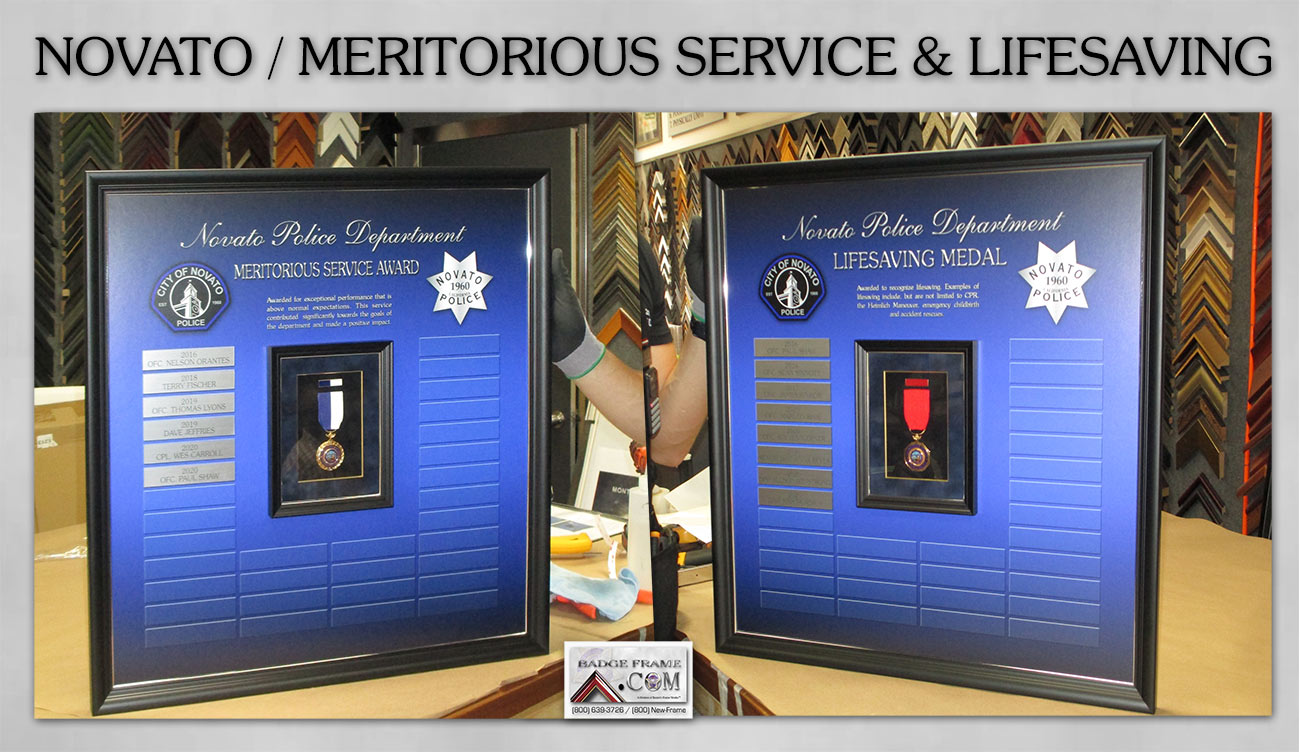
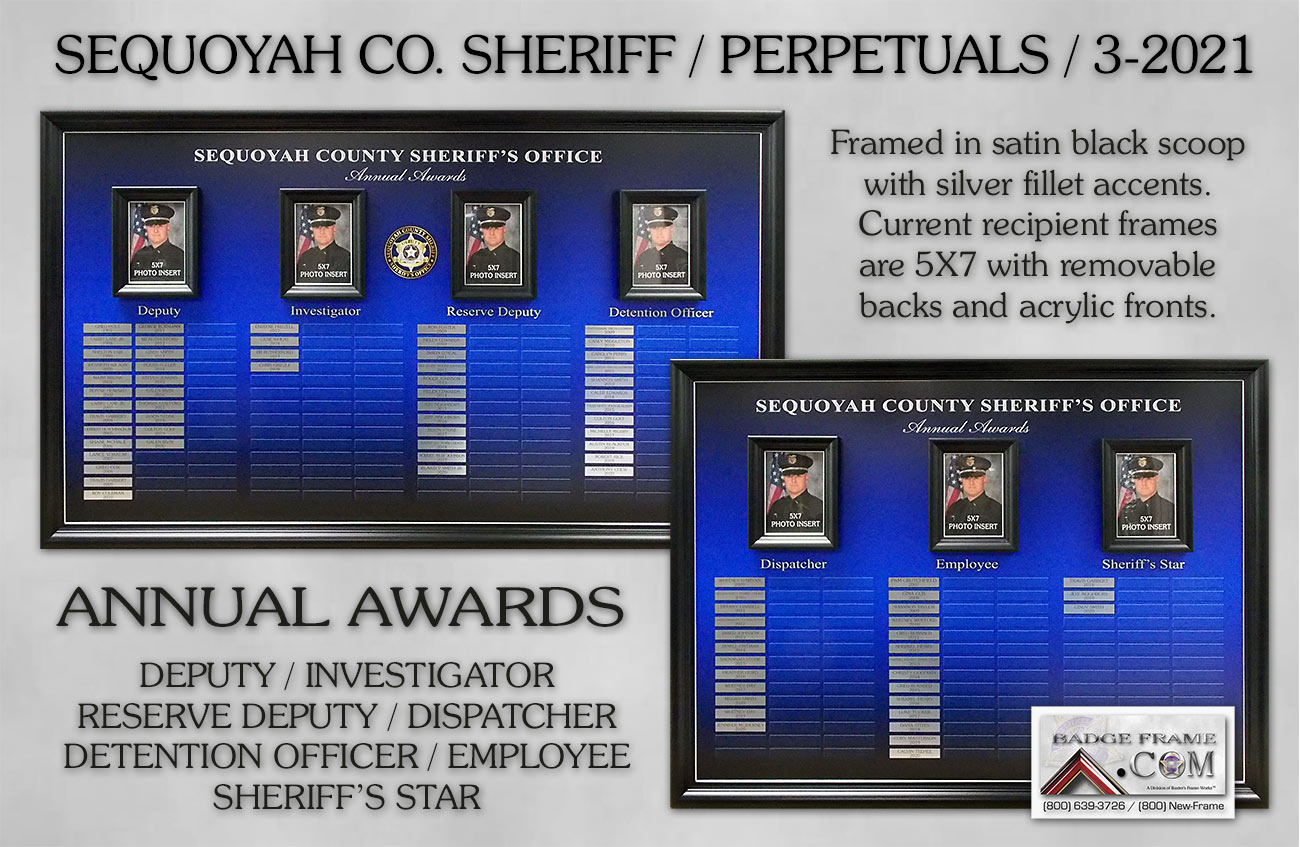
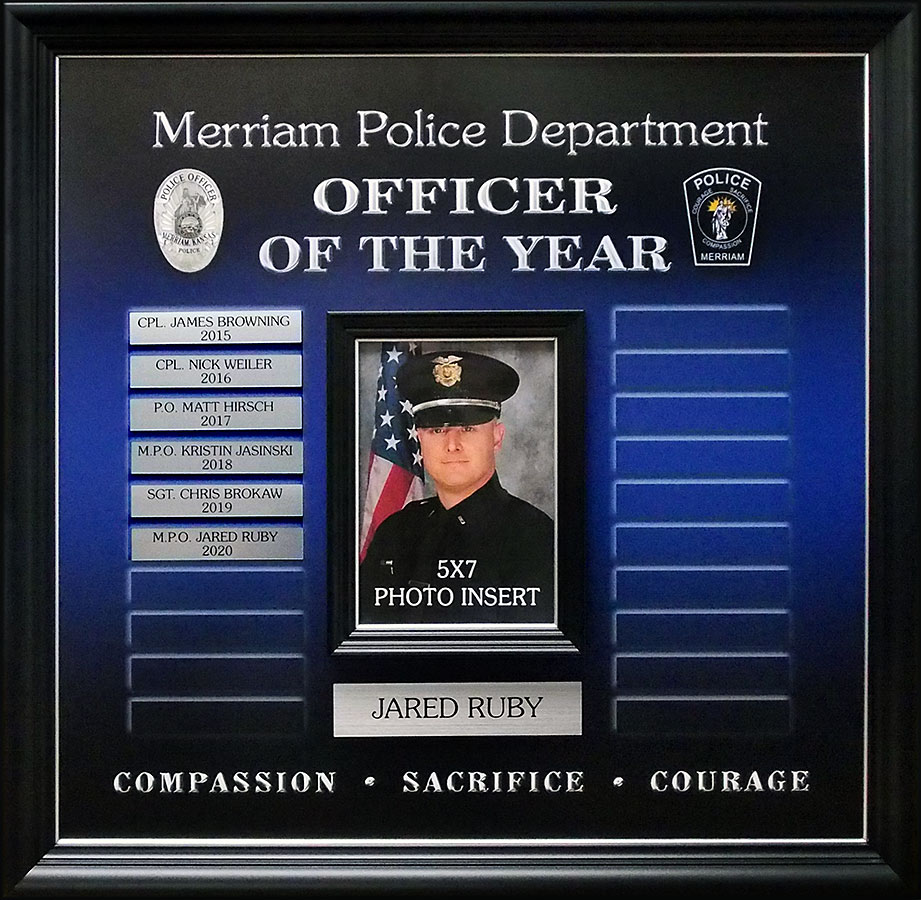
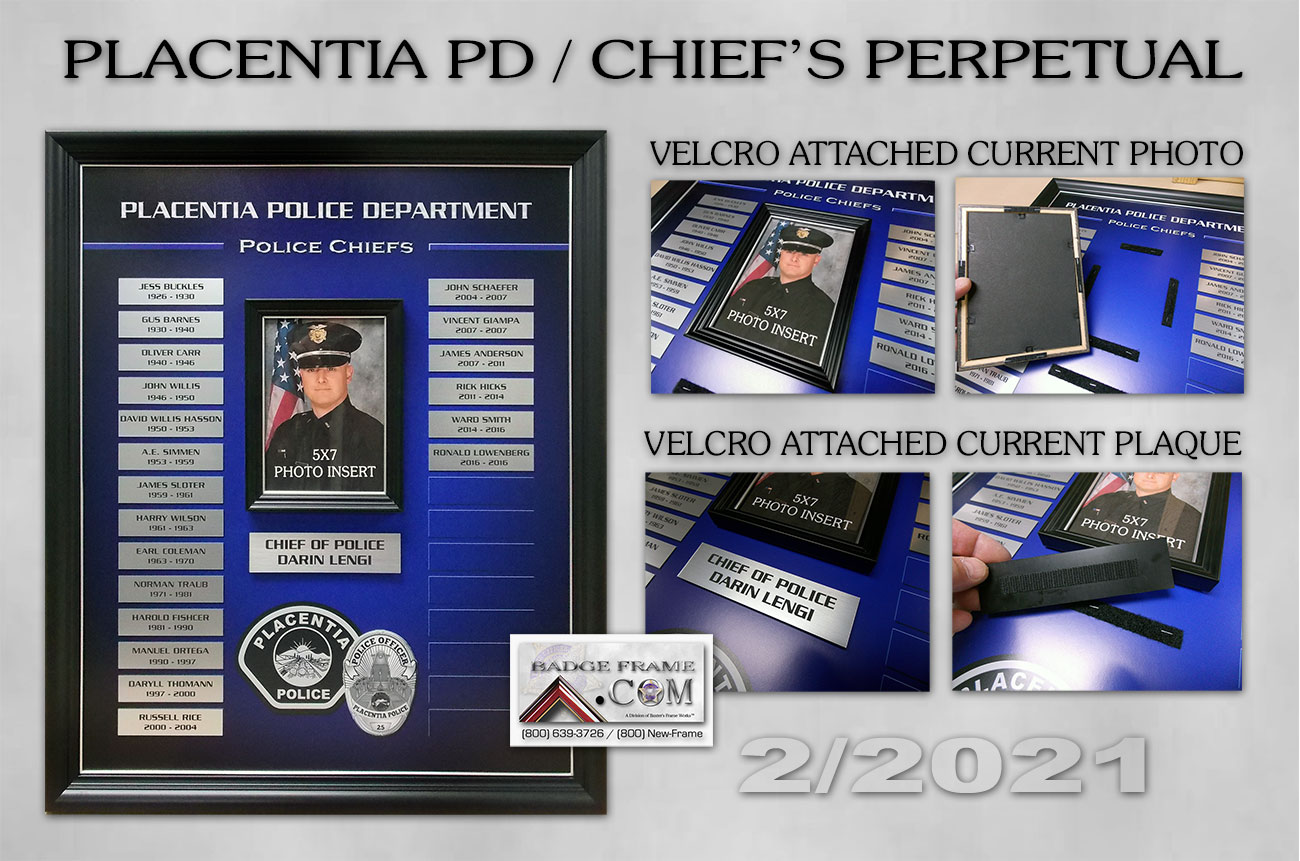
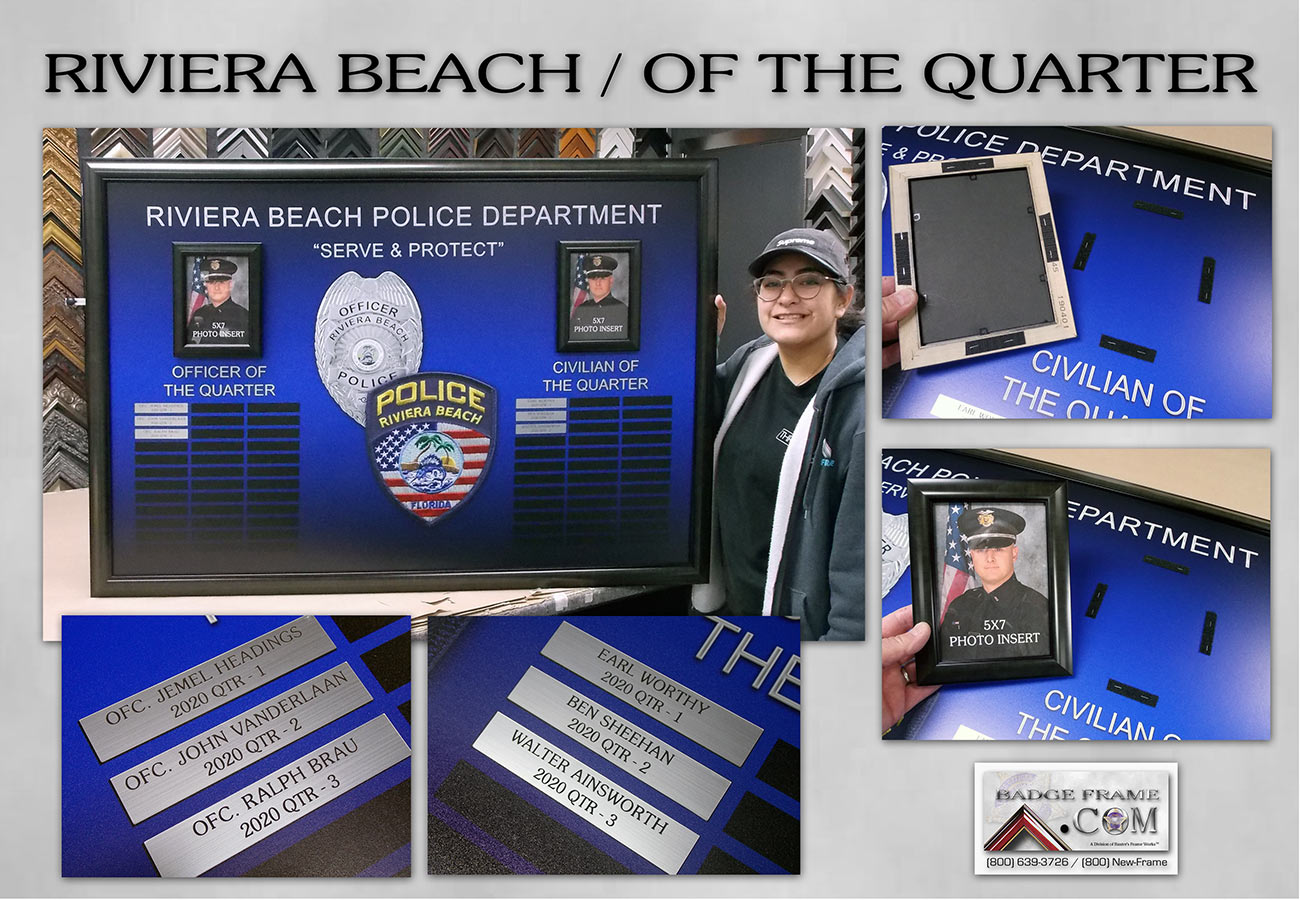
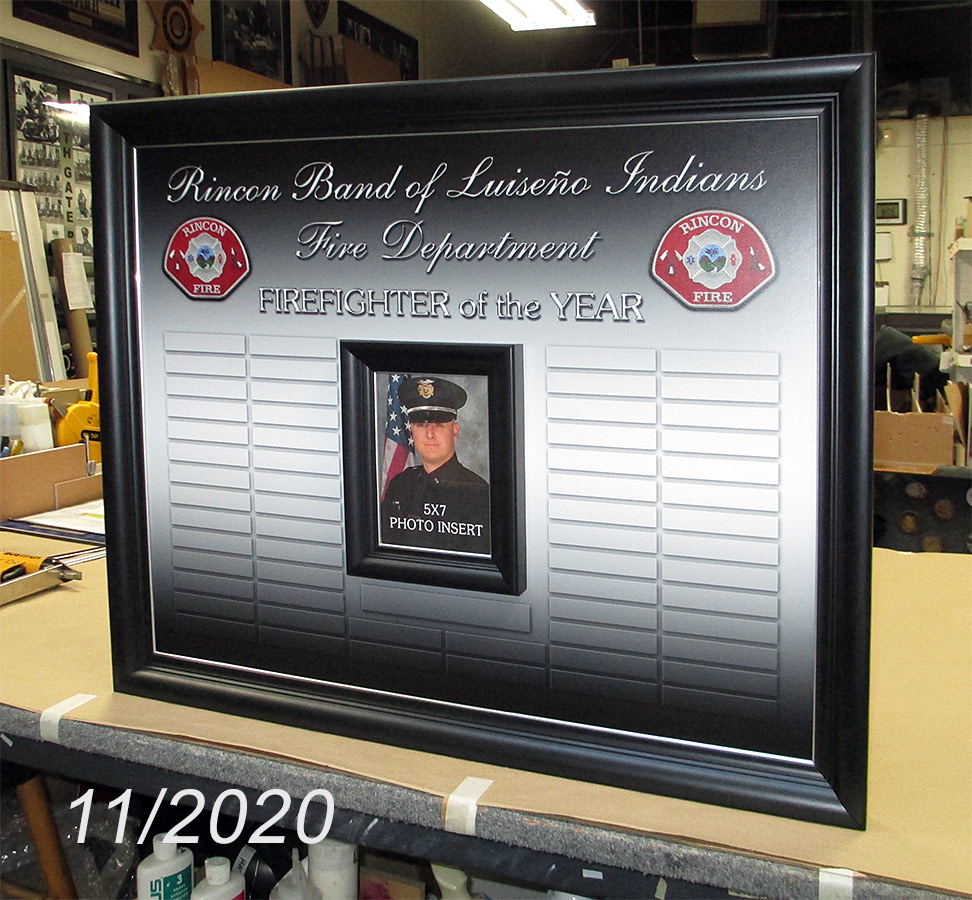
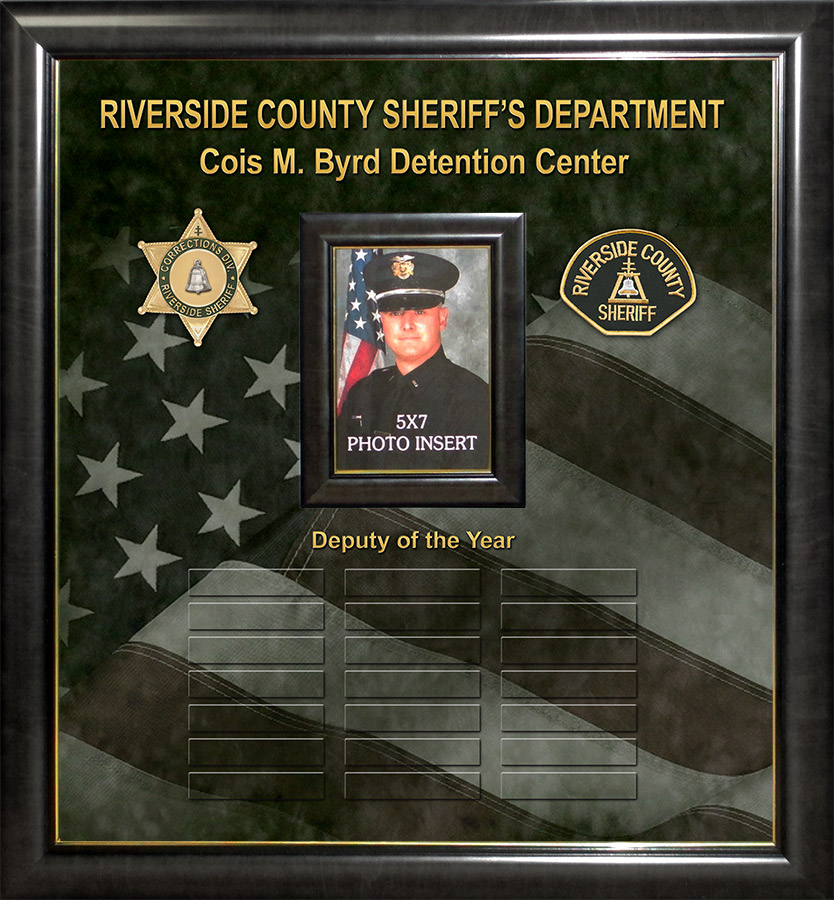
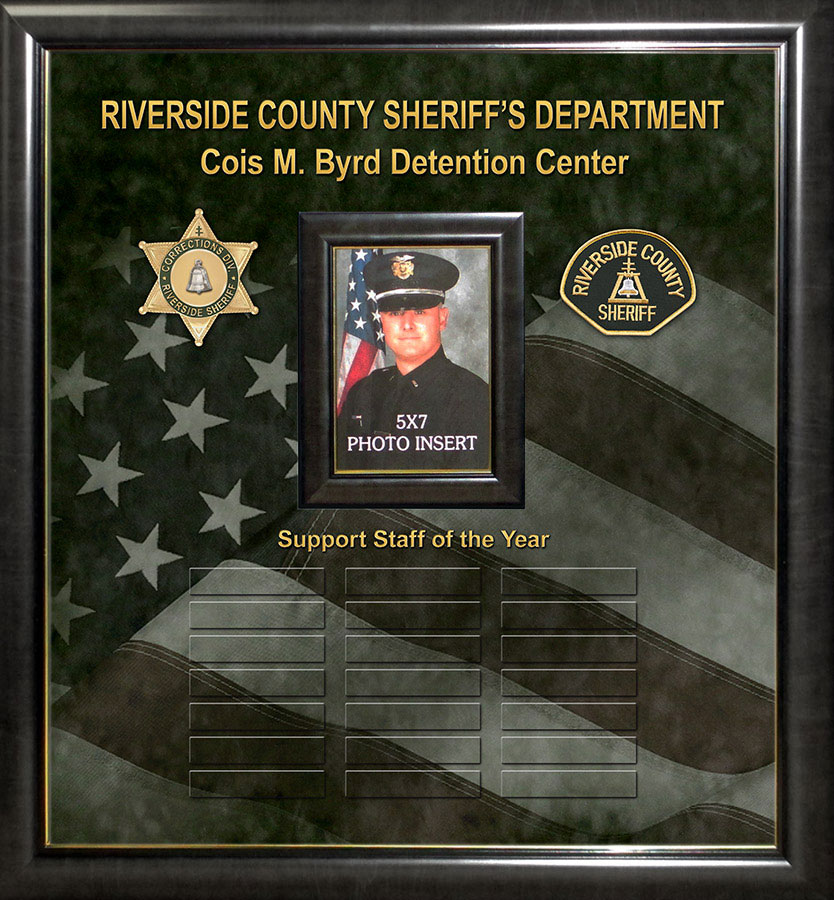
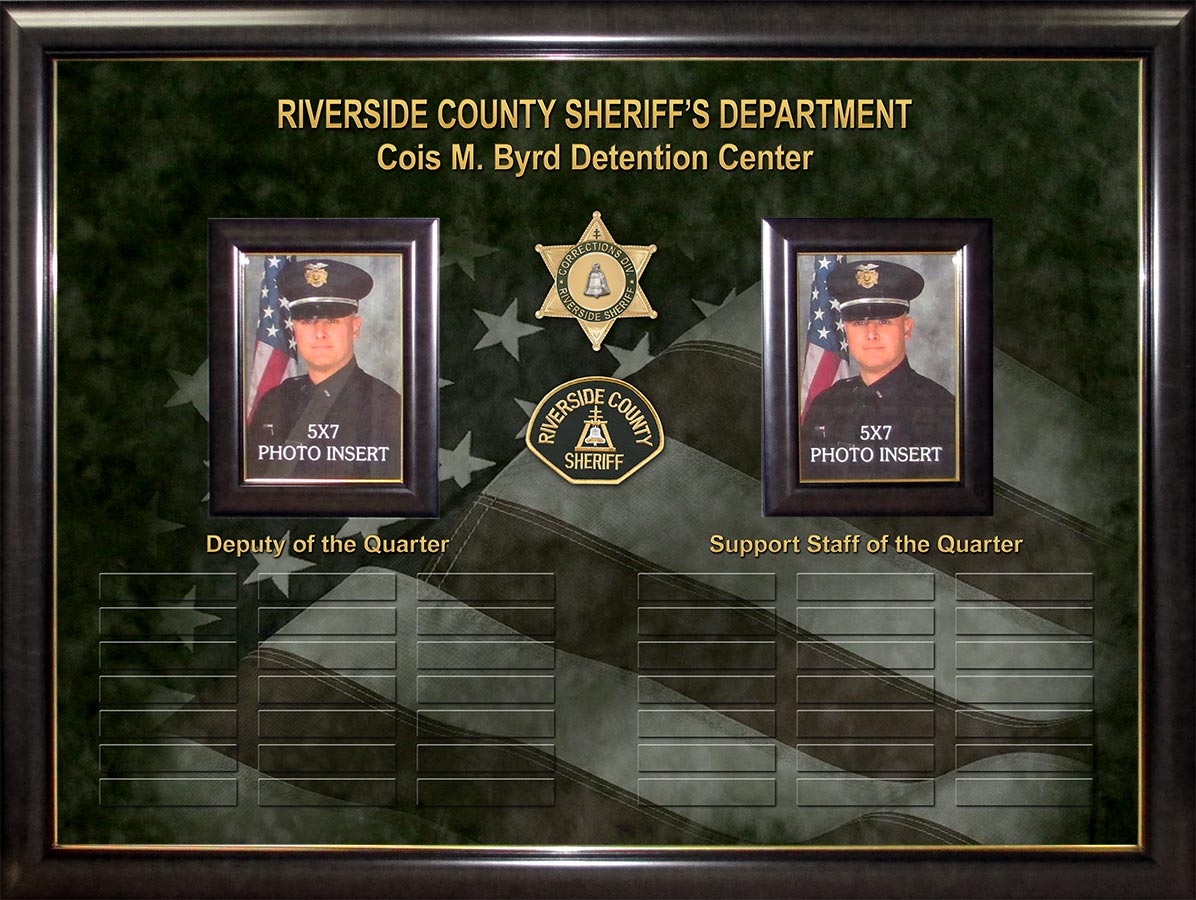
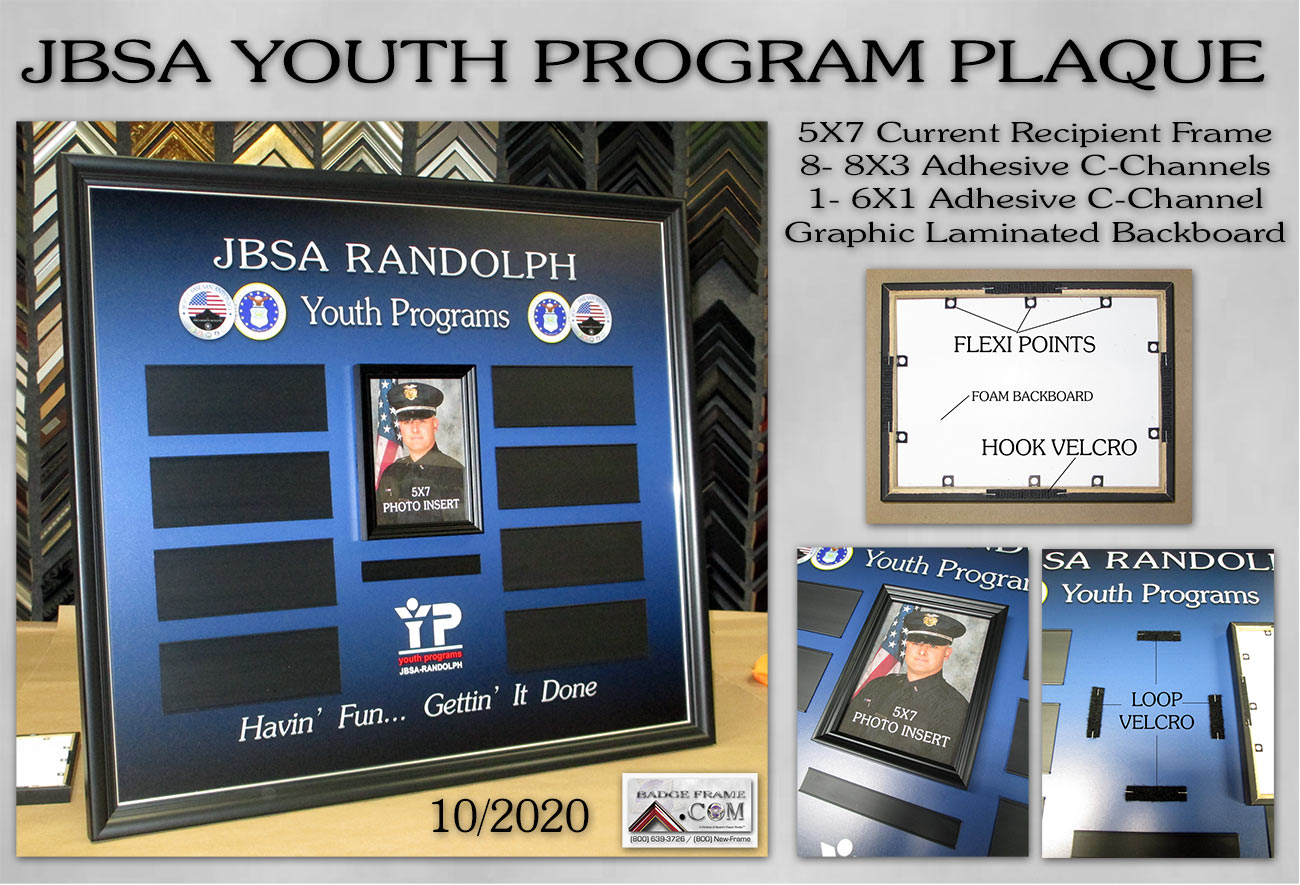
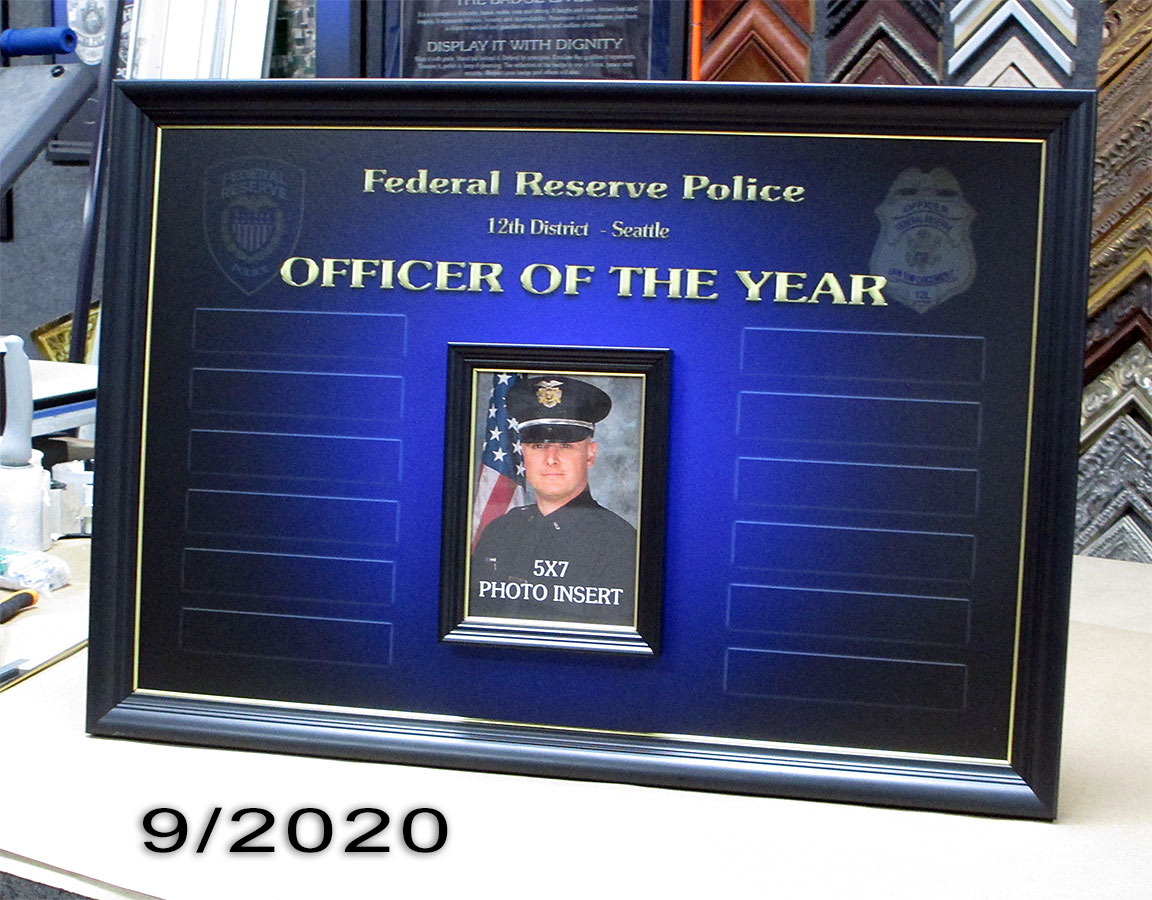
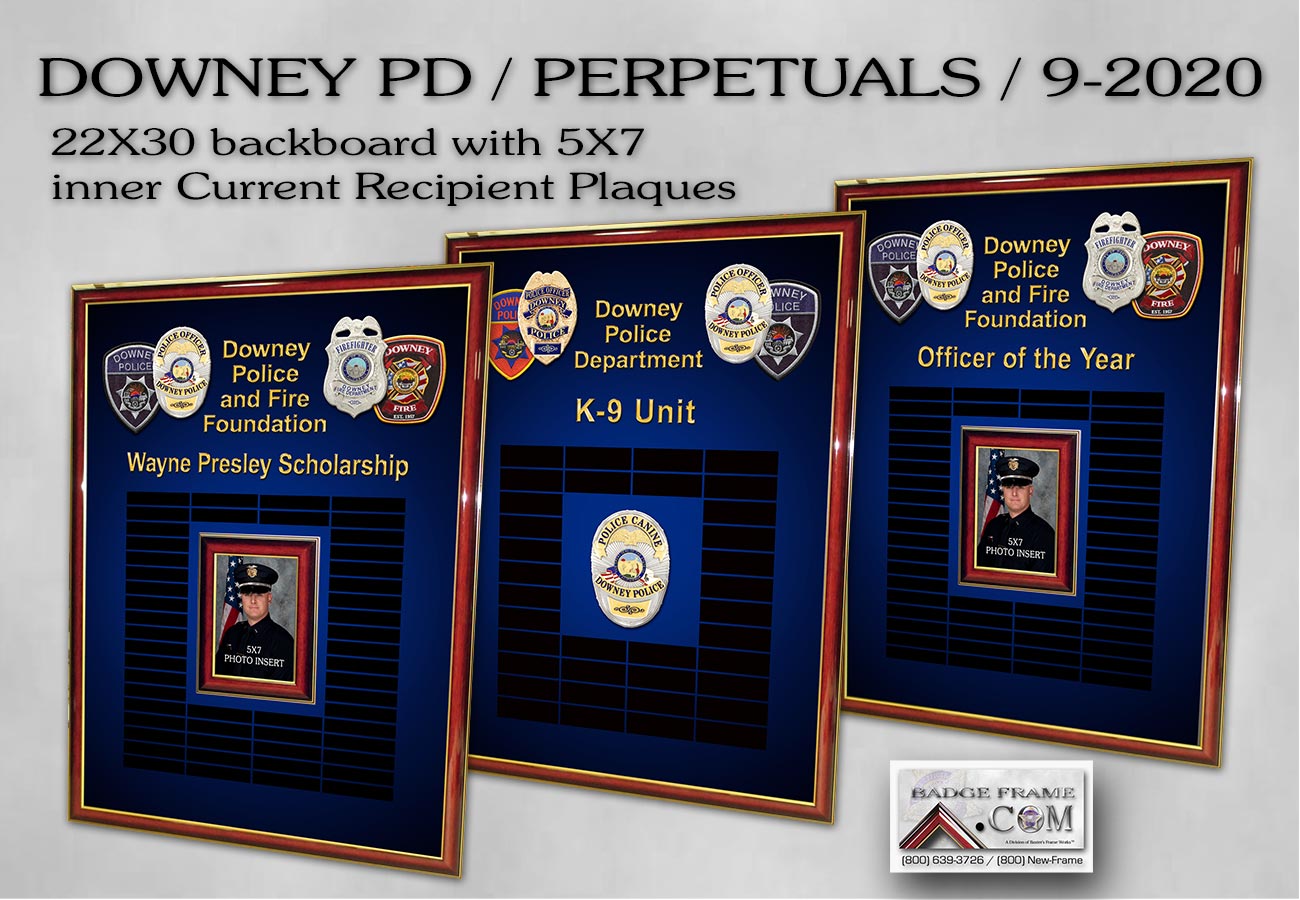
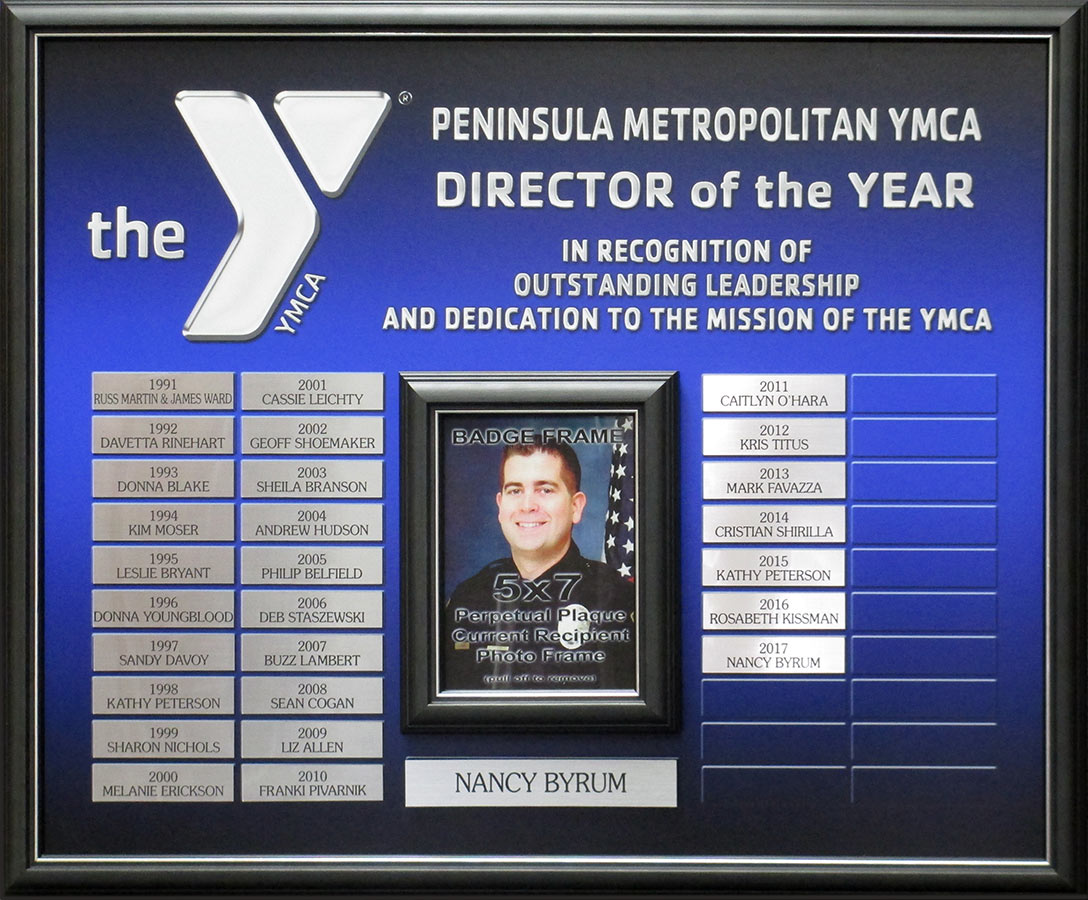
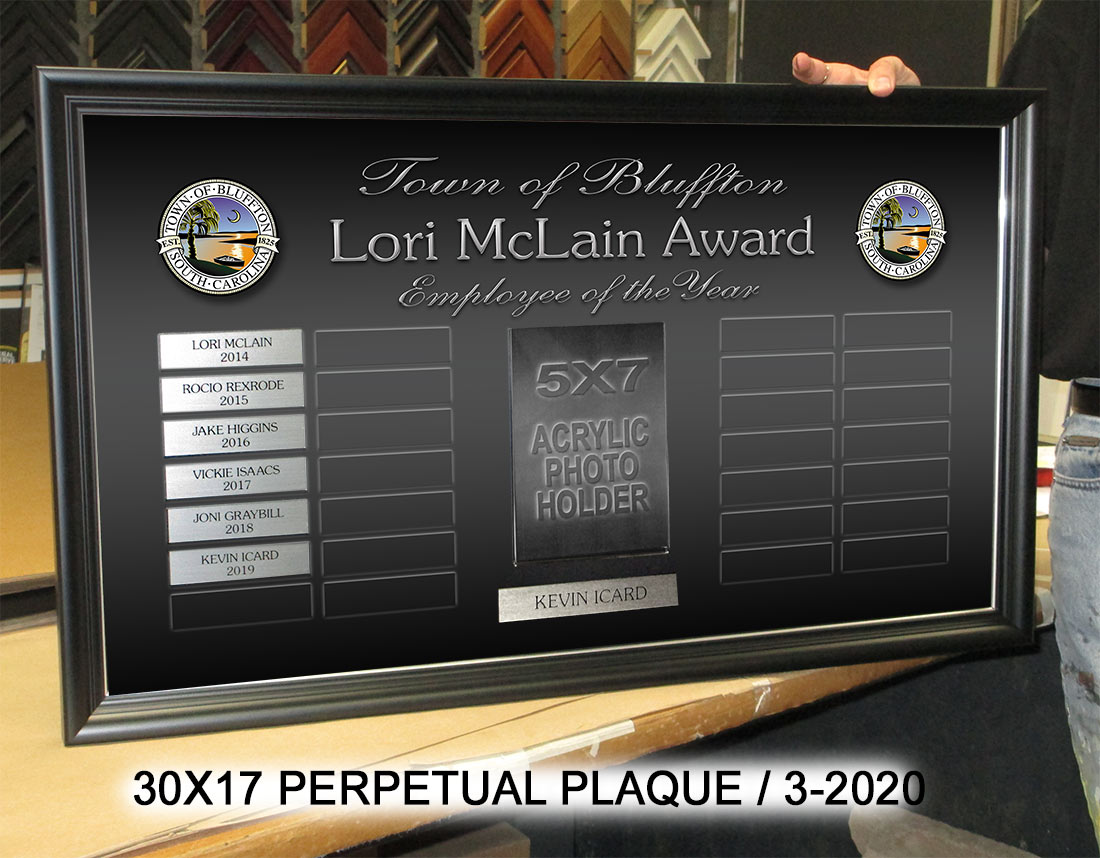
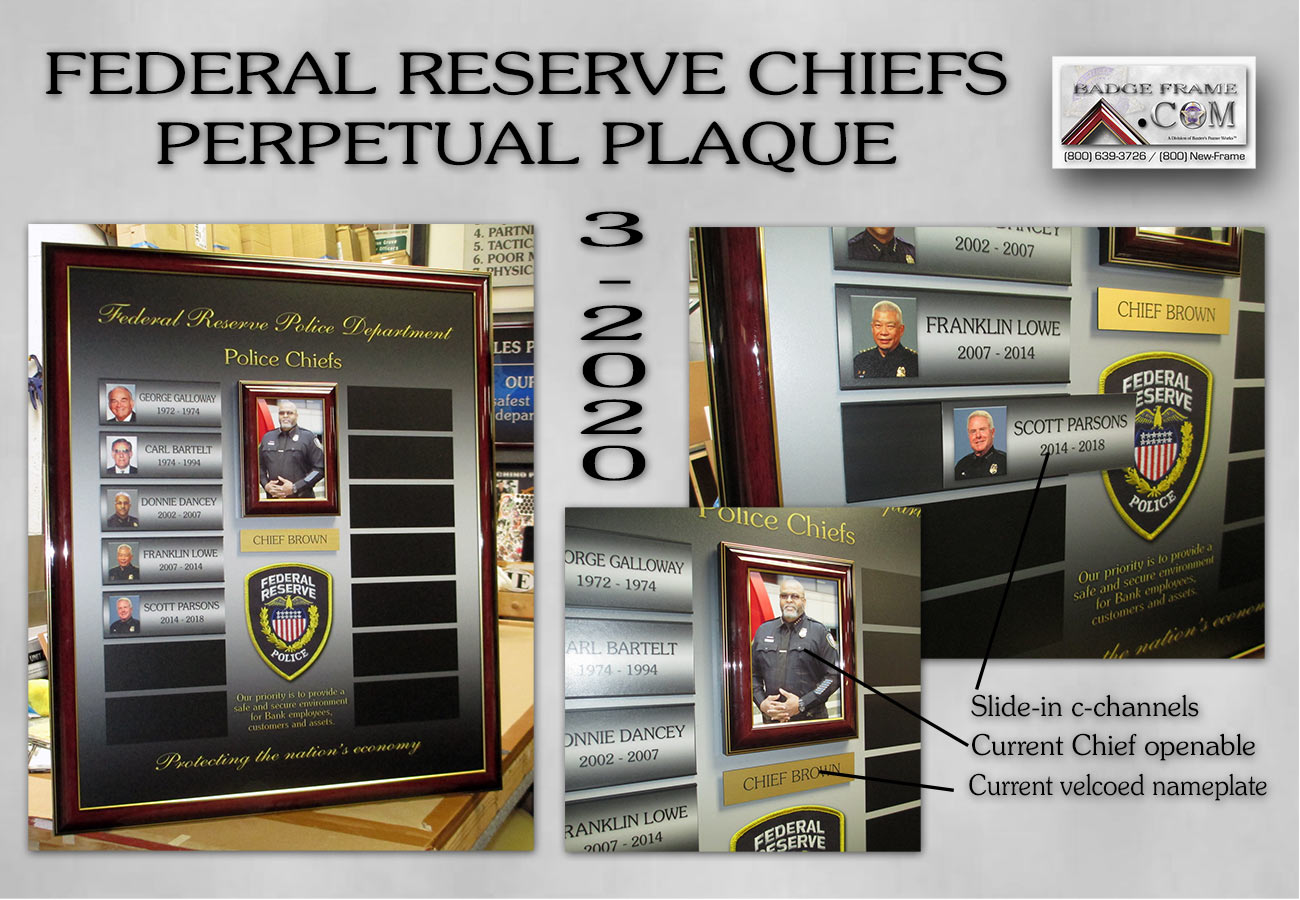
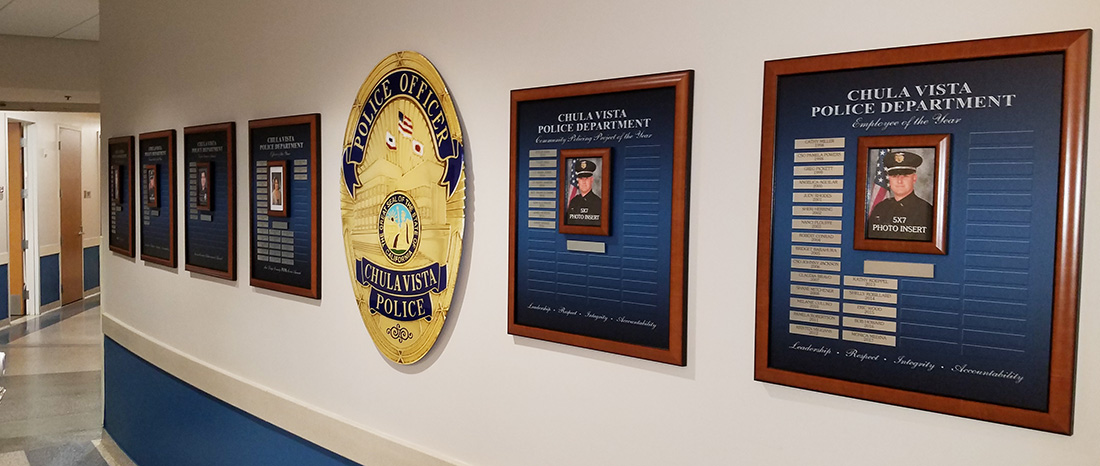
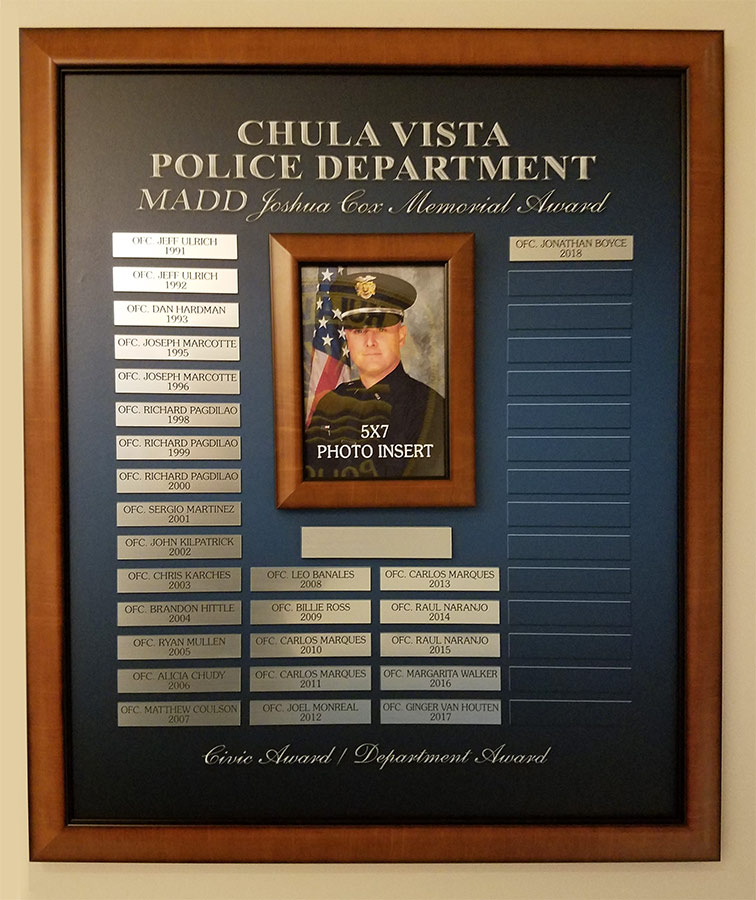
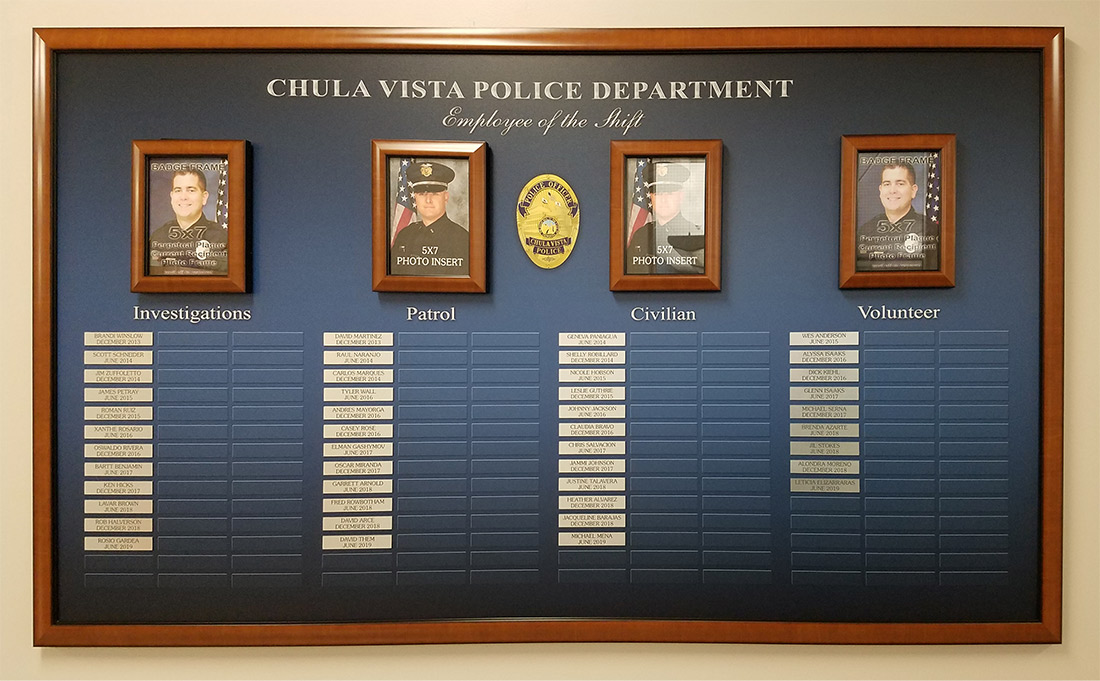
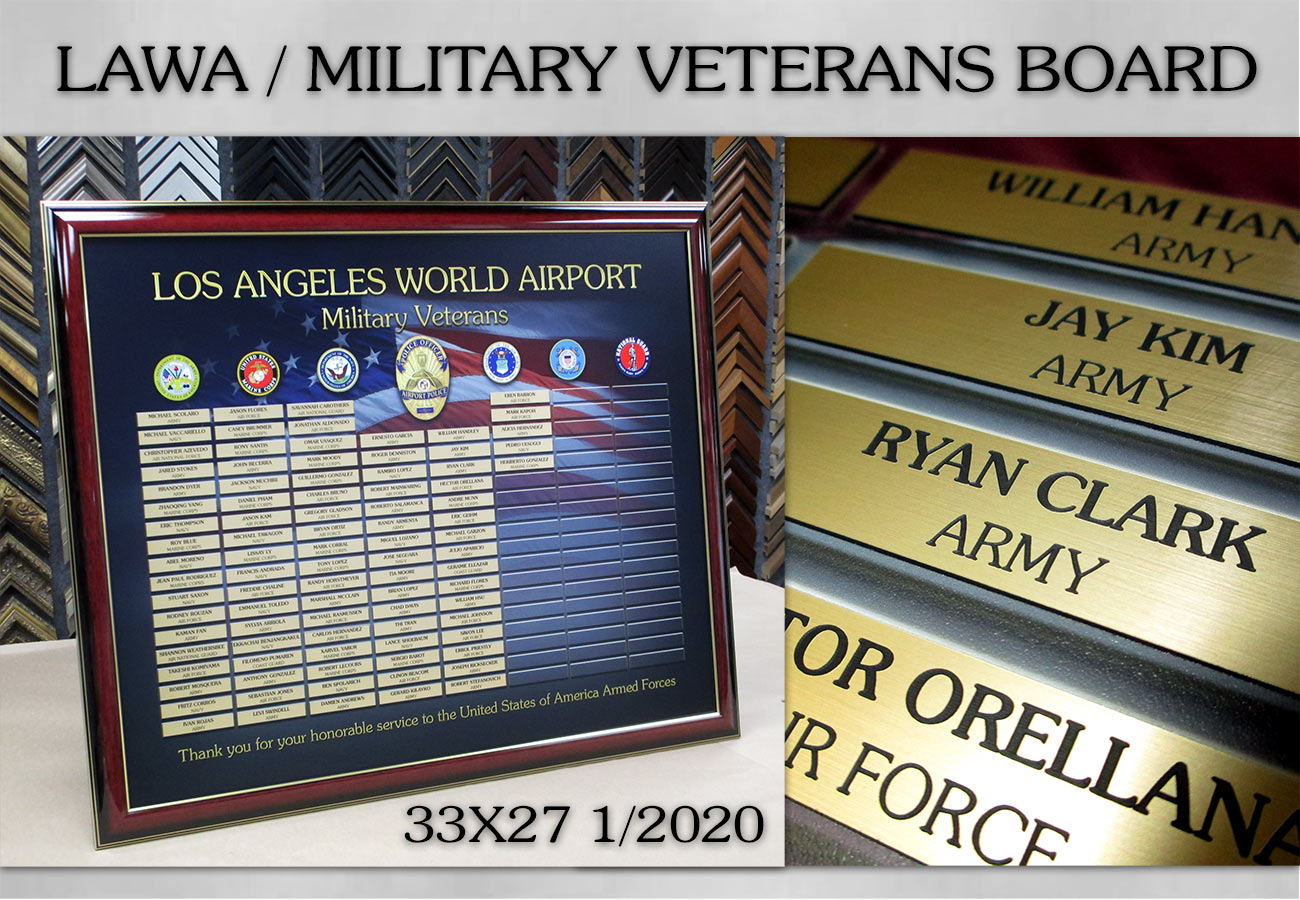
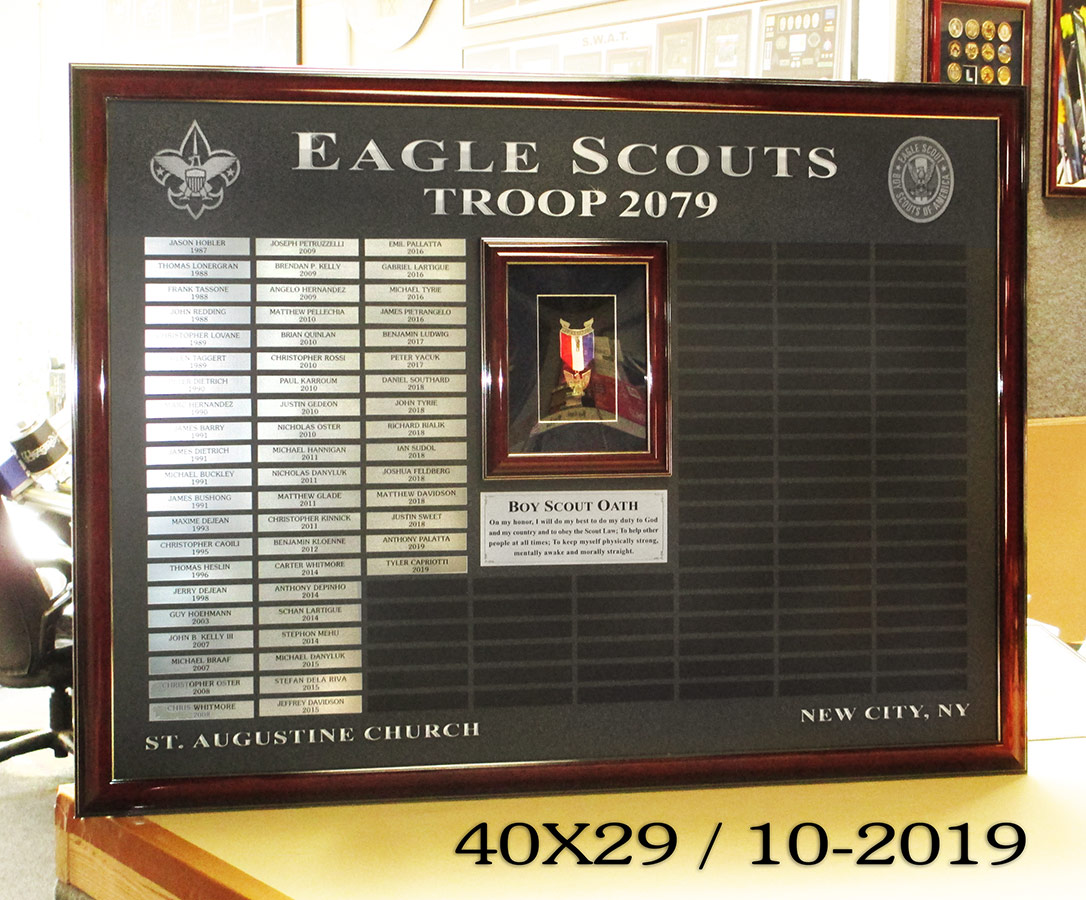
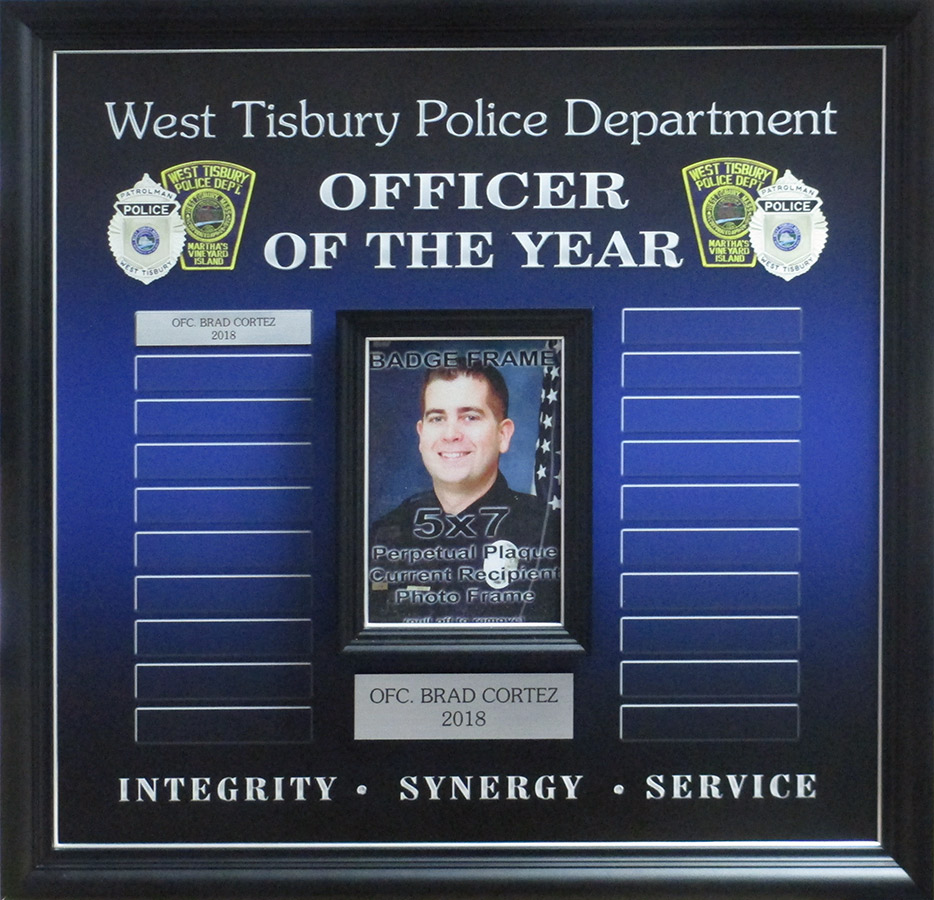
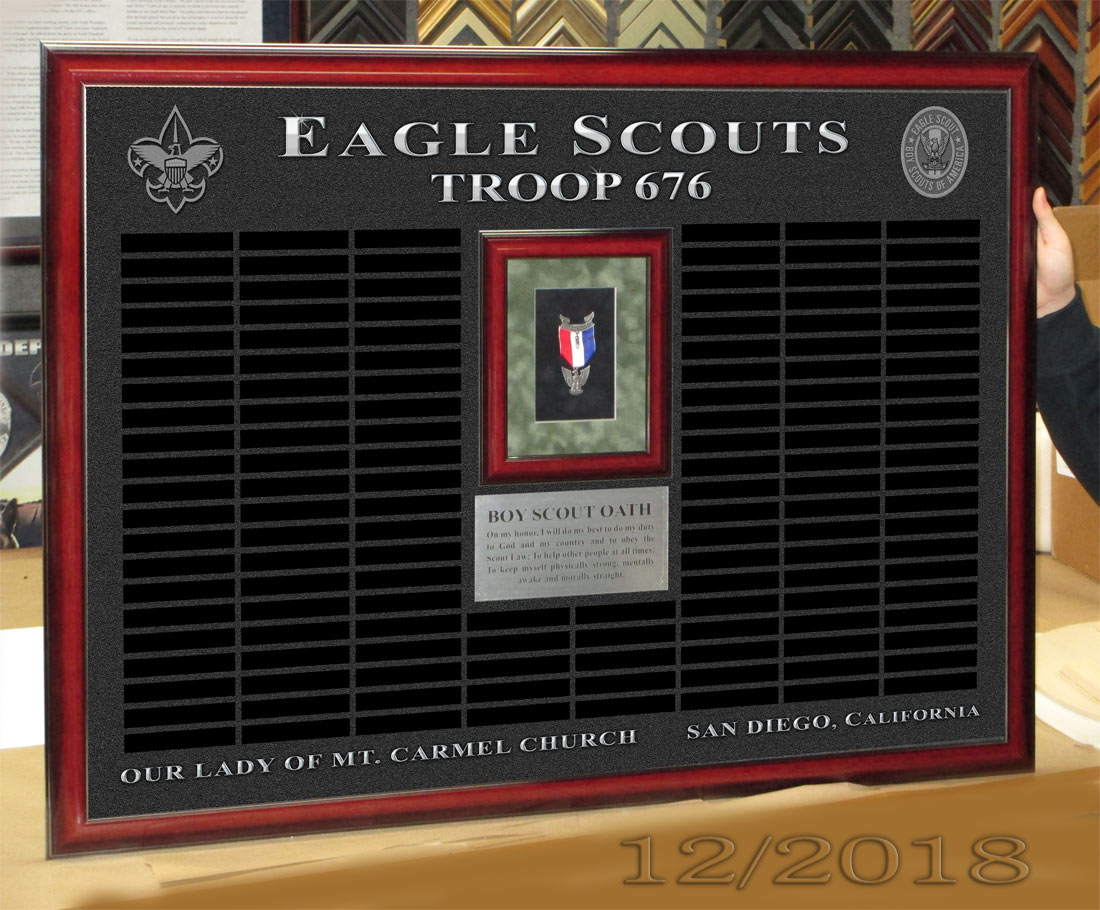
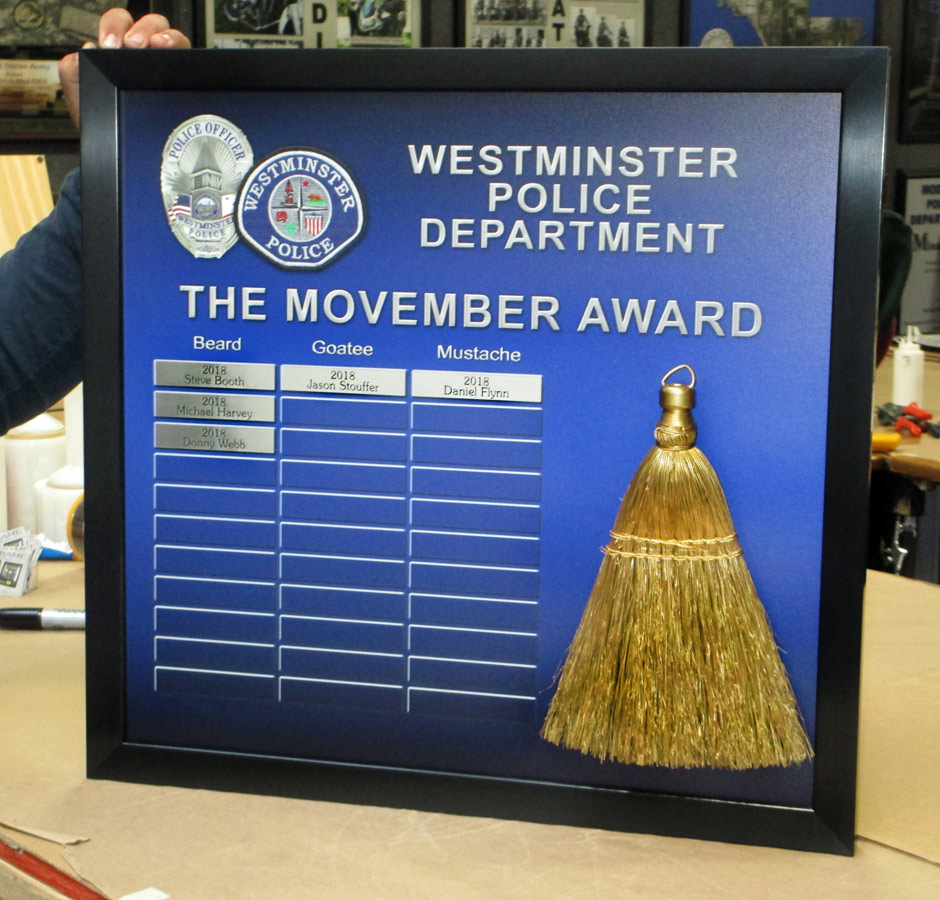
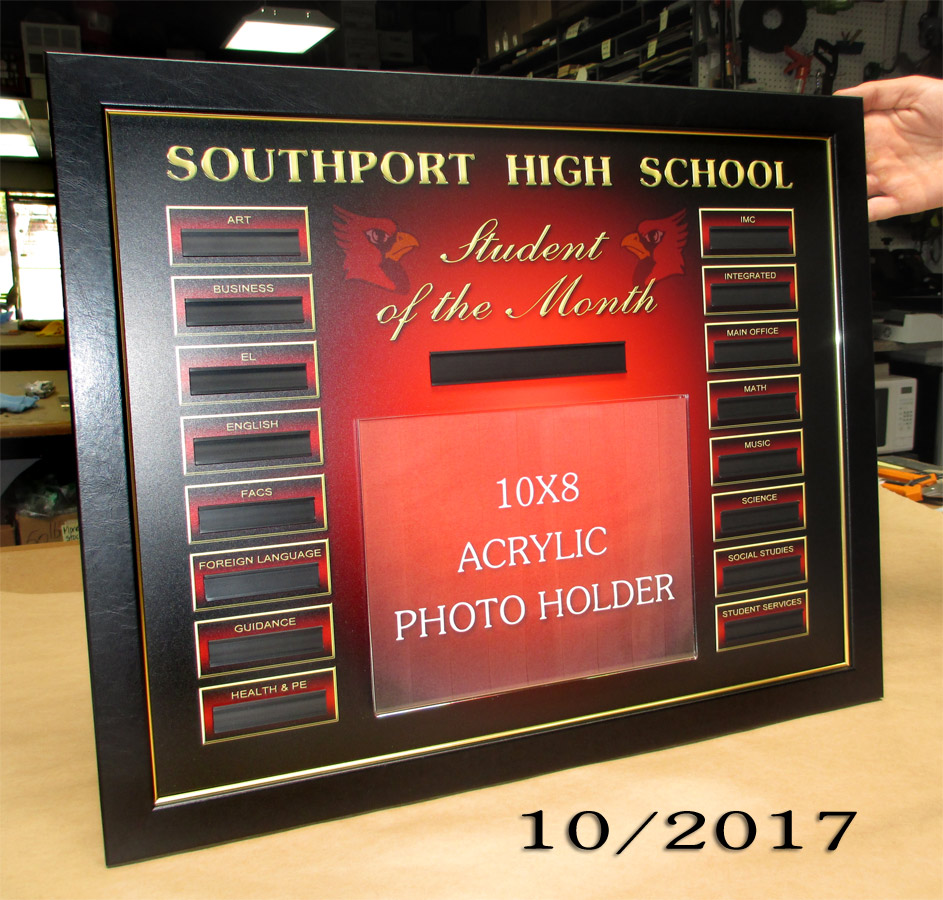
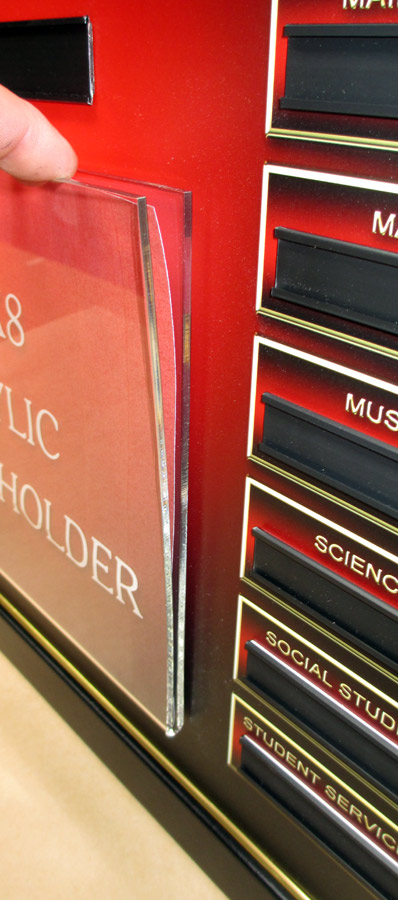
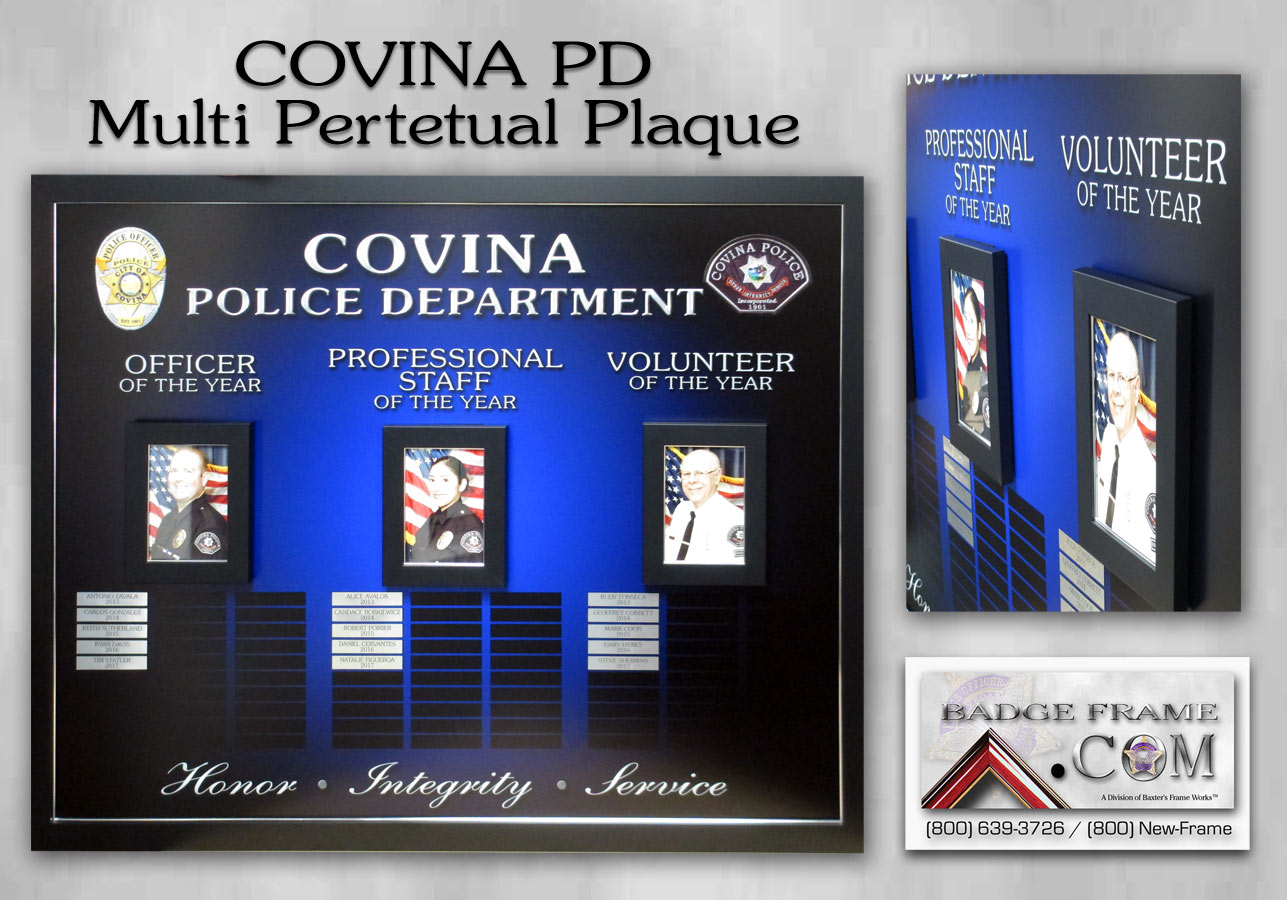
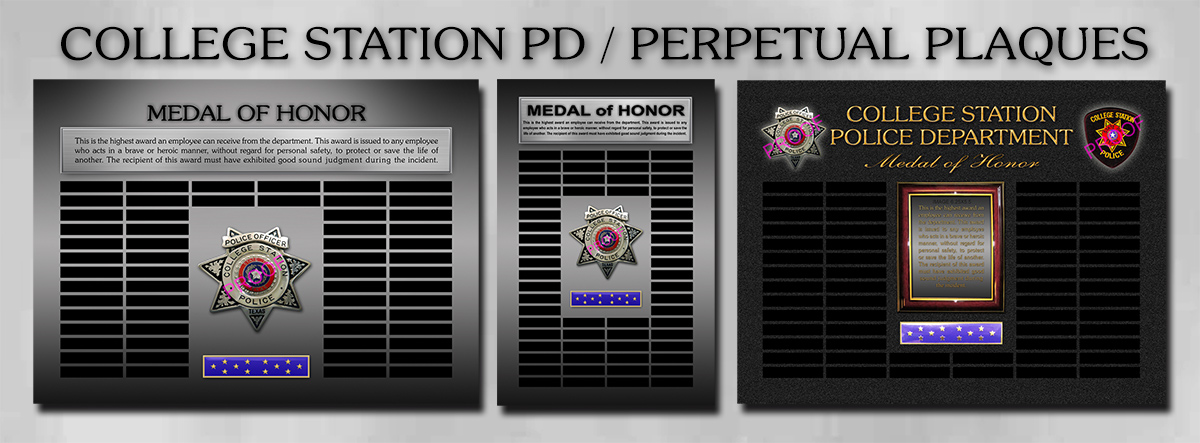
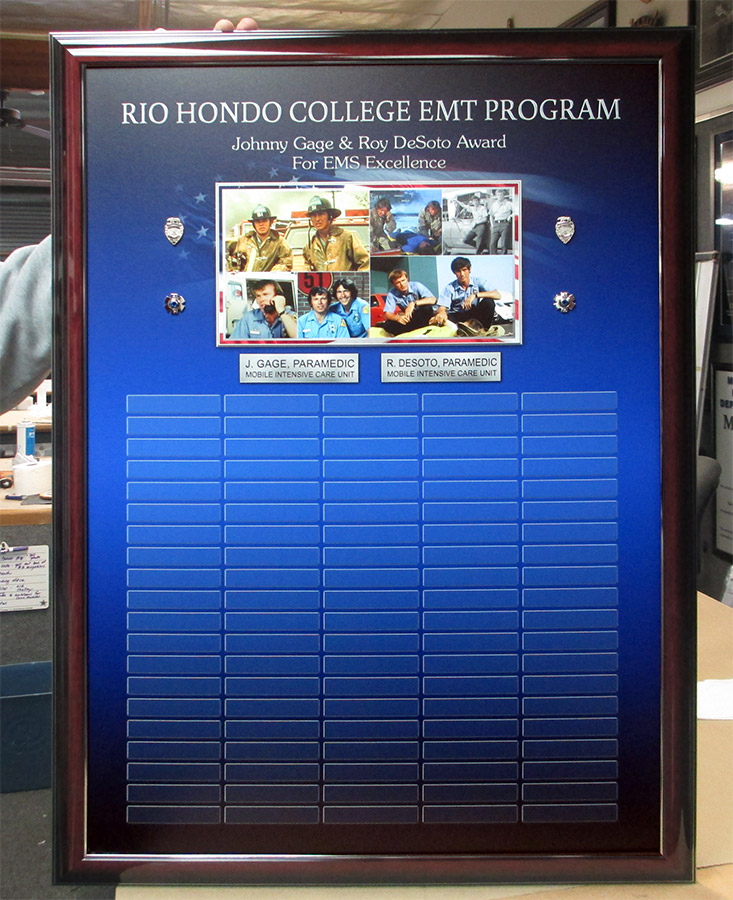
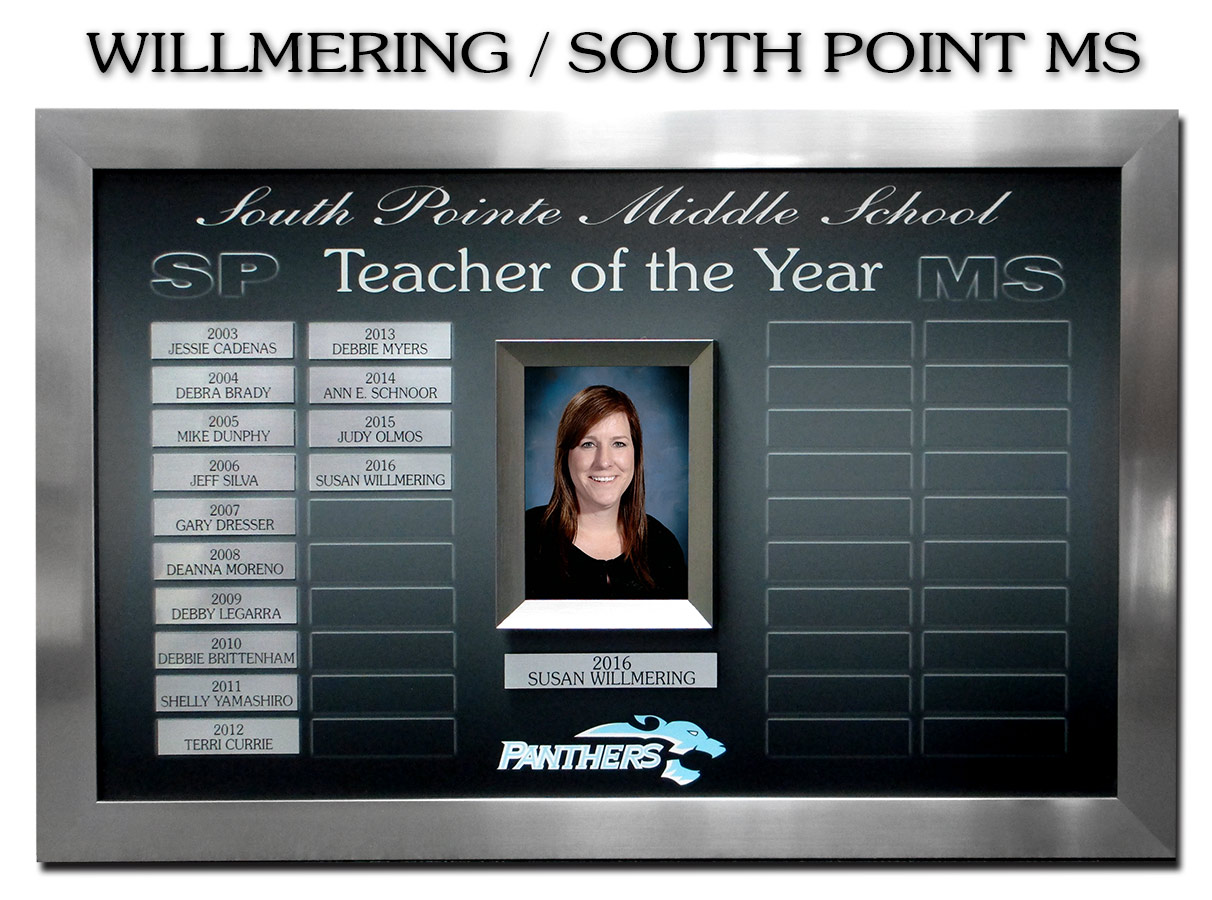
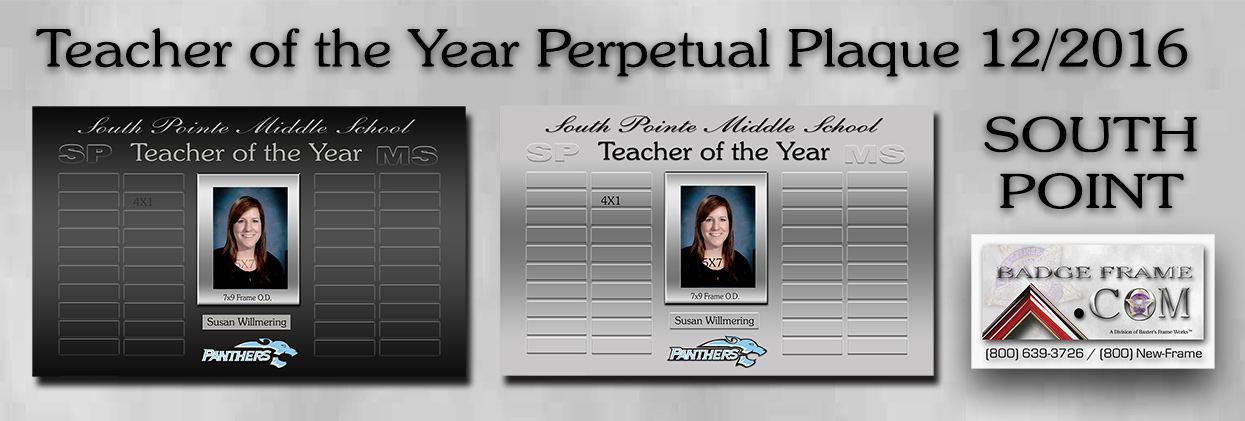
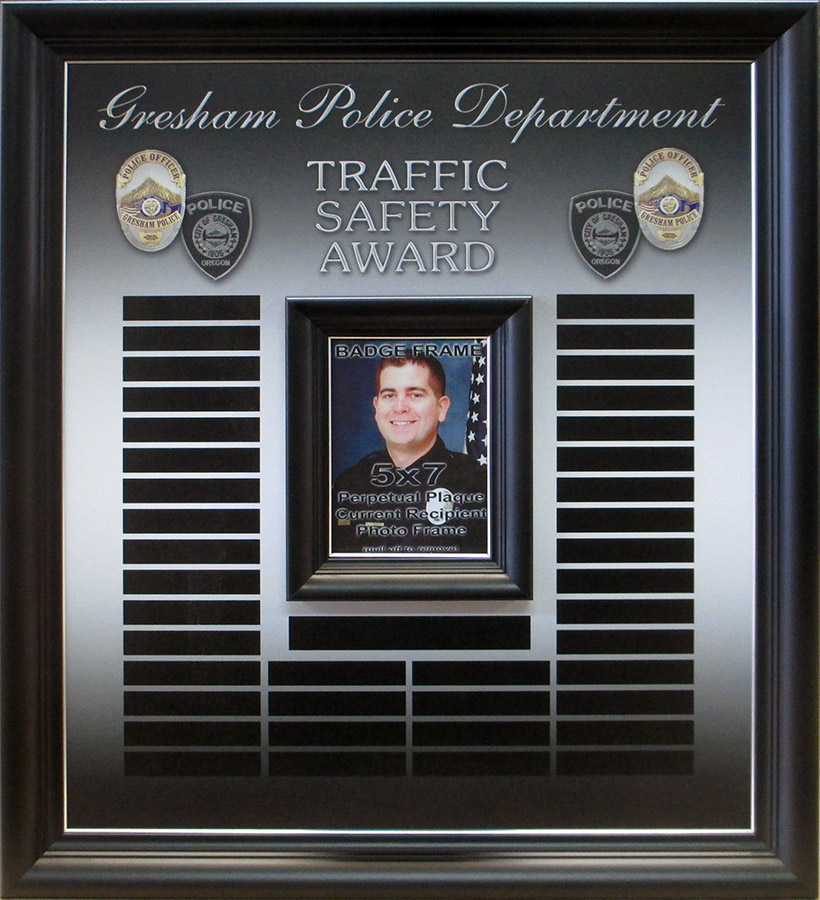
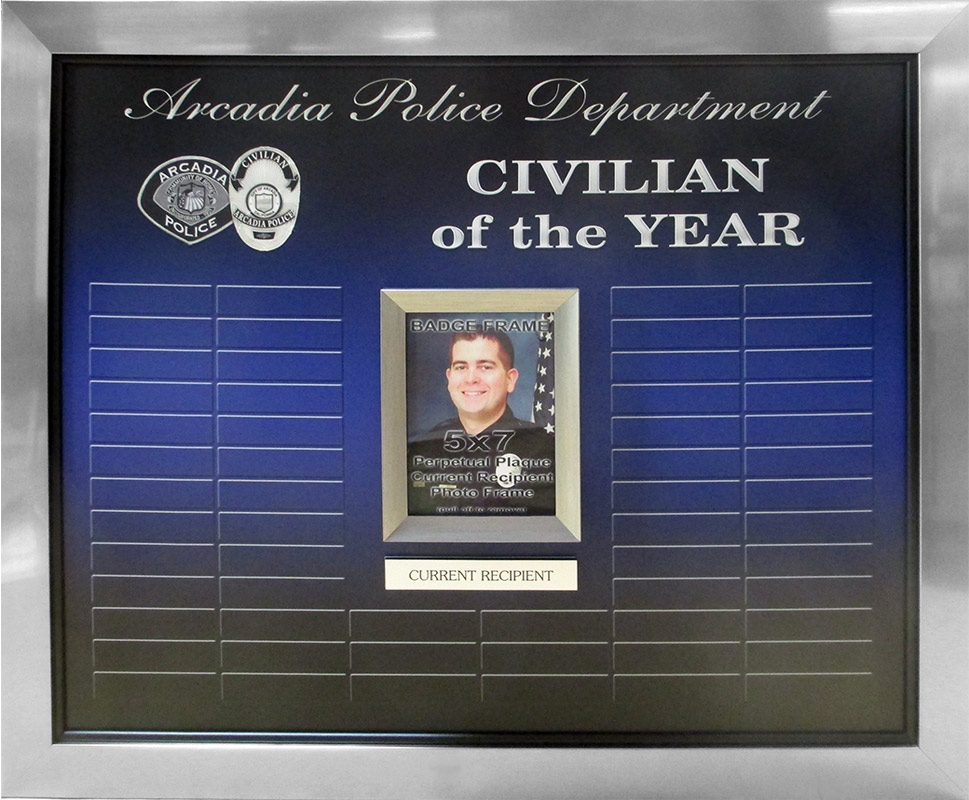
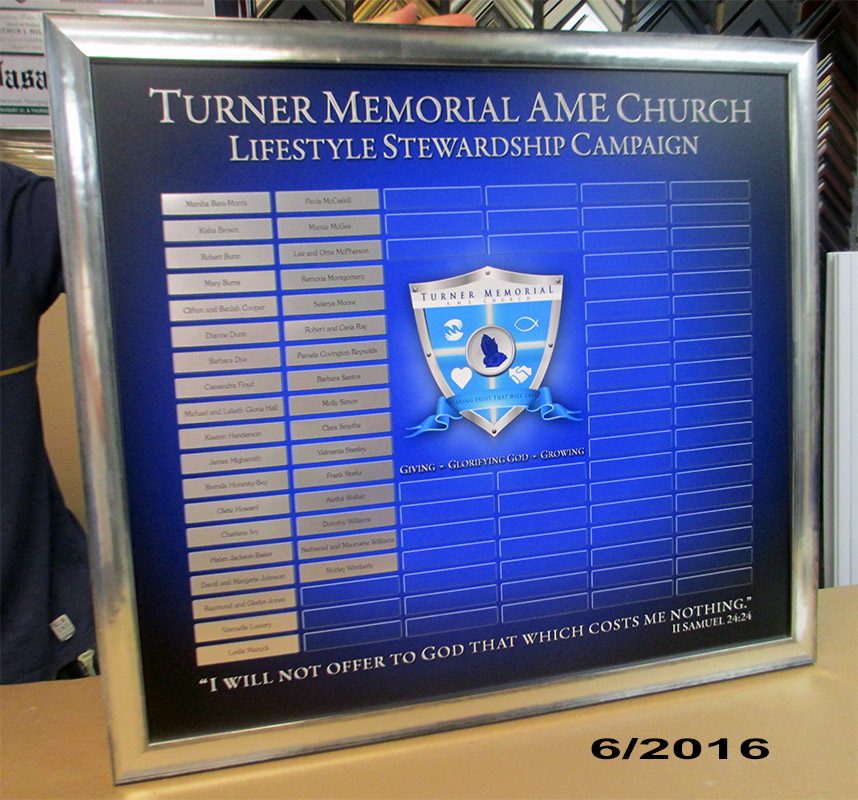
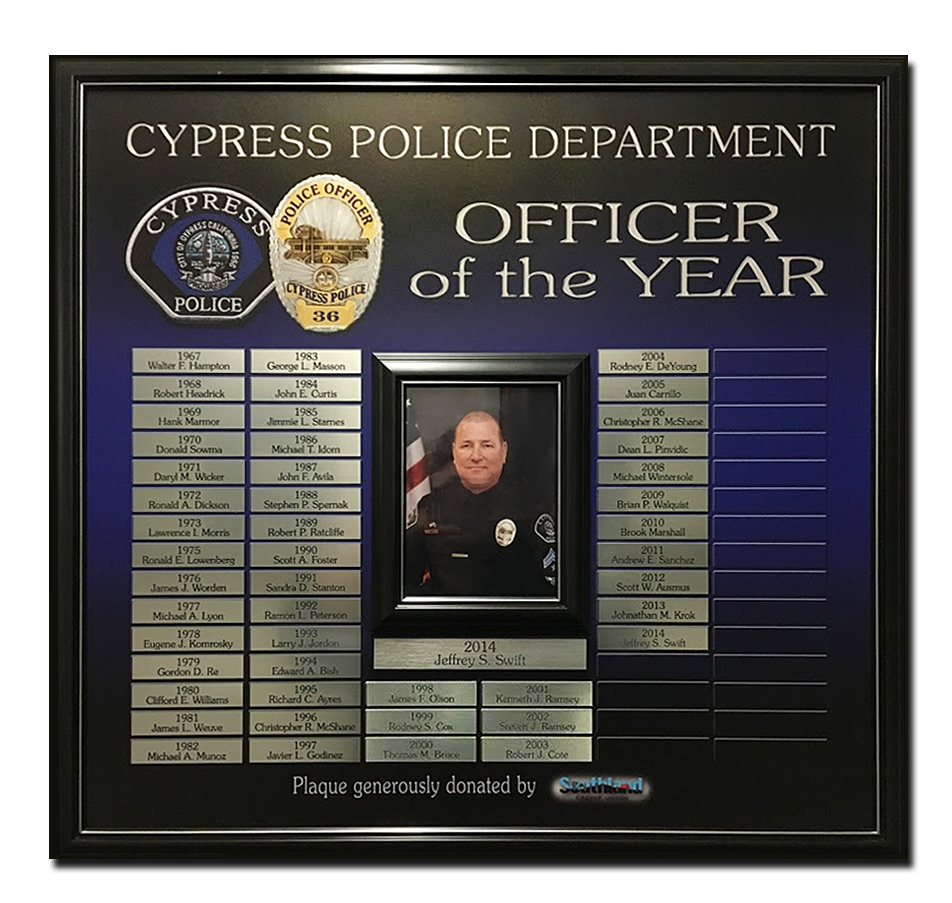
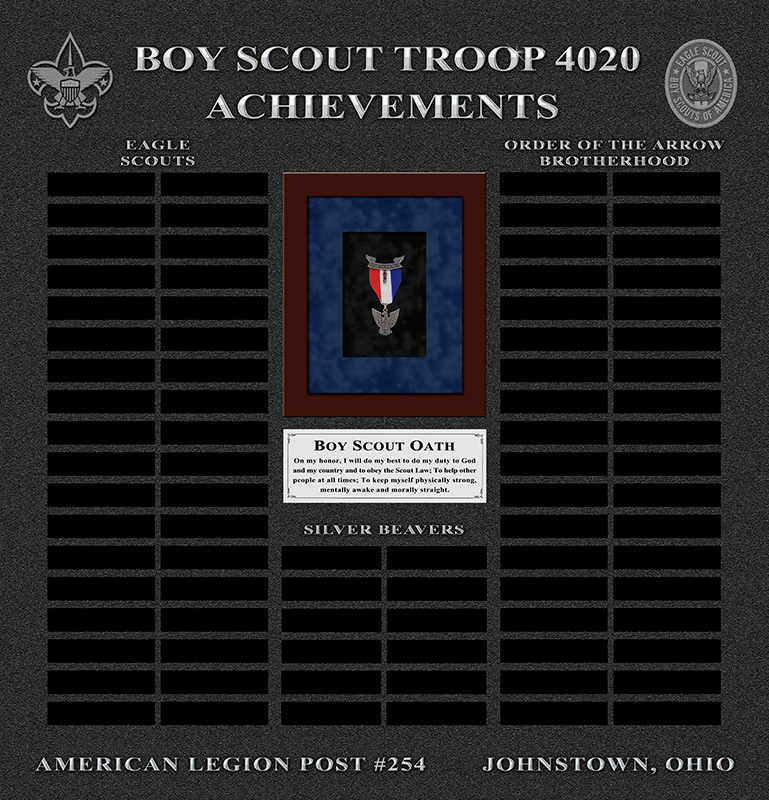
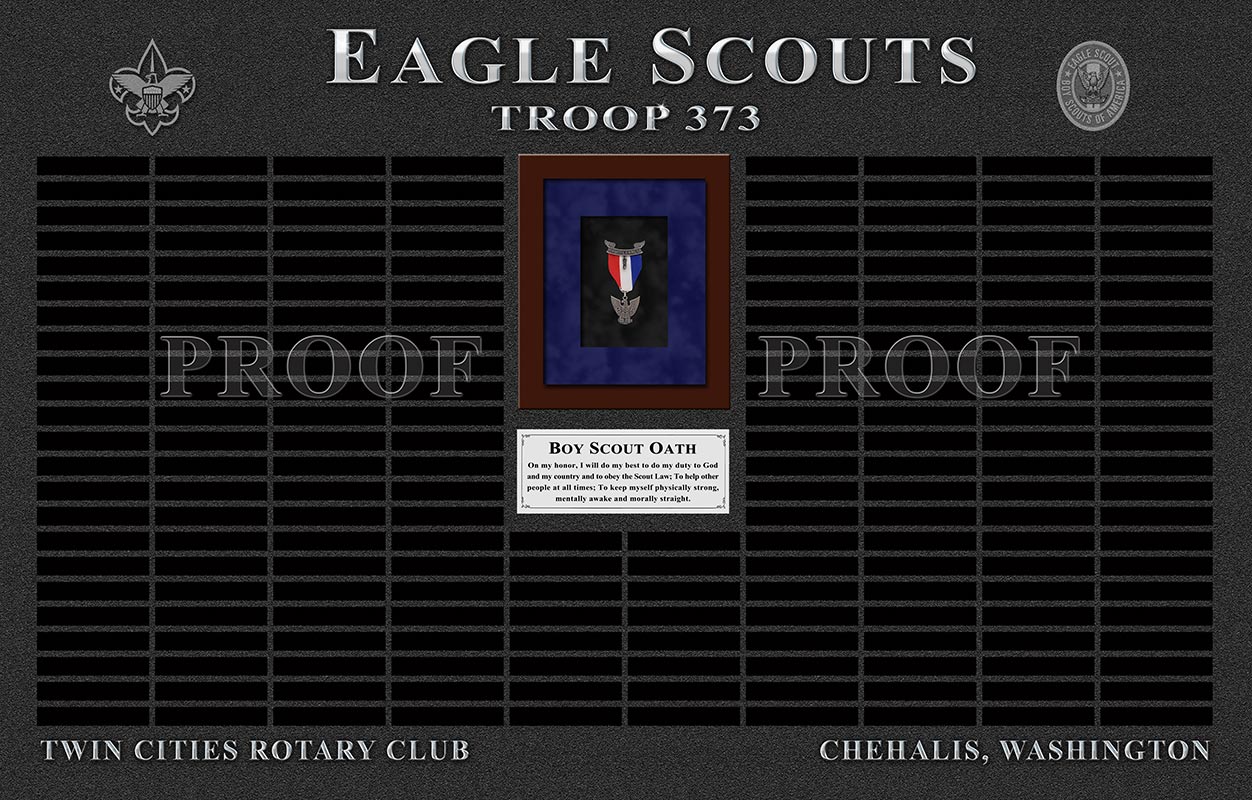
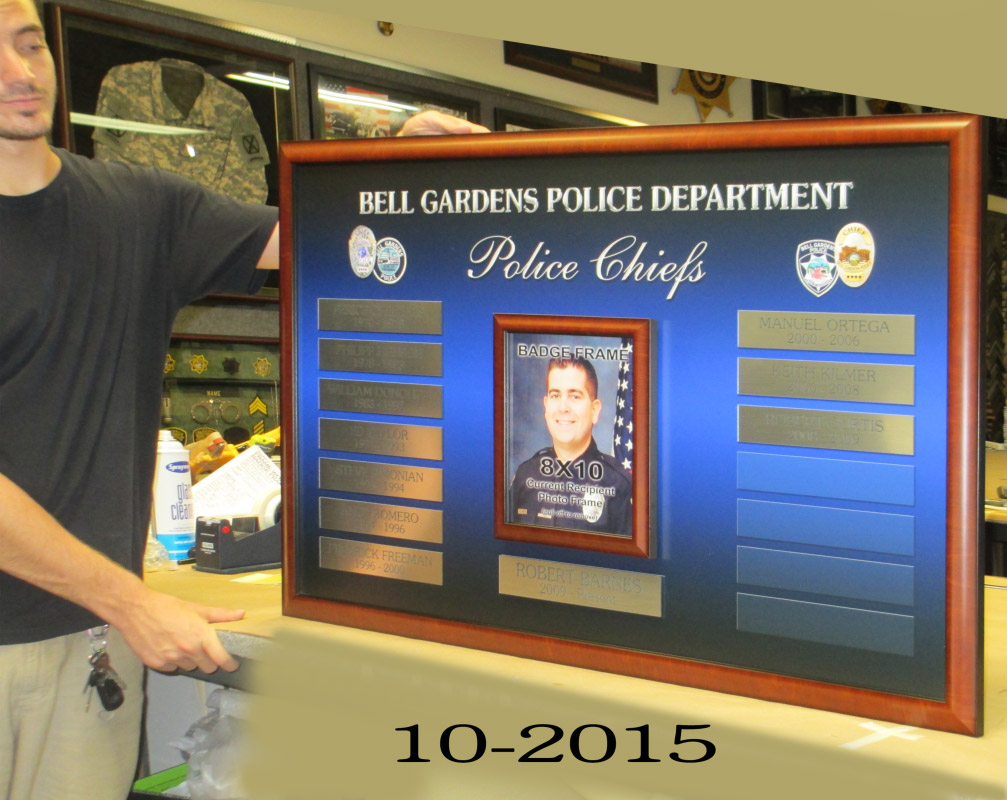
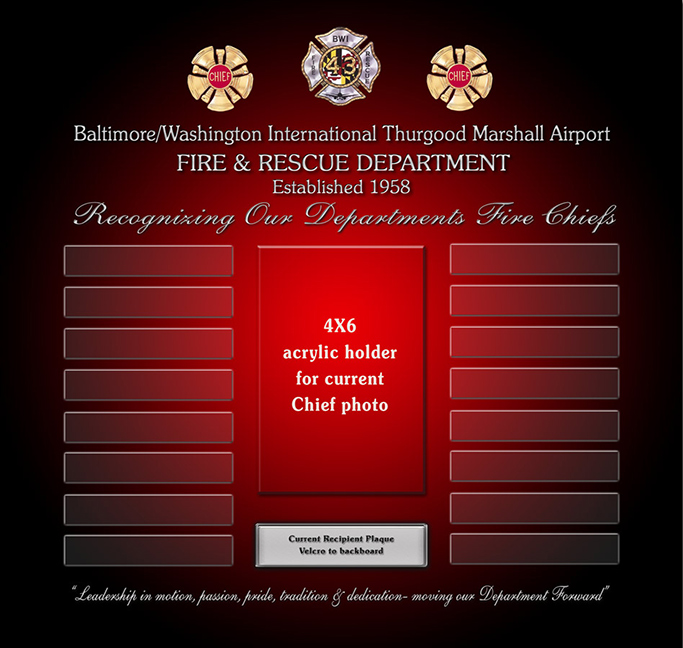
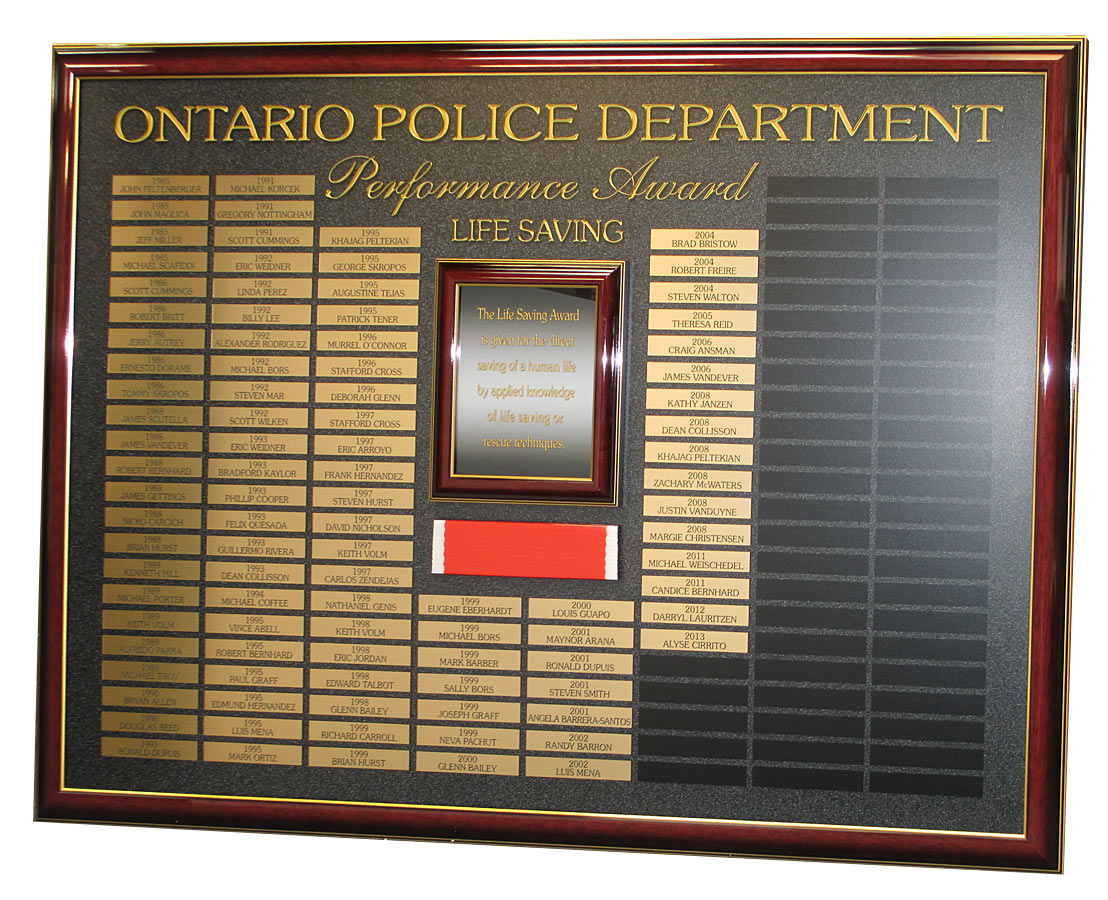
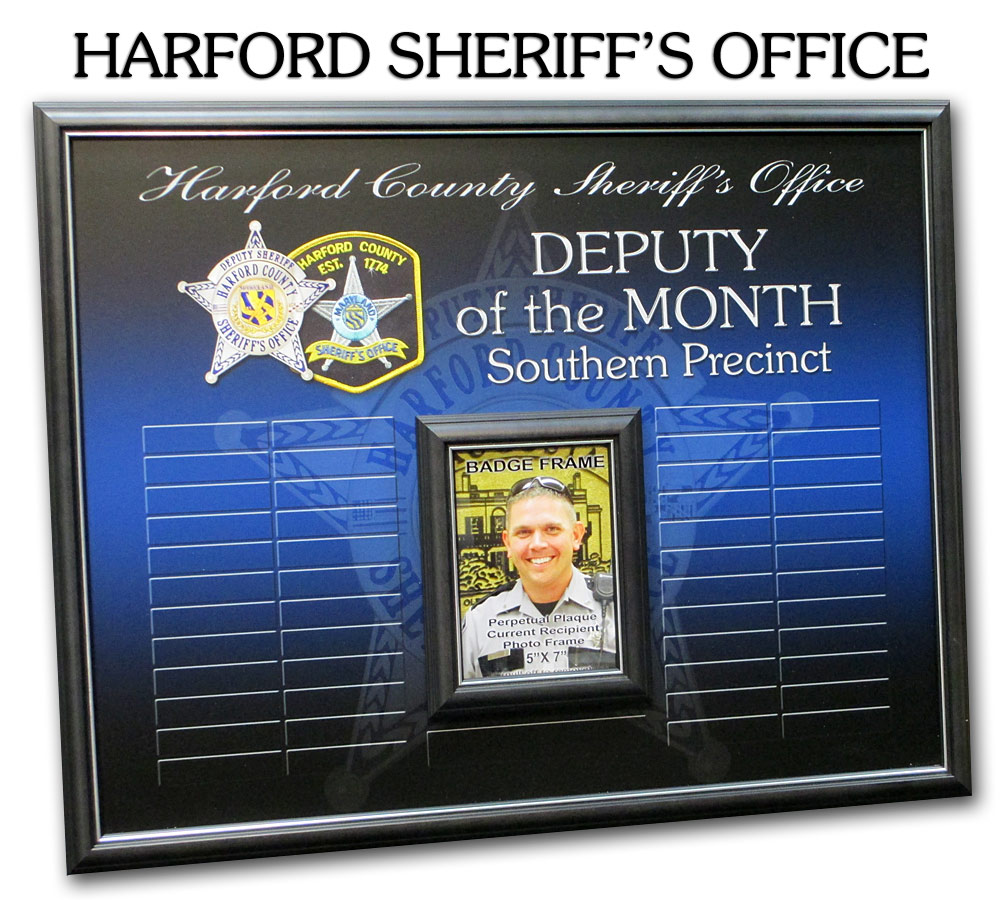
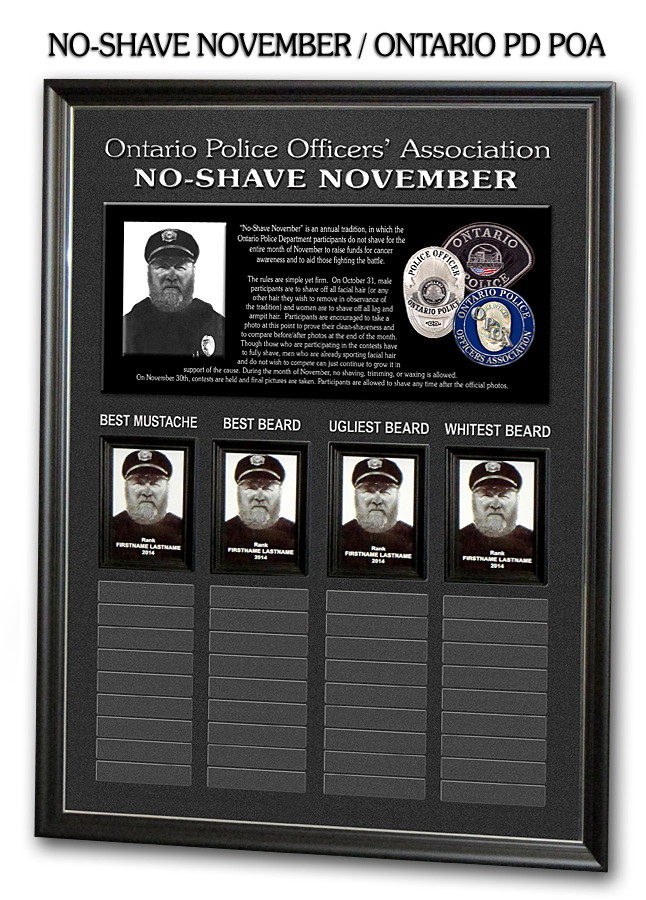
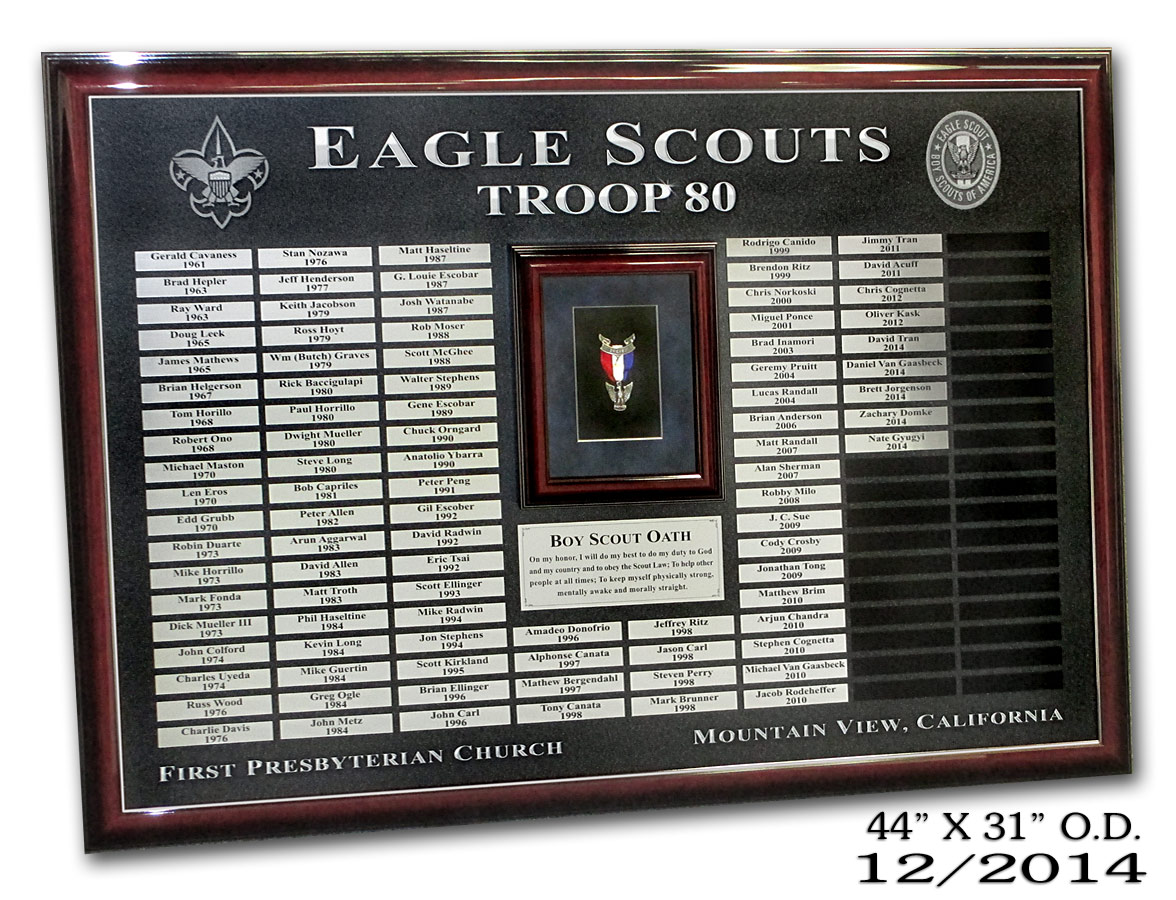
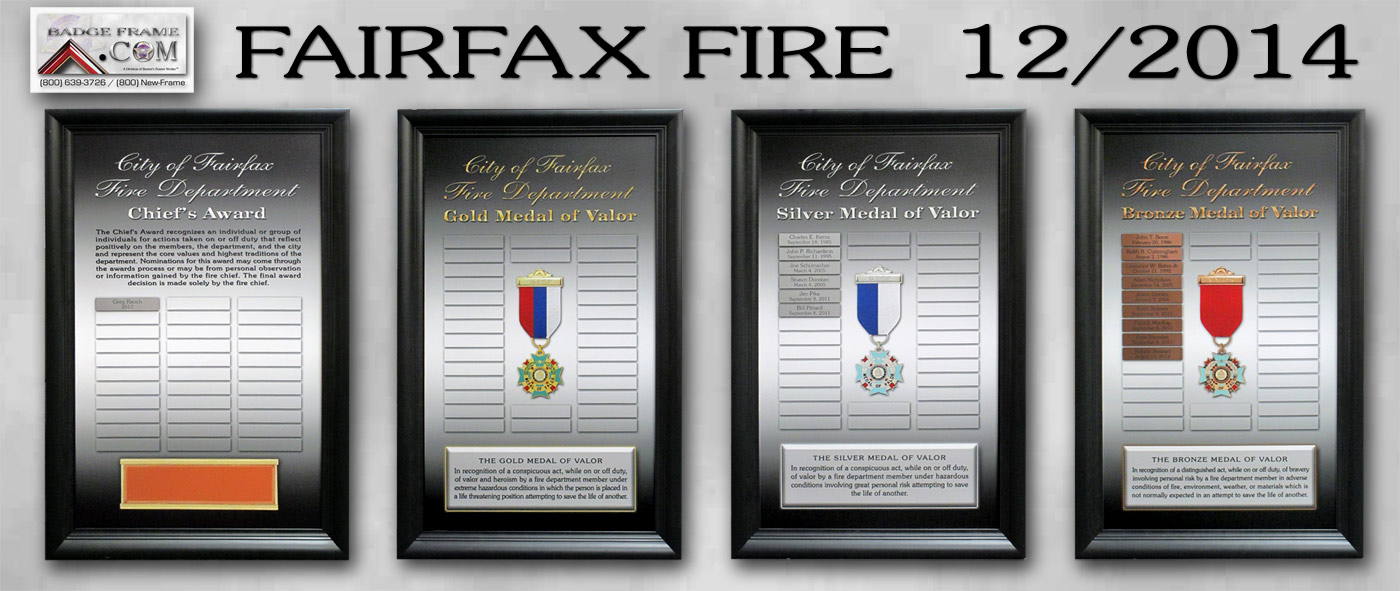
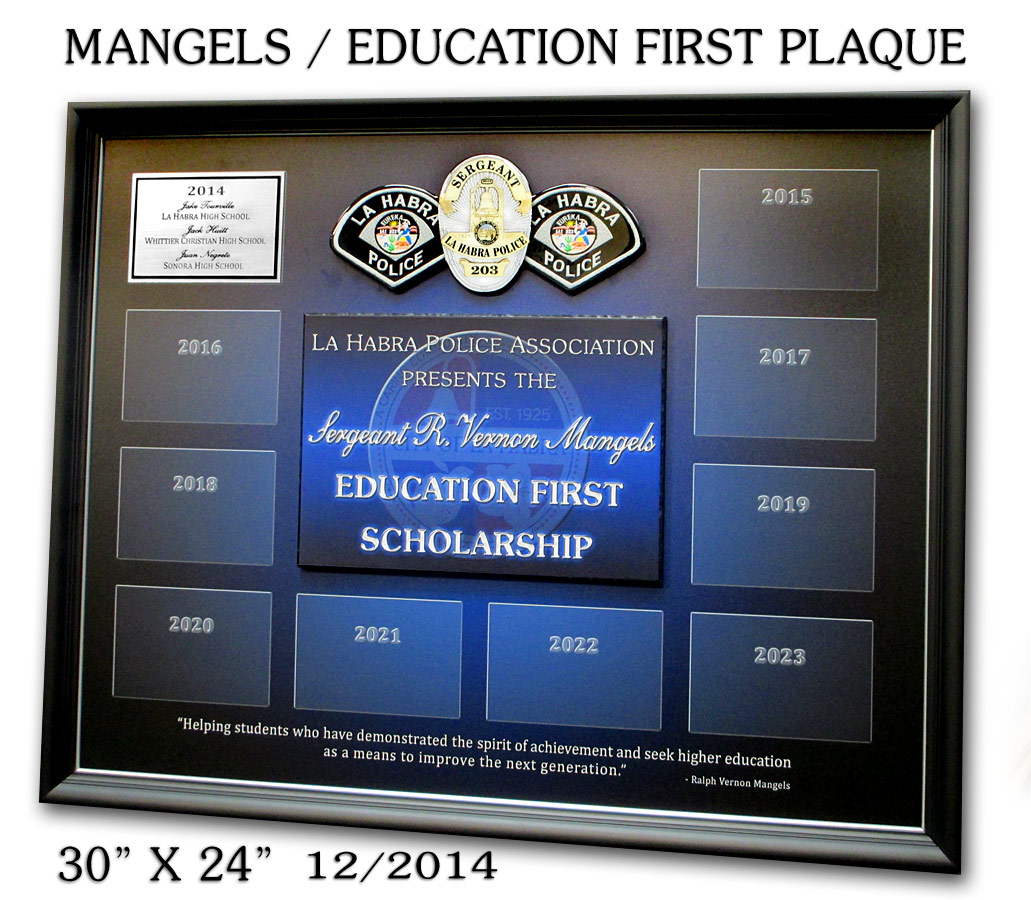
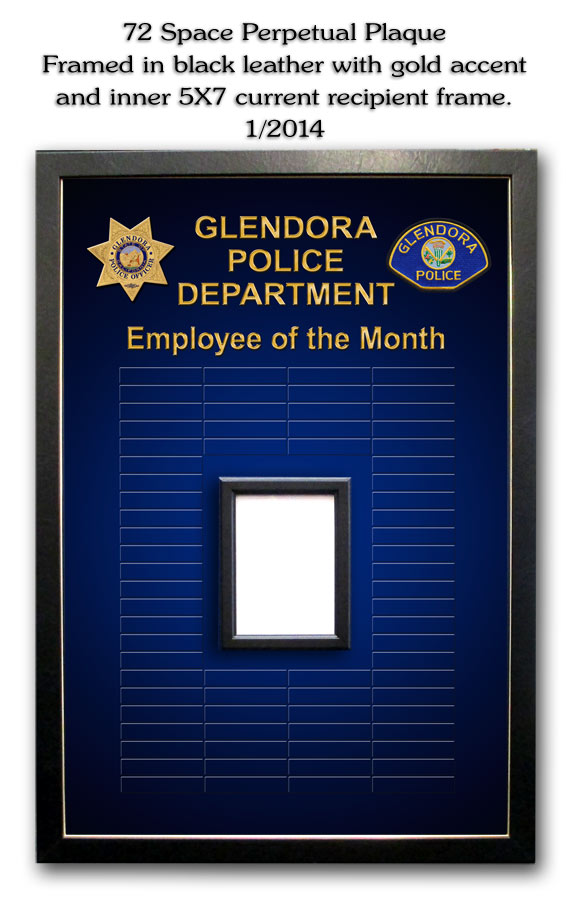
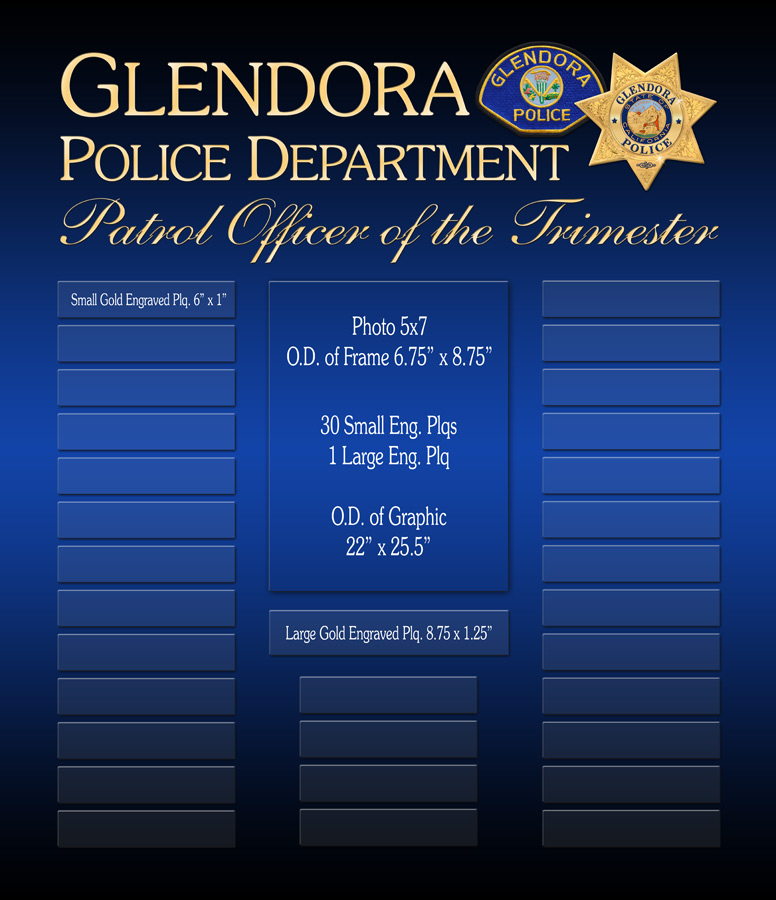
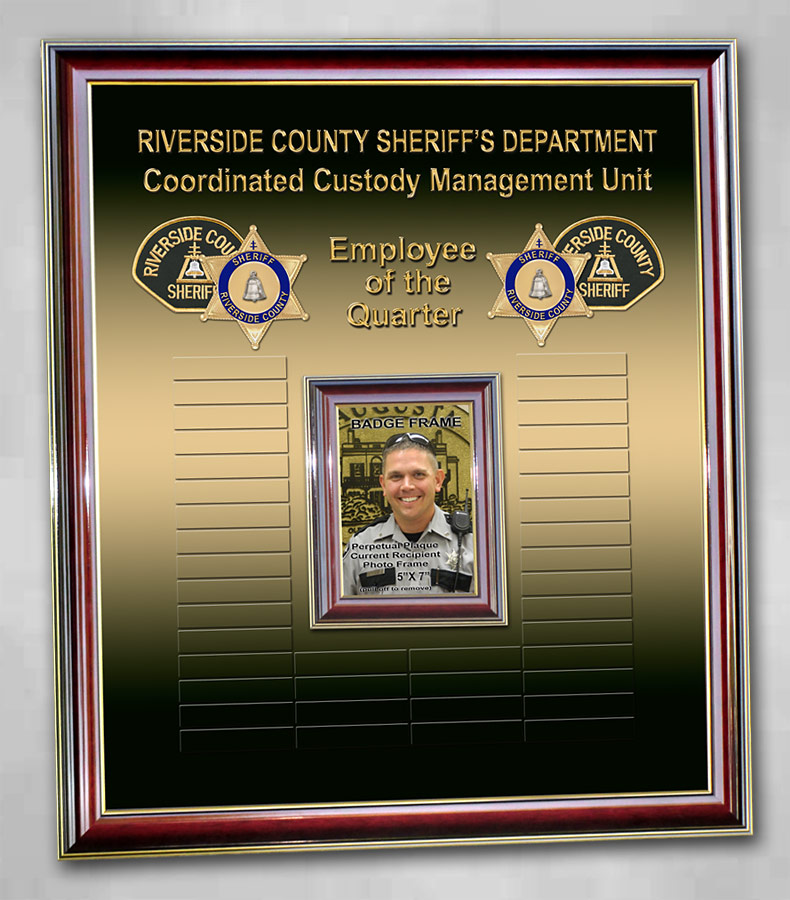
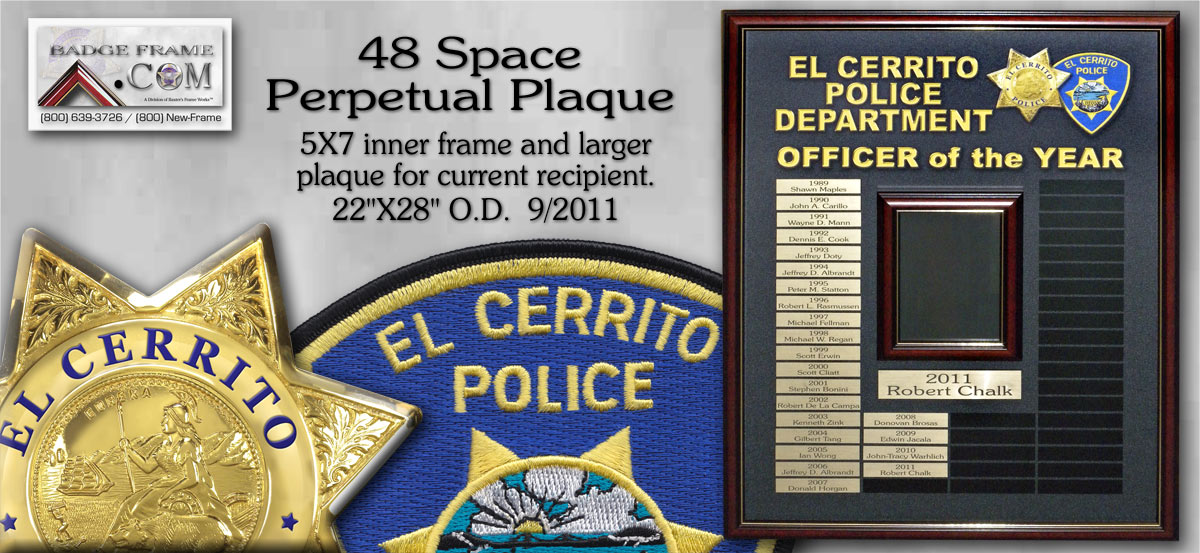
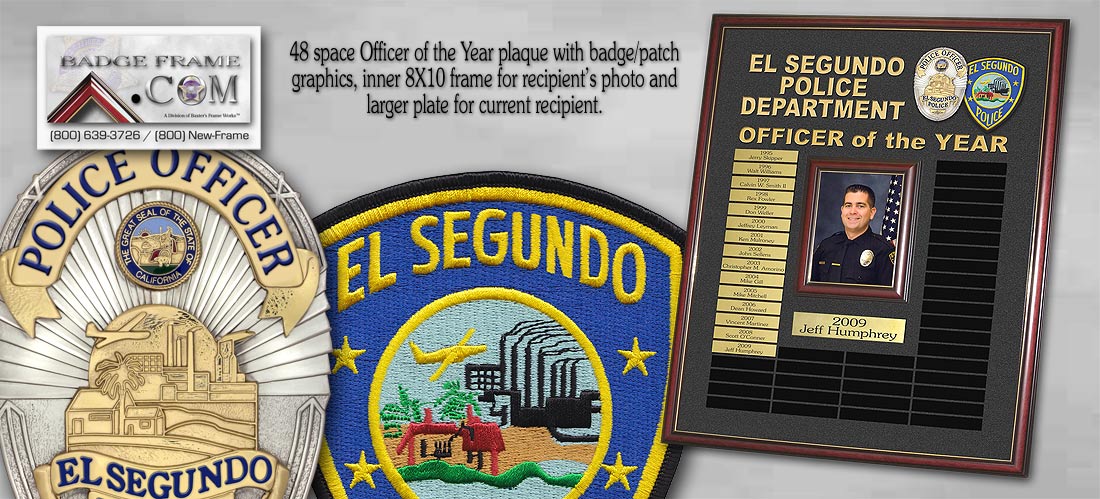
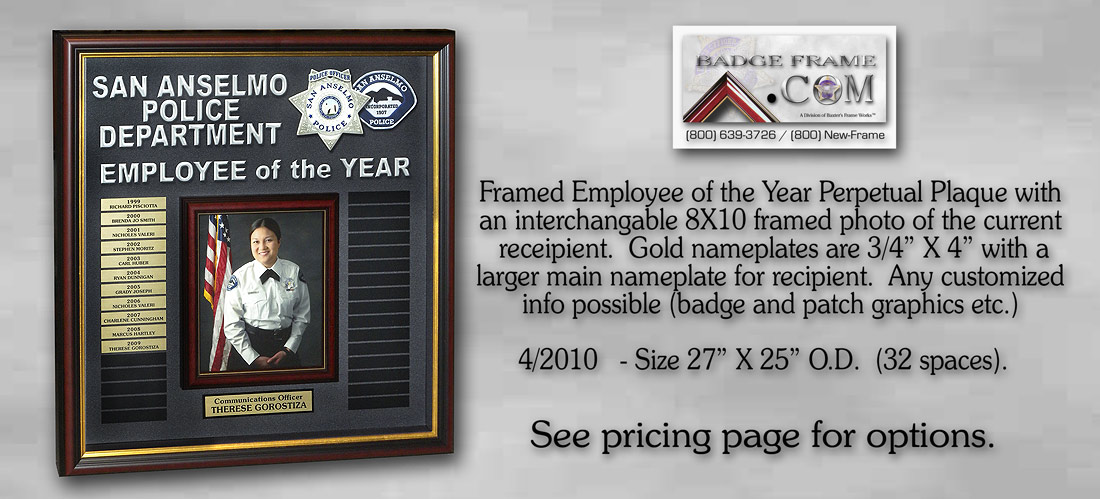
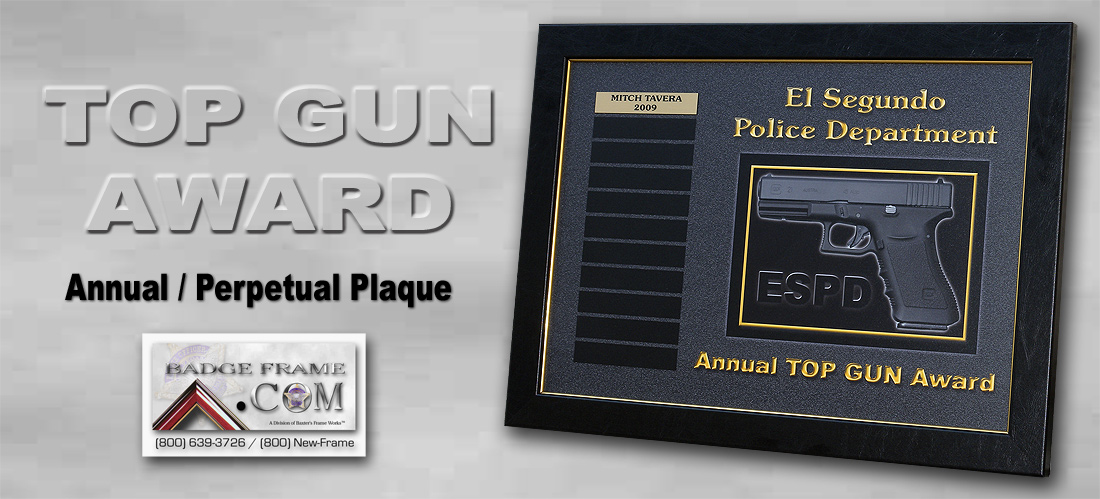
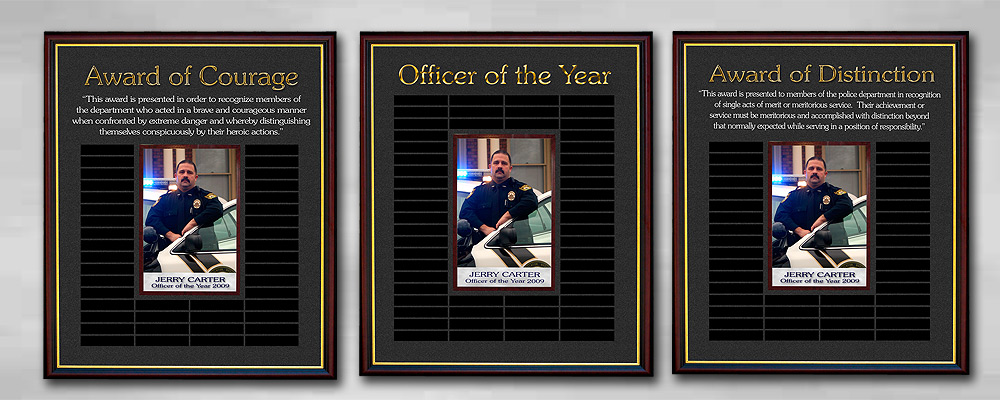
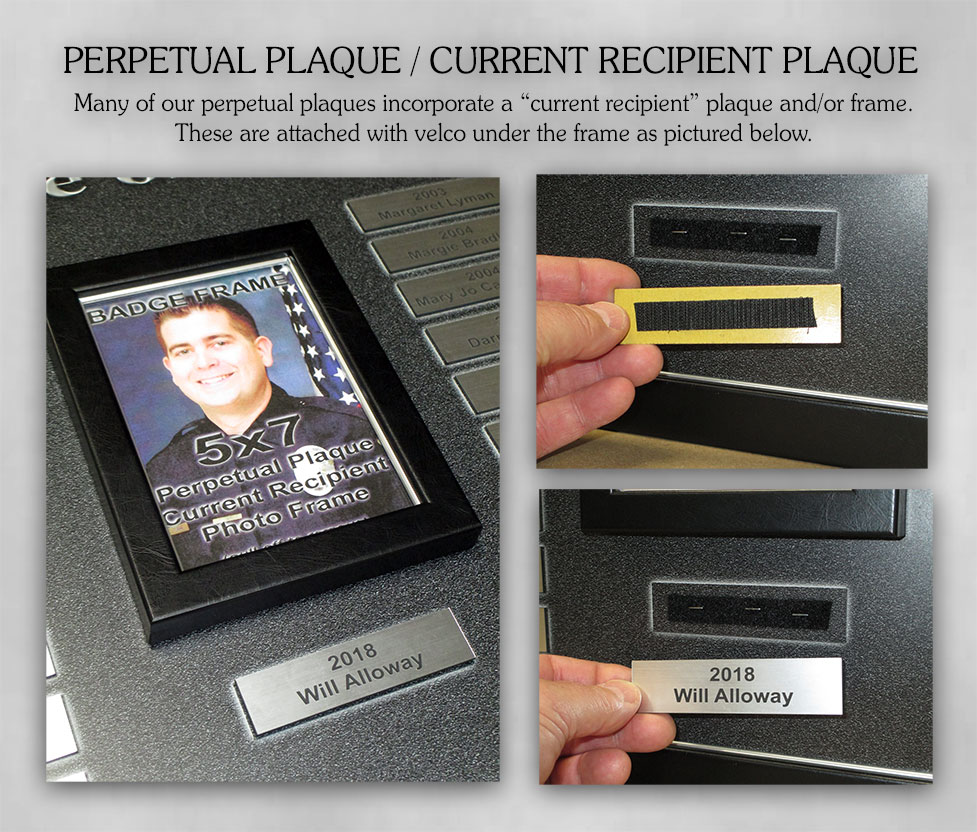
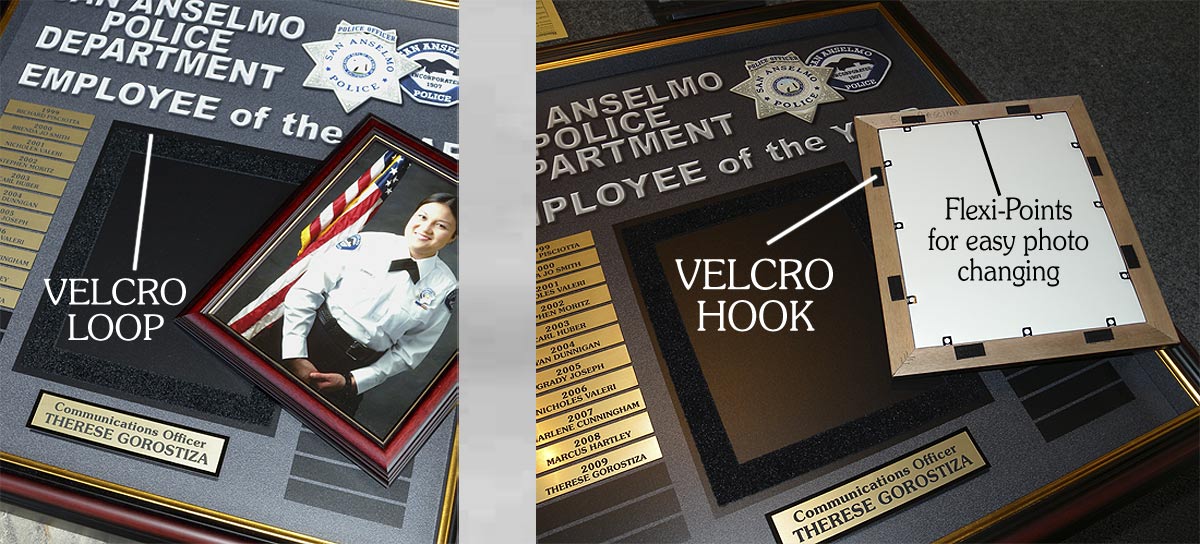
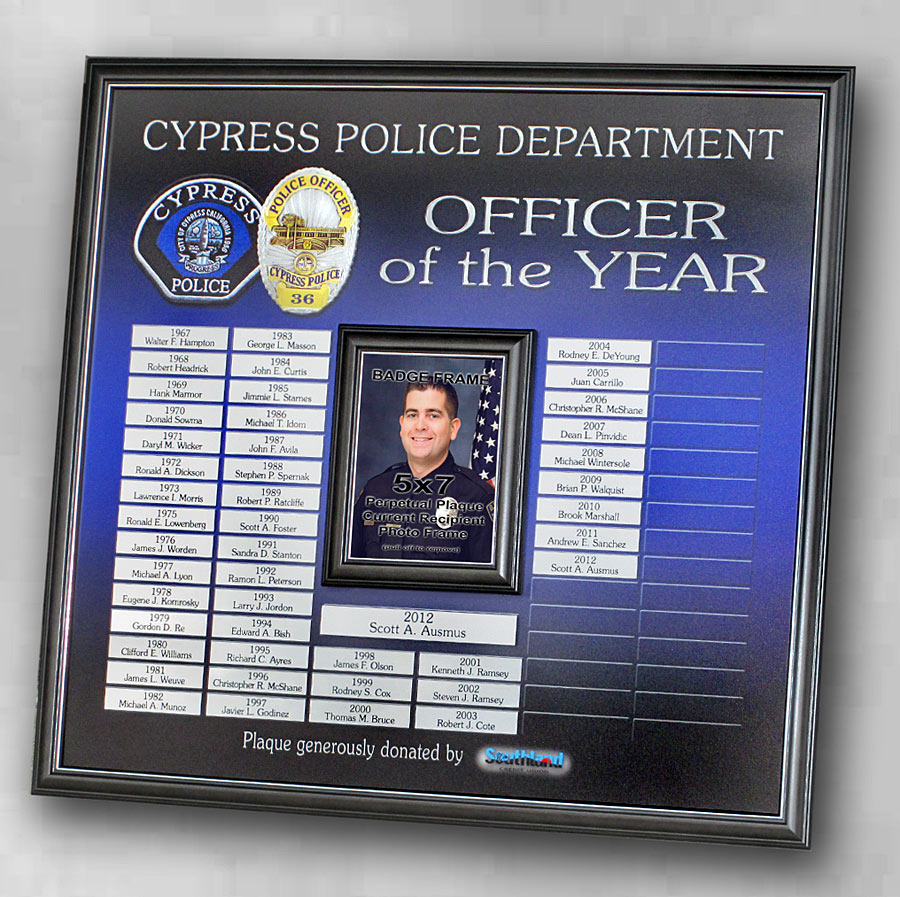
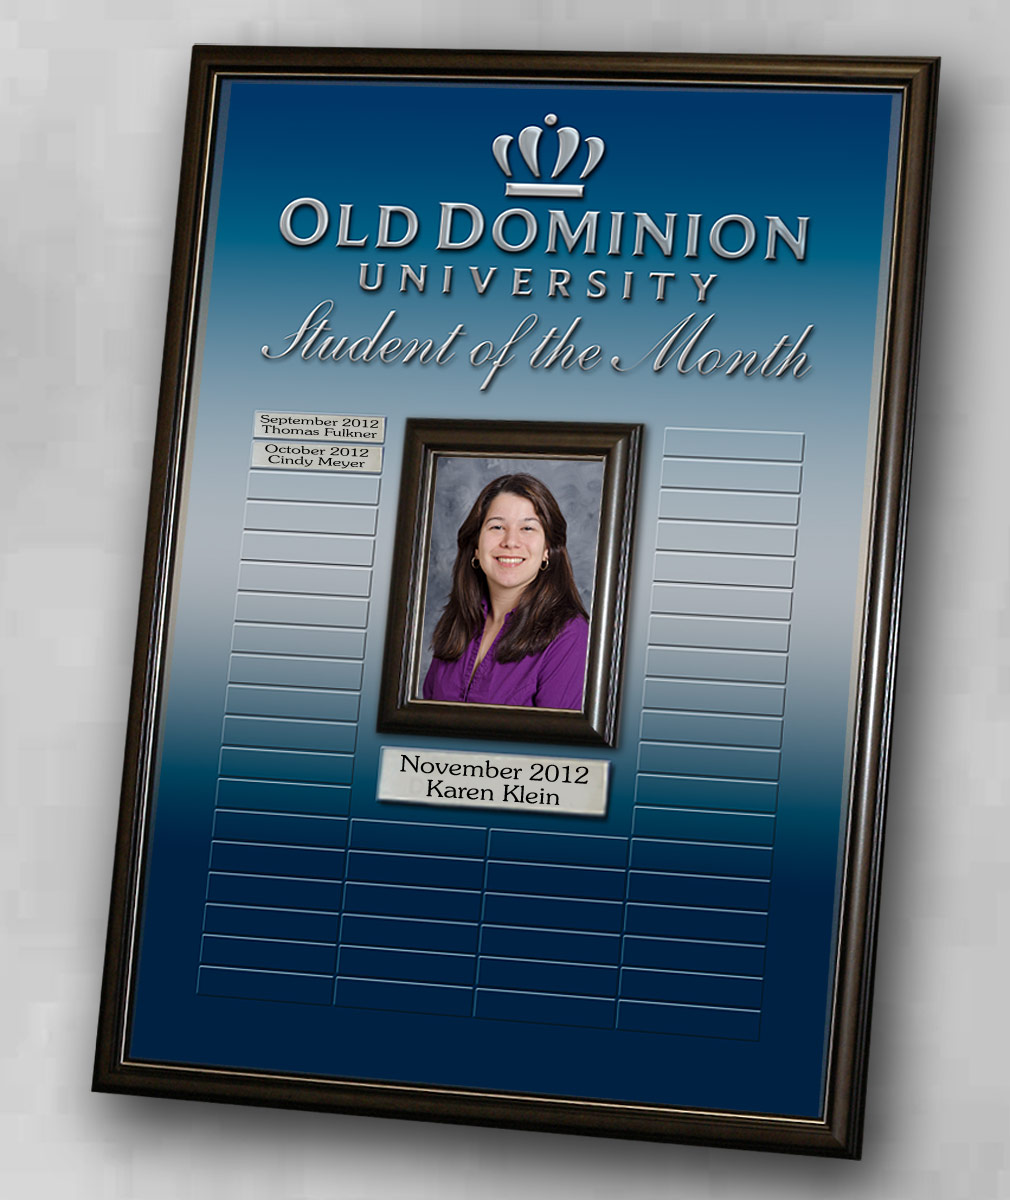
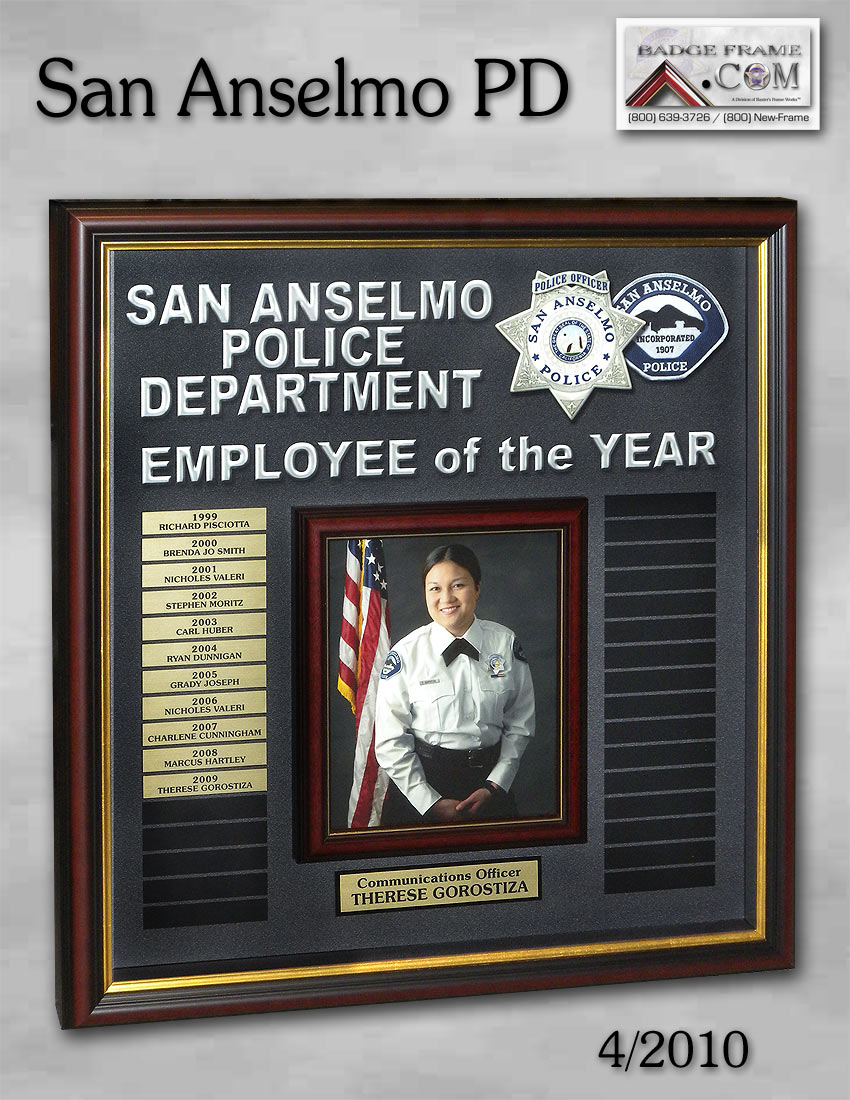
Plaques can have a interchangeable inner frame for the current
recipient’s photo or simply a graphic relating to the project.
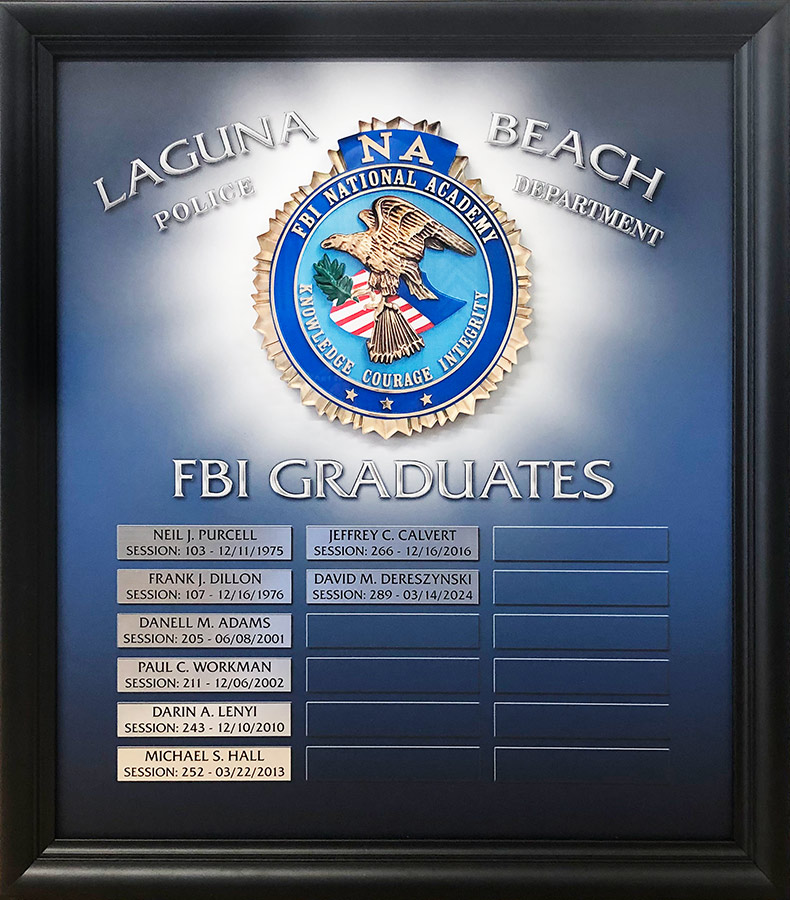
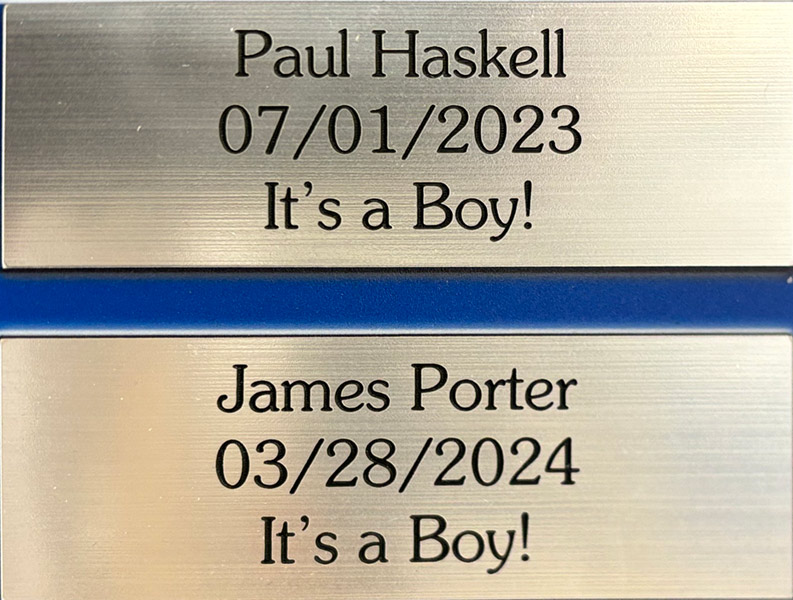
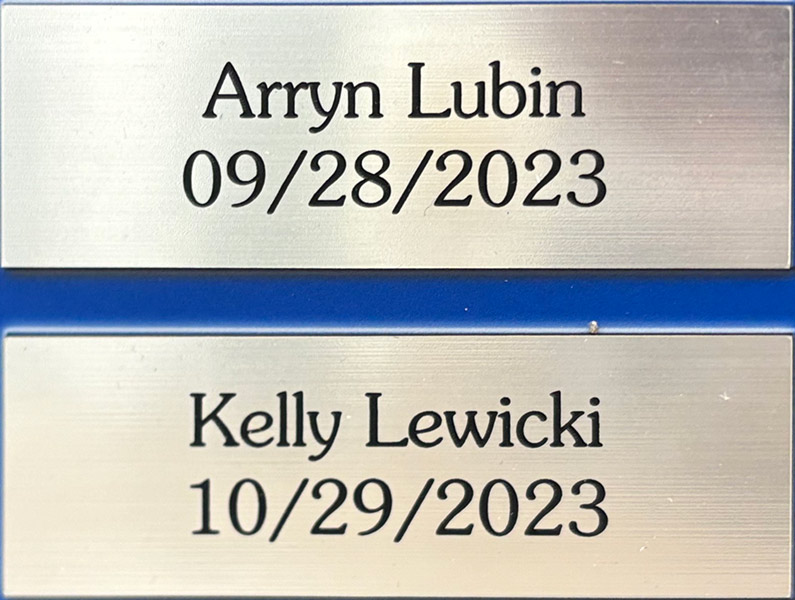
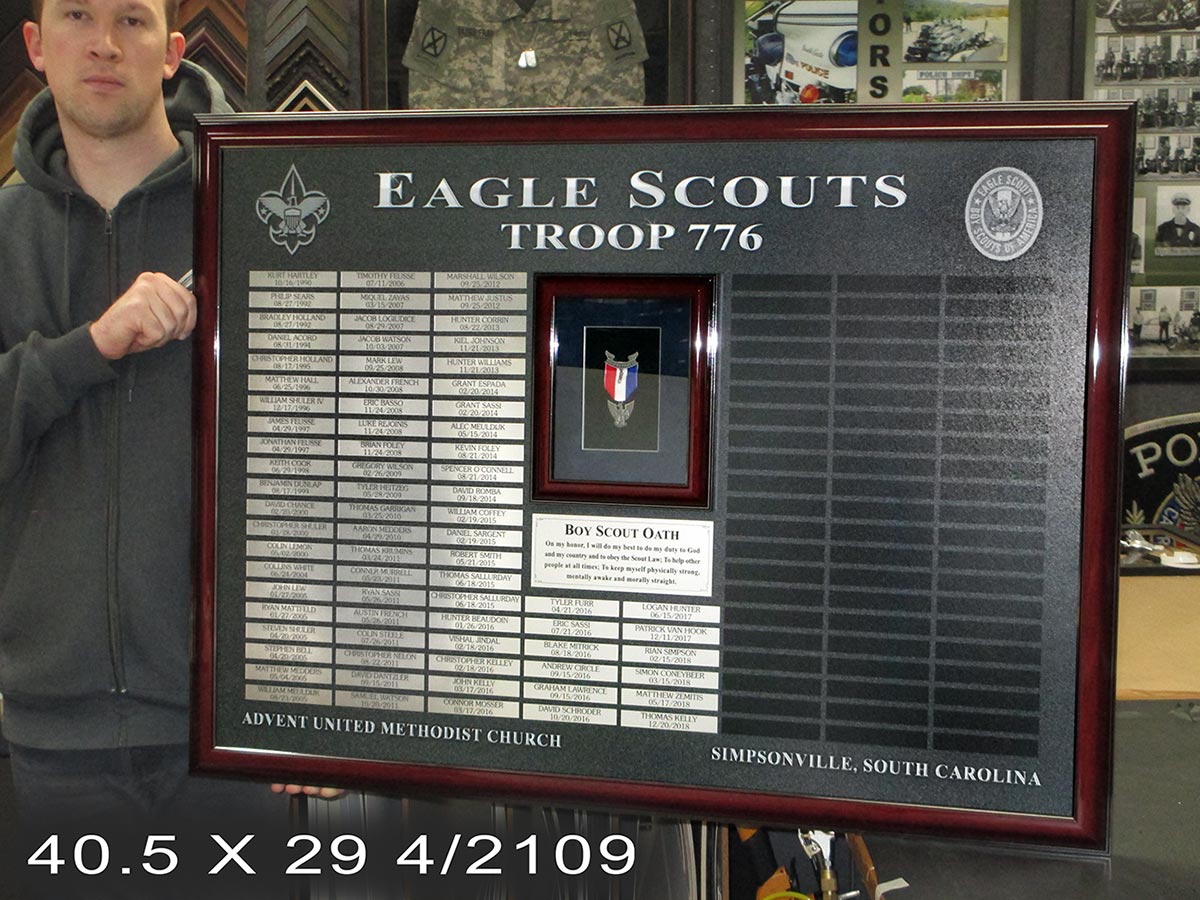
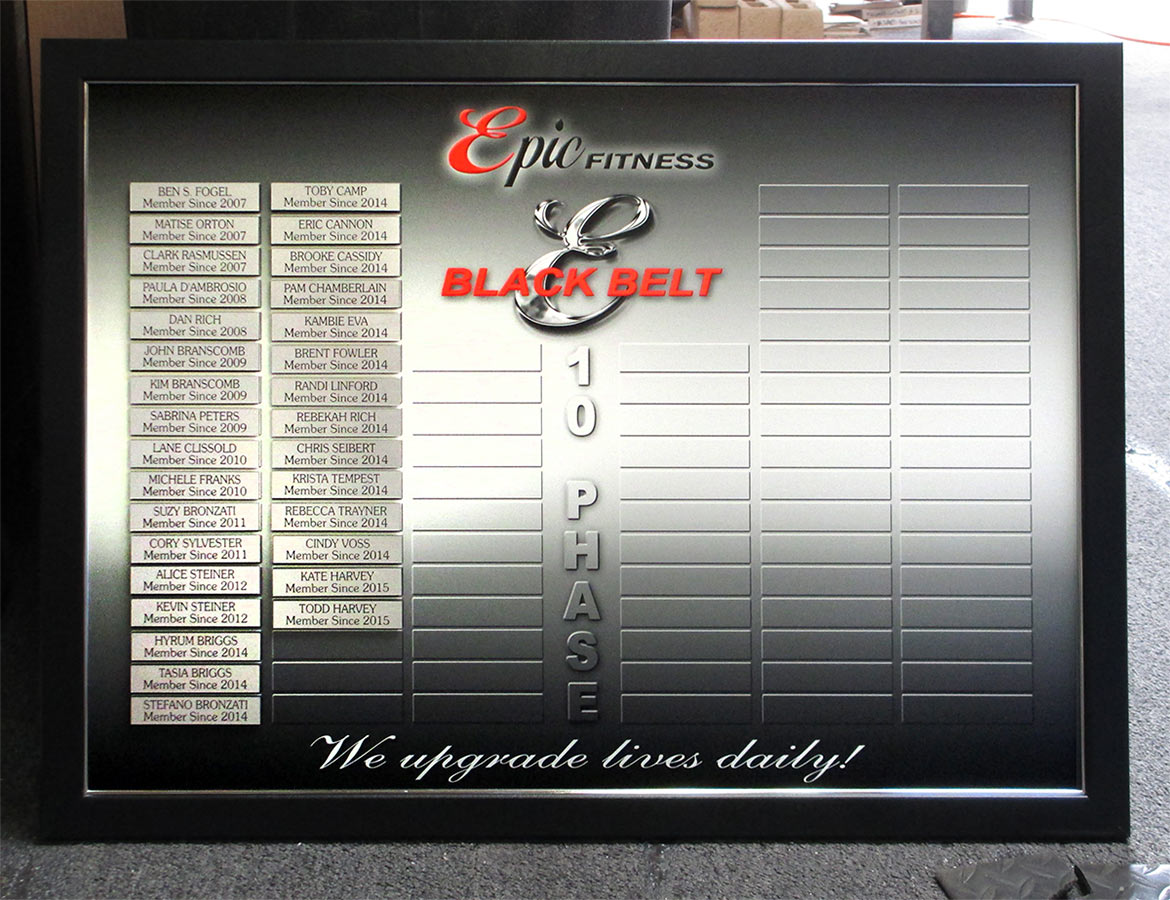
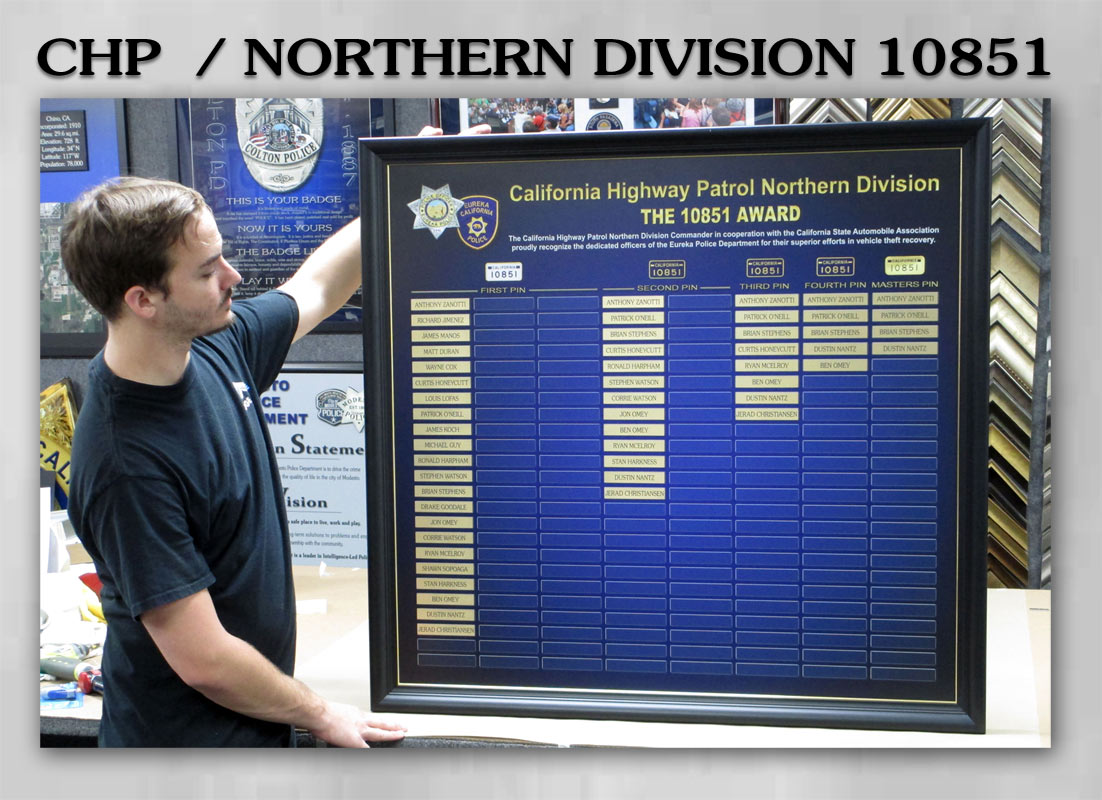
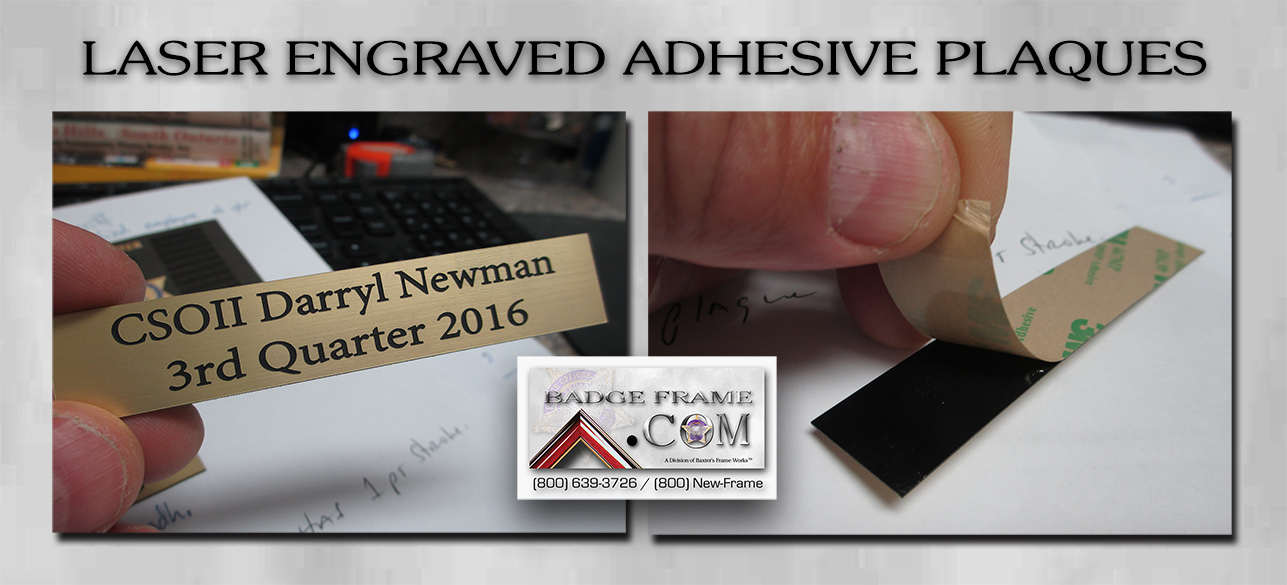
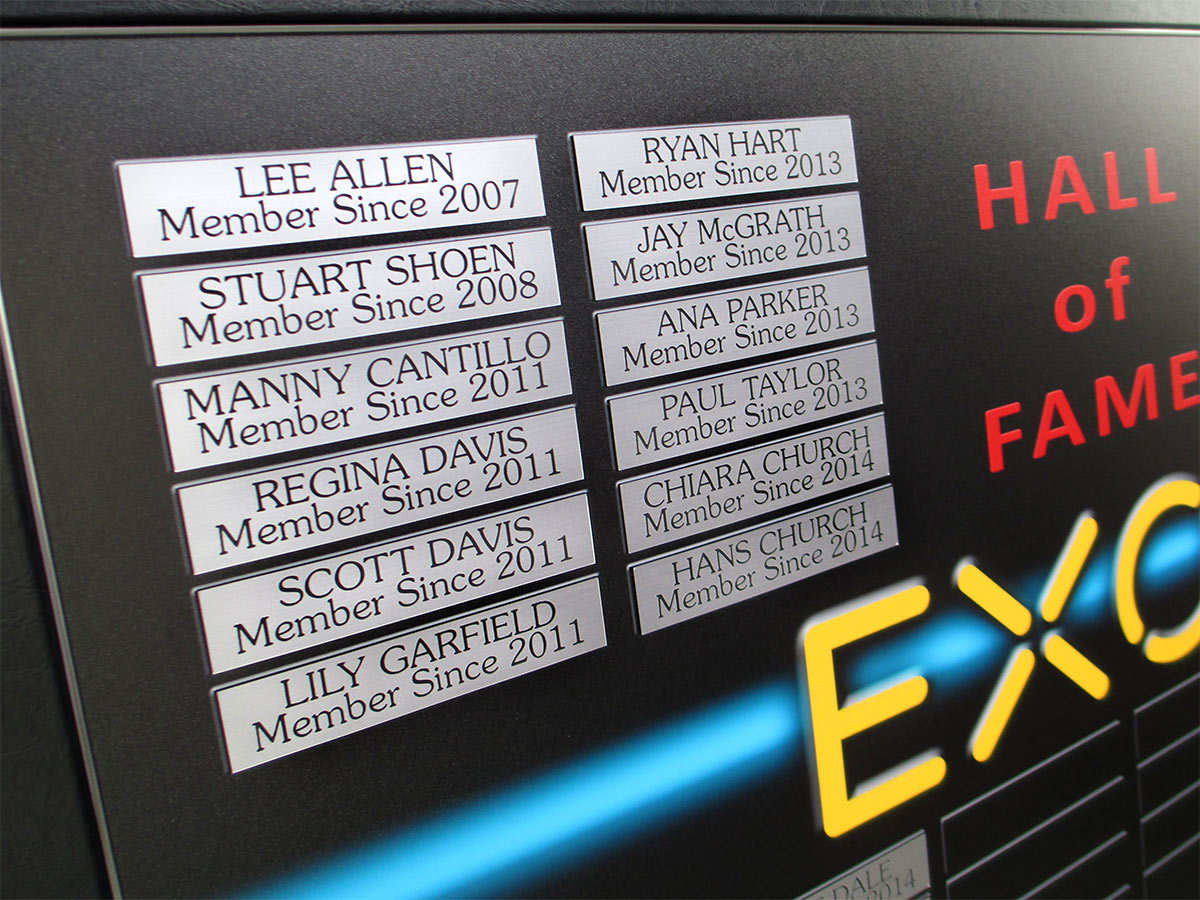
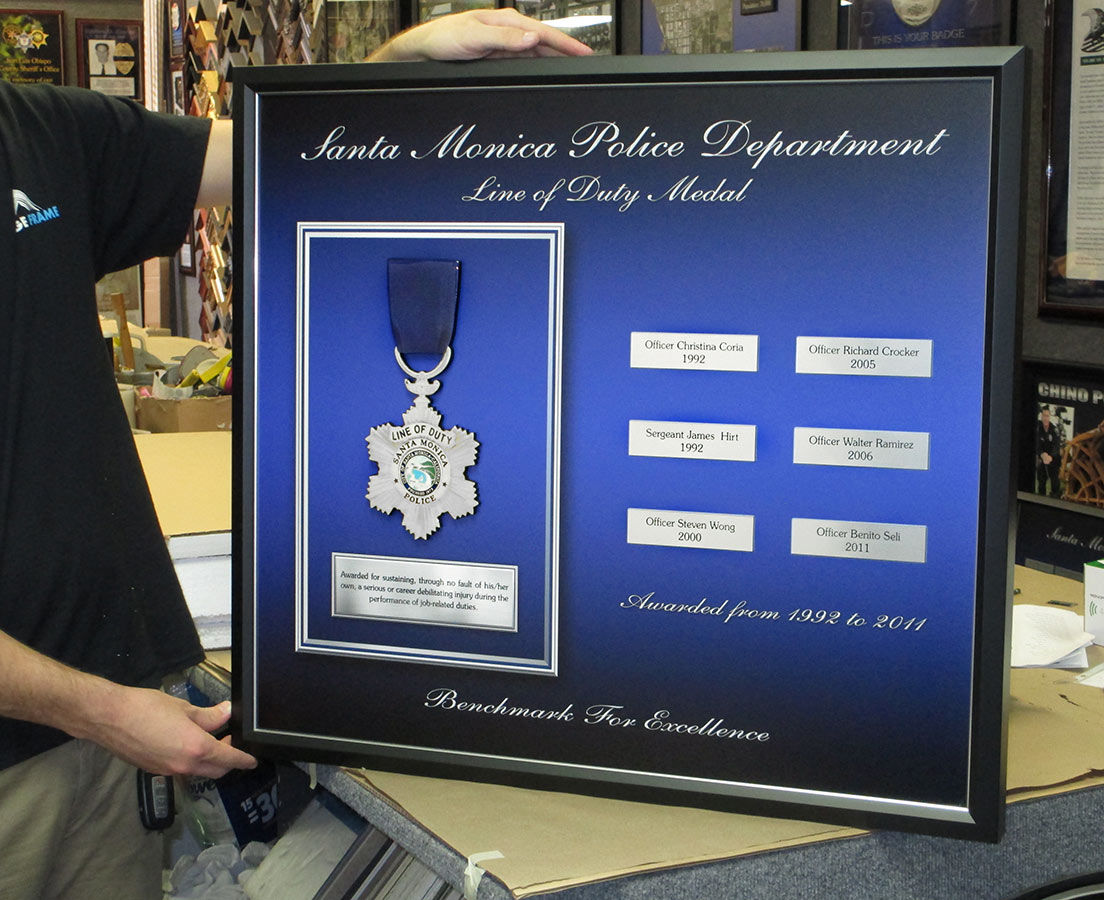
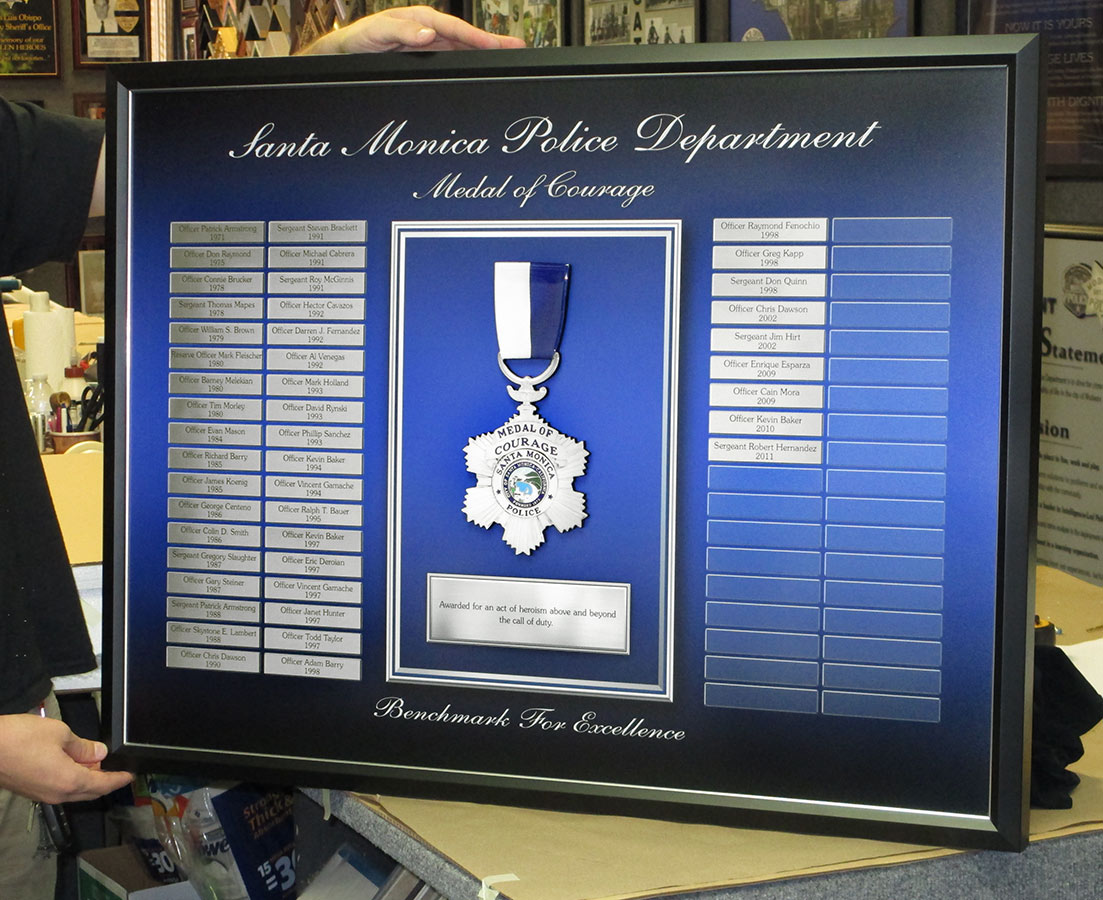
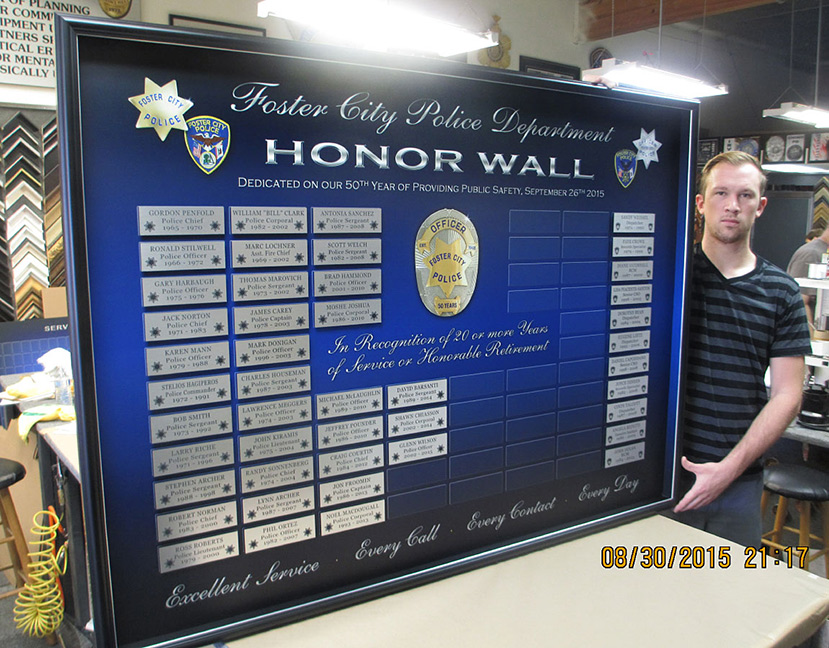
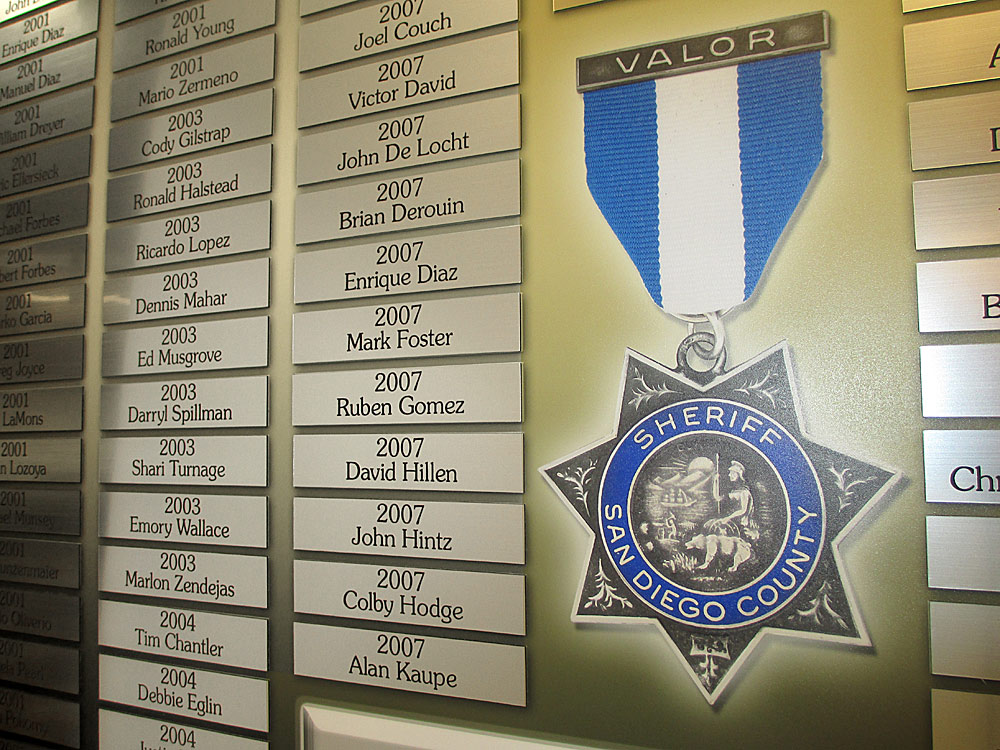
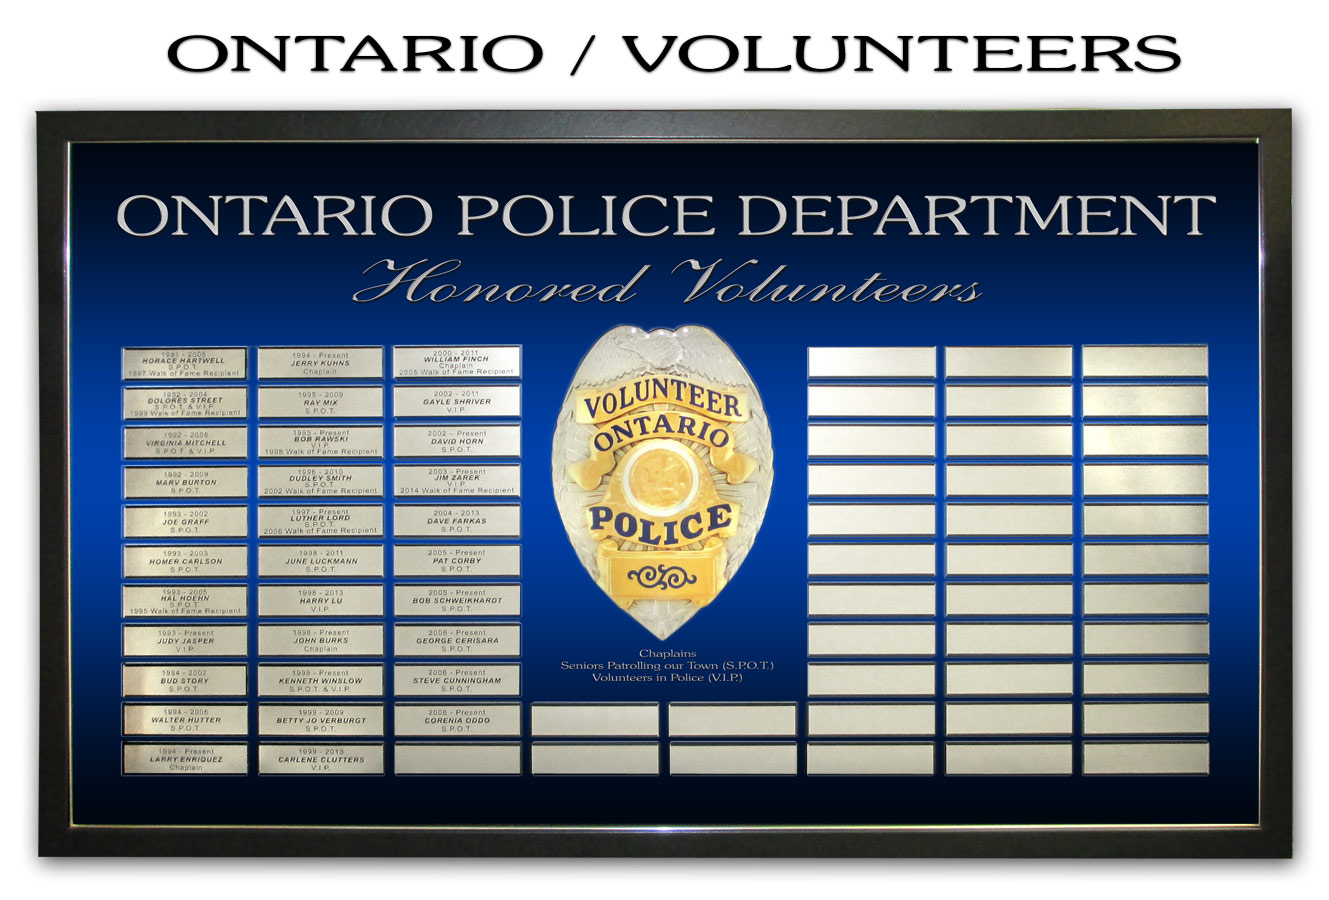
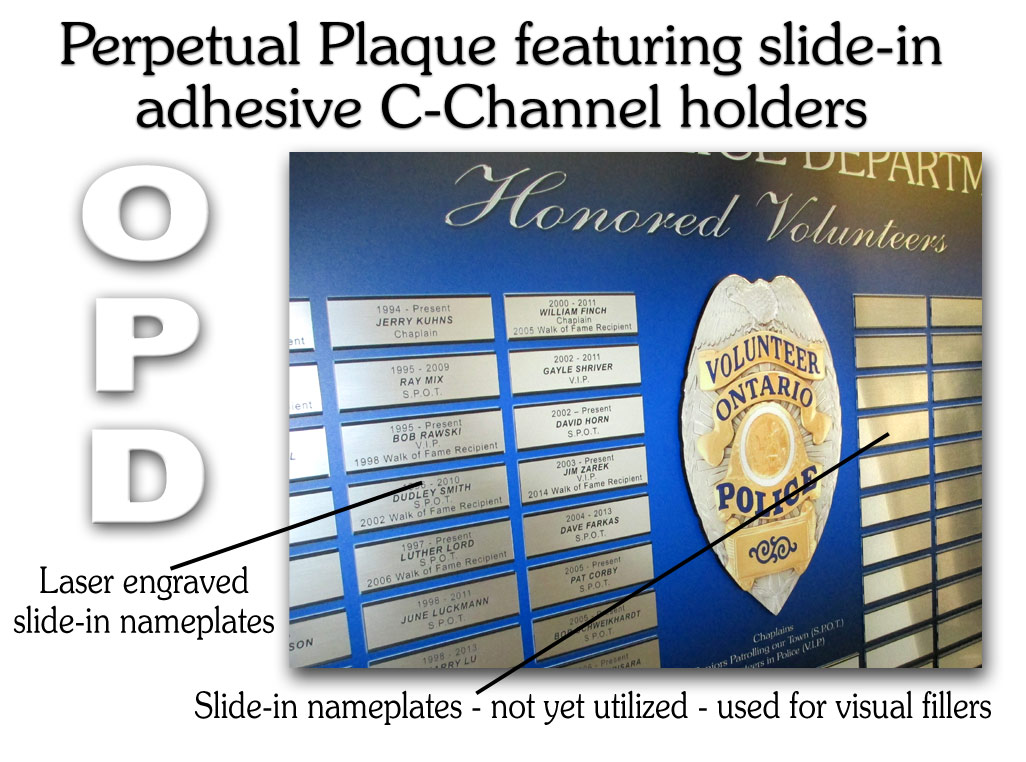
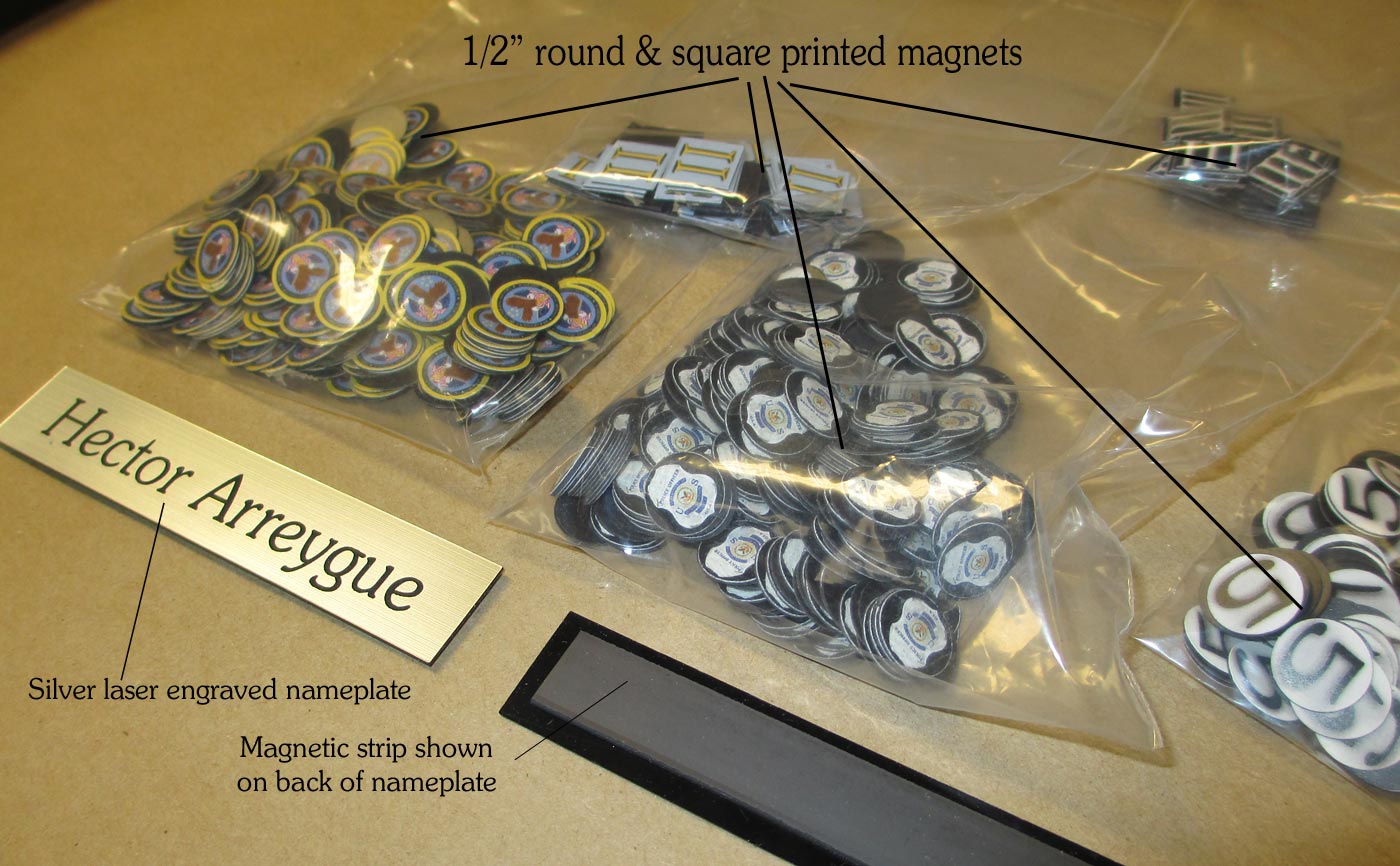
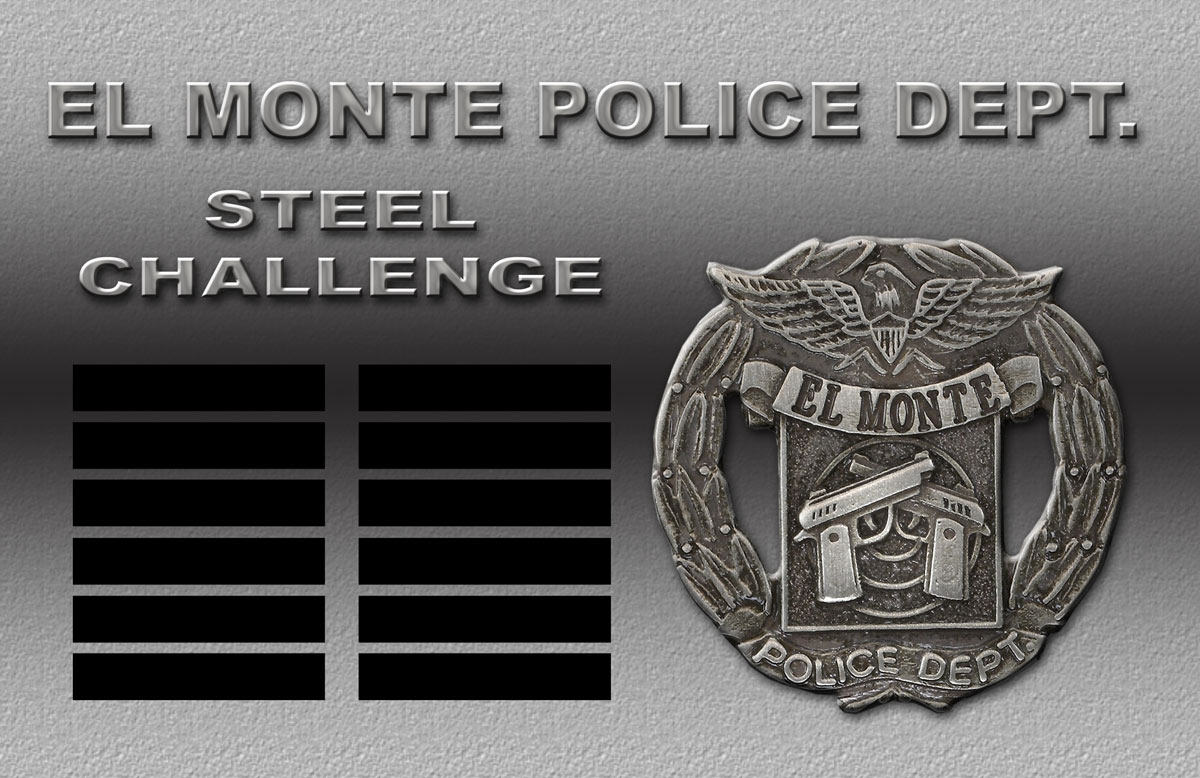
Individual nameplates (that are actually legible) can be any
size and are laser engraved. Ghost or black placeholders
on the backboard
make the placement of new self-adhesive plates easy to
install.
You
can also have a removable - interchangeable CENTER FRAME or just a
graphic related to the plaque. Pricing for these options is listed
on our PRICING PAGE at section "V".
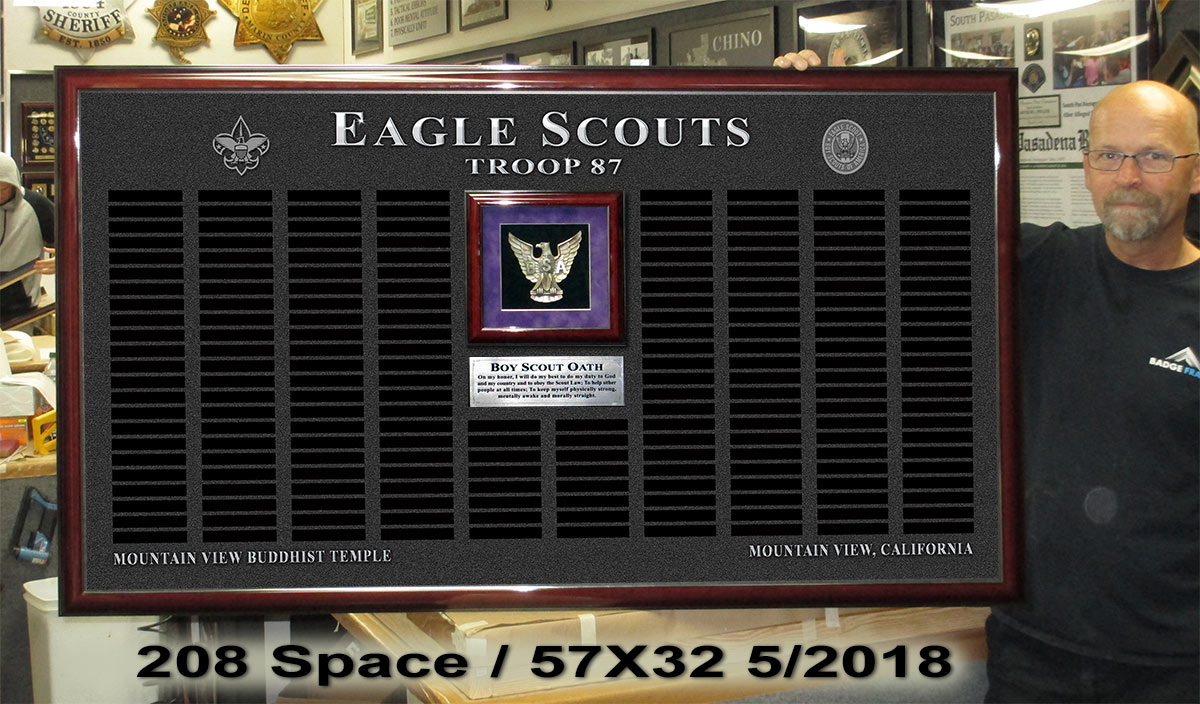
Here are some guide lines for newcomers....
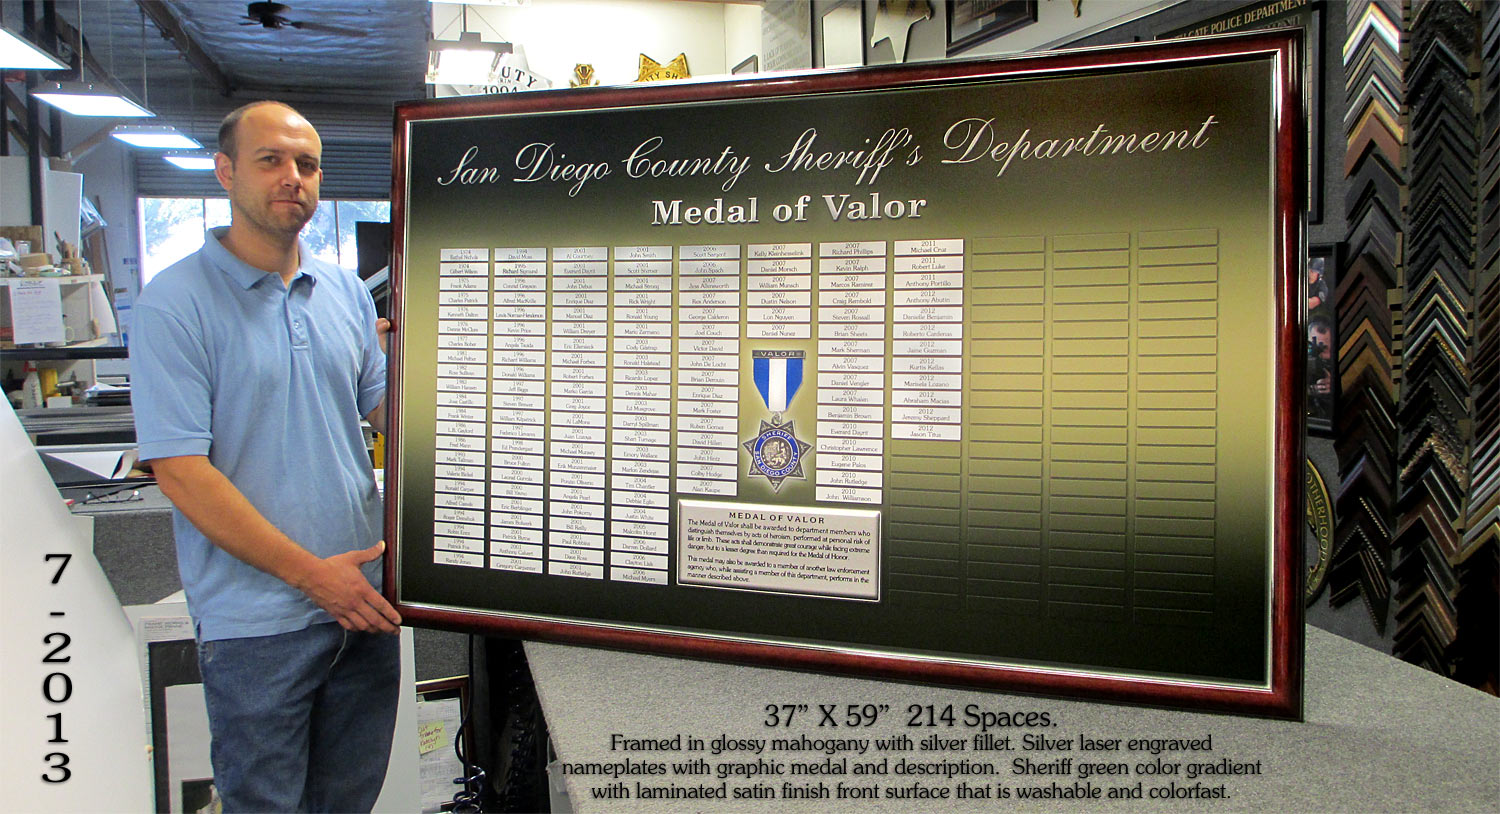
There are no "standard sizes" at Badge Frame. I can tell you
that the 2 line plaques look good at about 4" X 3/4" or 1".
We can design these boards to have ANY size plaques with ANY
number of line information.
The size and number of the plaques will dictate the over-all size
of the boards.
so..
What I would need to start mapping things out is...
1). To know if all the boards need to be the same size or
not. Keep in mind that some boards will have many more
plaques that others.
If they all need to be the same size (outside), the plaques
sizes will differ.
It is best to have a nice grouping with a couple large boards and
a few smaller boards, all displaying the same size plaques.
2). Taking one board at a time, tell us how many total spaces
(engraved plaques) you will need for each board.
Keep in mind the past recipients and as well as the future
ones. Don't plan on exceeding 10 years for the future.
In 10 years, these presentations will be obsolete and will be
electronic. Info will be input via WiFi or something like it.
It starts to look stupid empty if you plan to go too far
ahead.
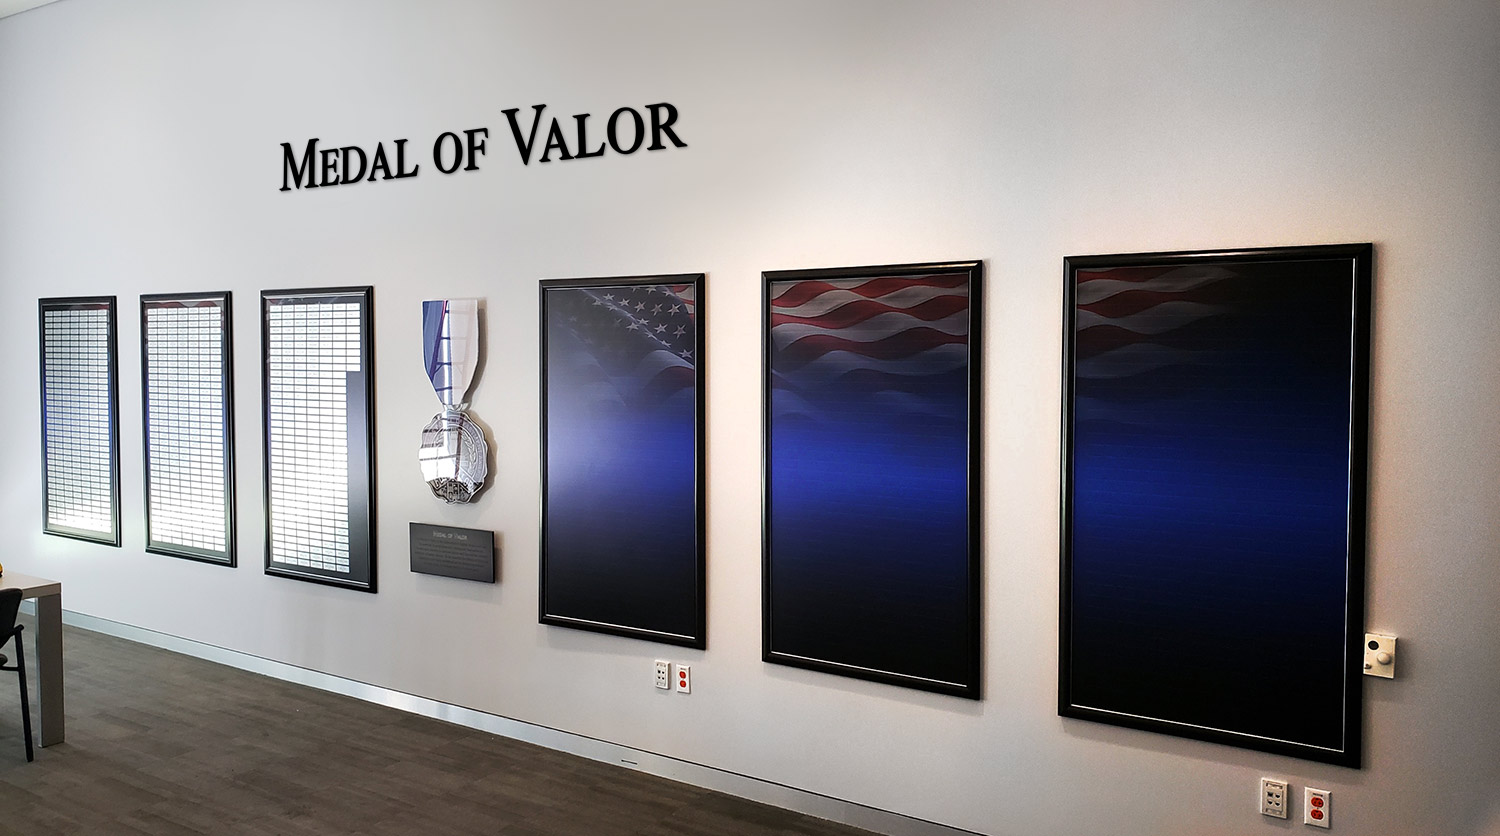
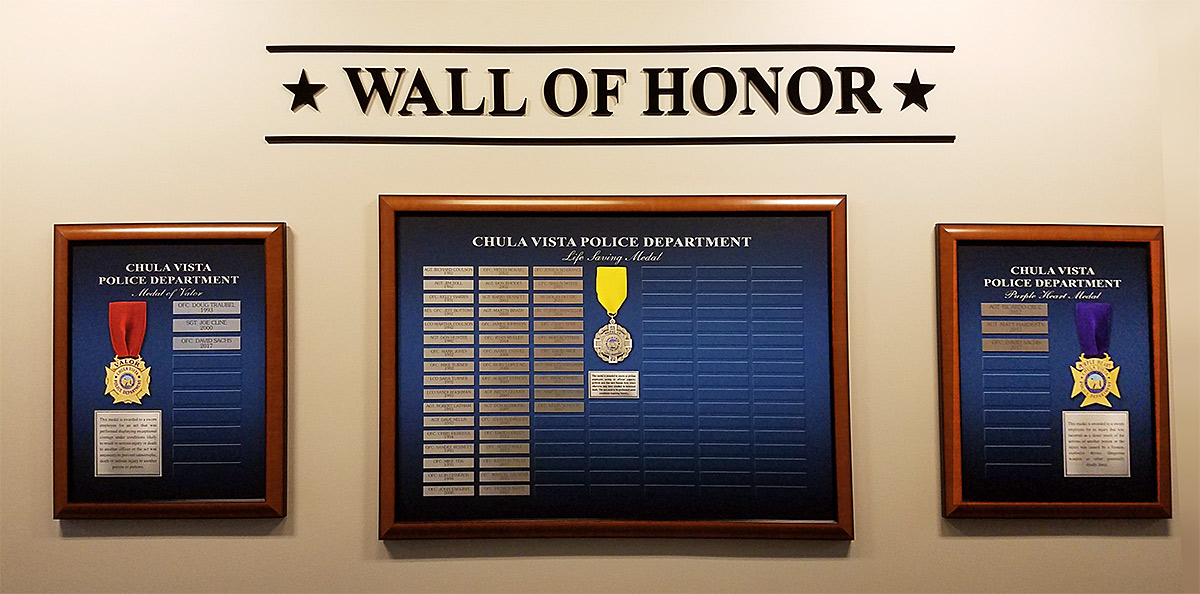
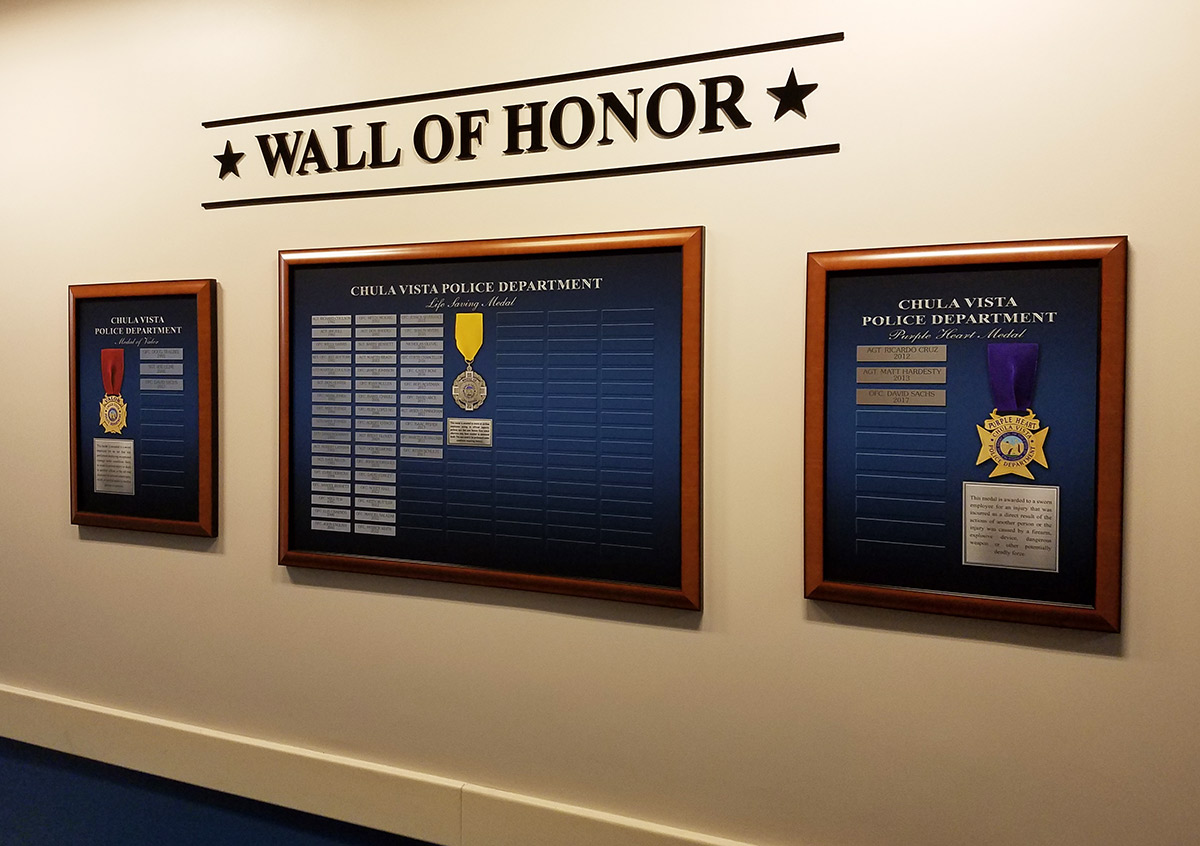
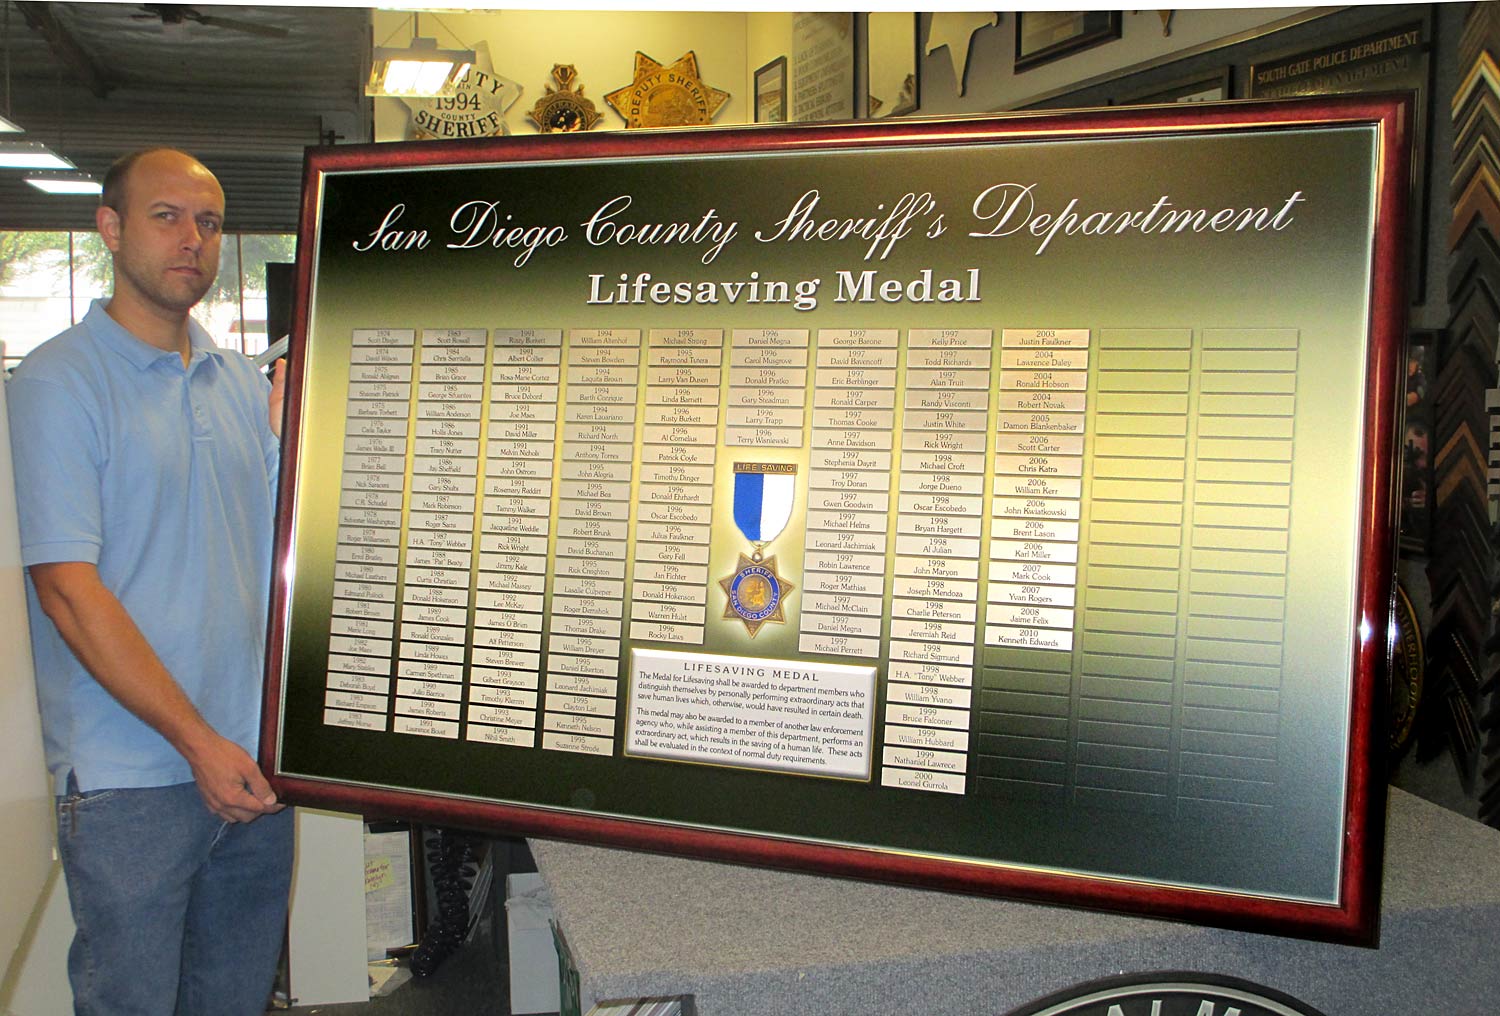
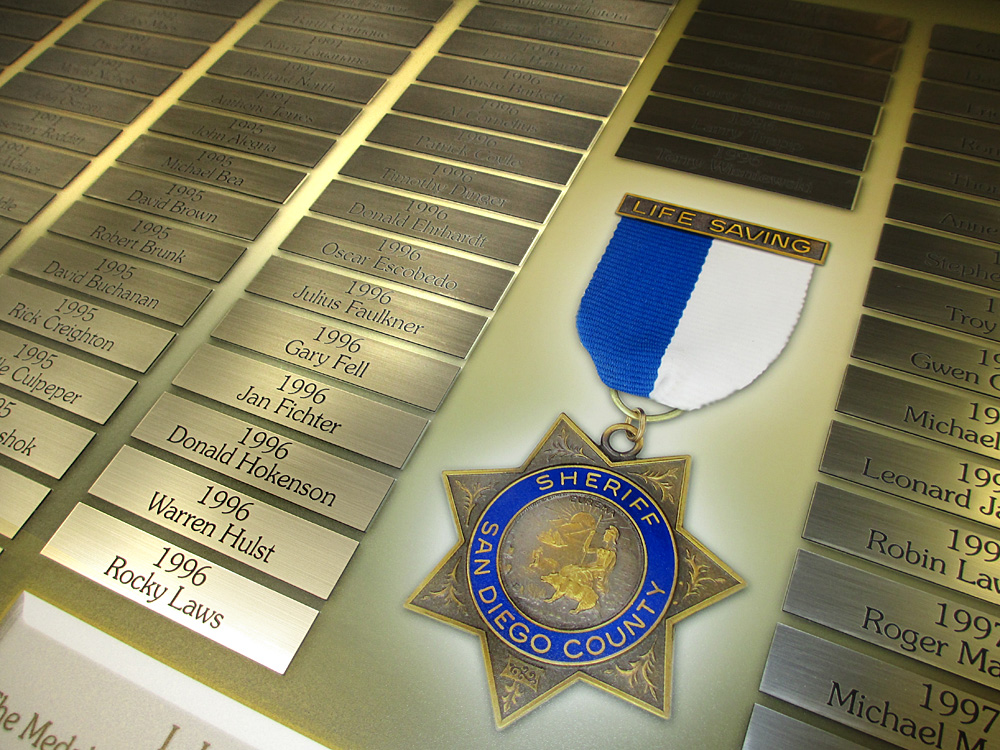
For boards like Valor or Lifesaving (ones that are not awarded
annually like Officer of the Year etc.)
you will need to estimate based on average past entries for how
many future ones you will need.
3). If there is any possibility of a "tight fit" on a given
wall area, we need to know the
wall dimensions to make sure the boards will fit and look nice.
Let's get that info and we can get you some proofs going.
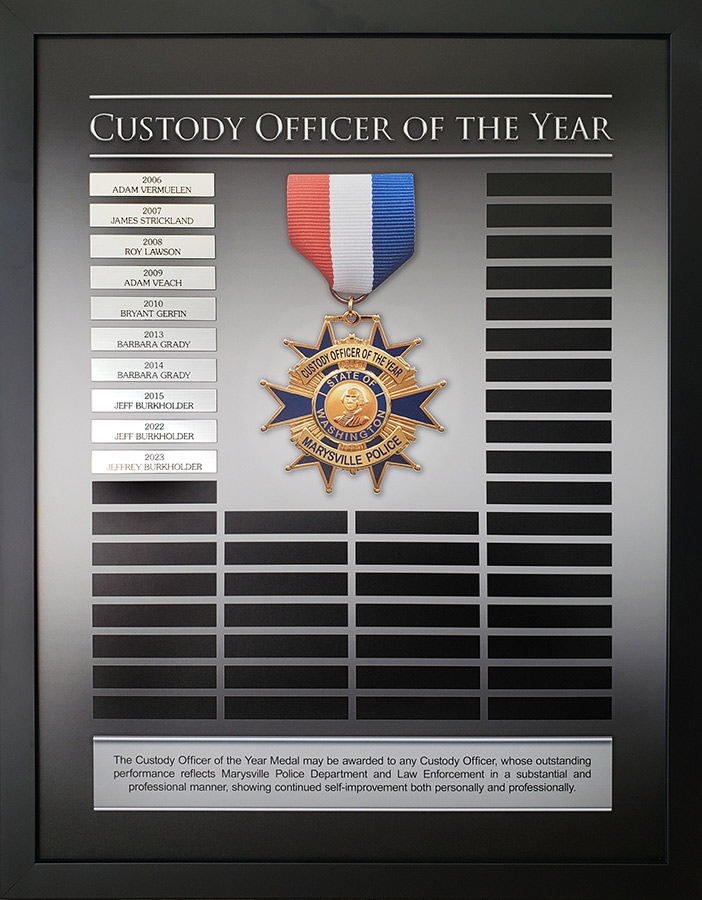
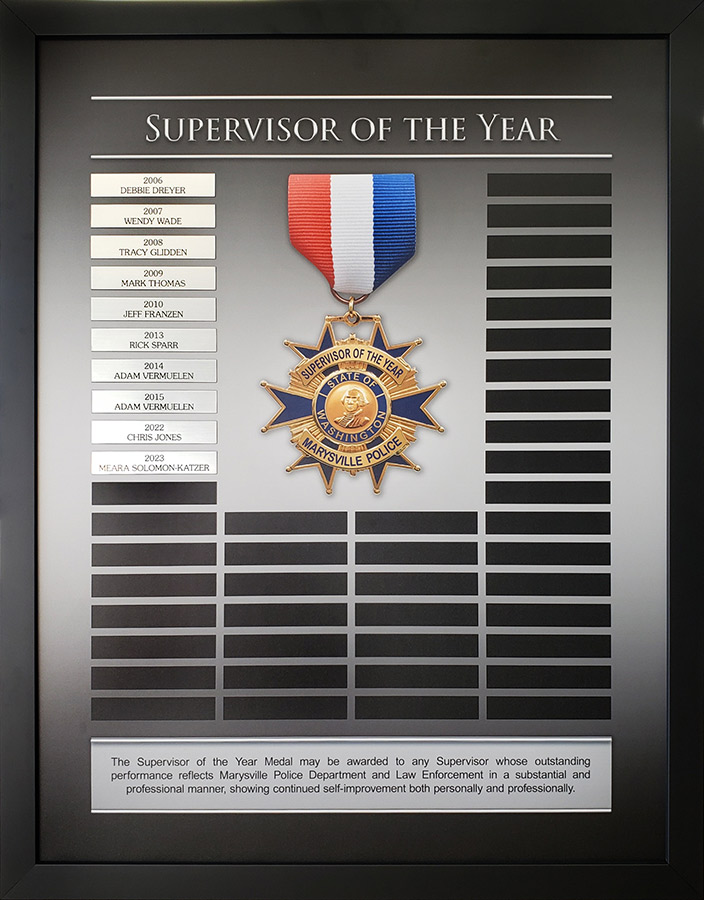
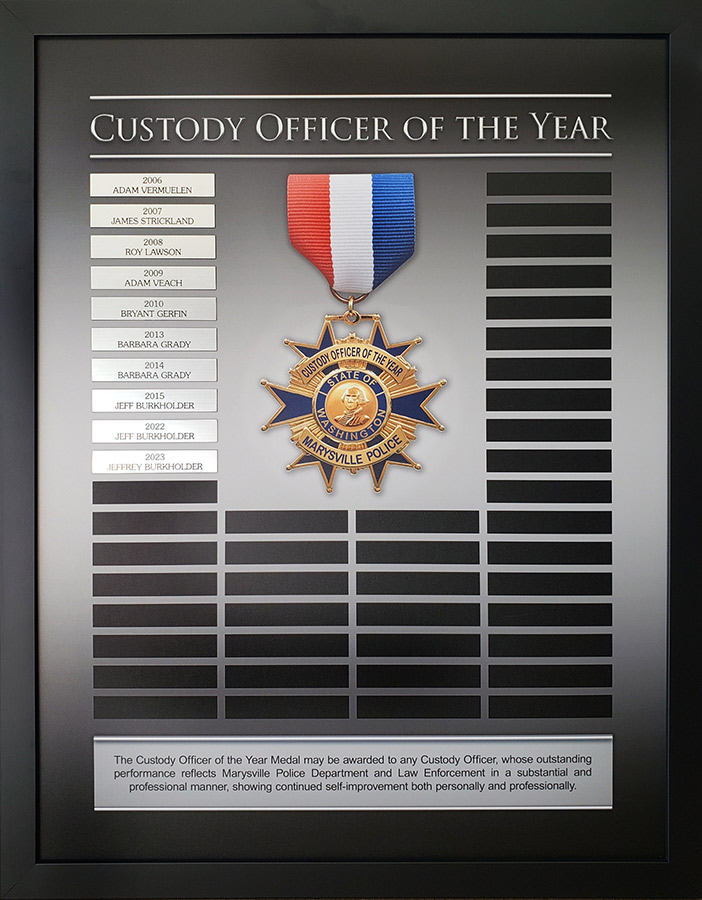
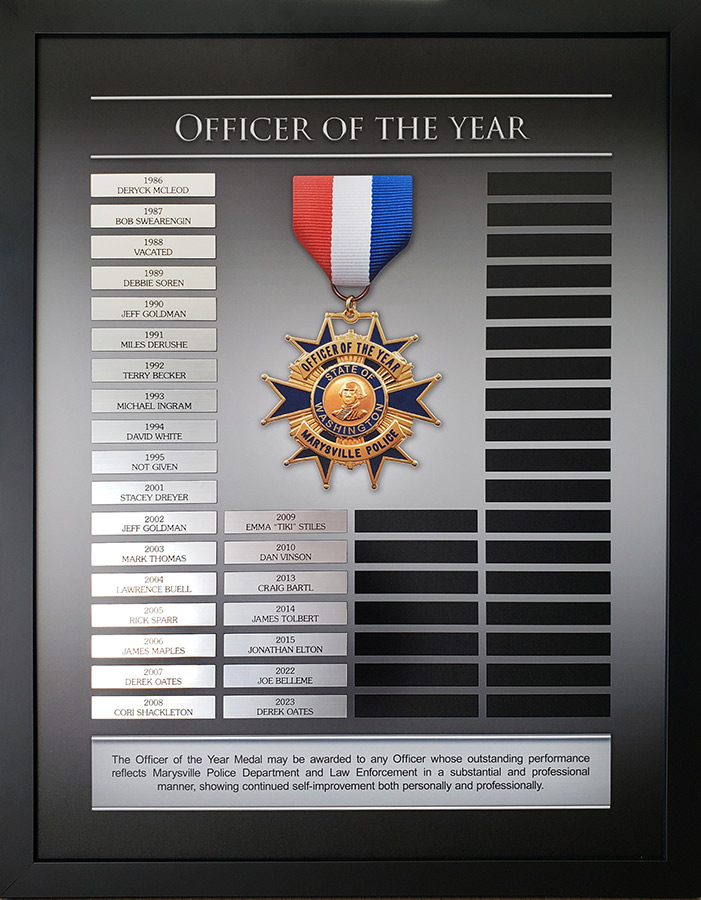
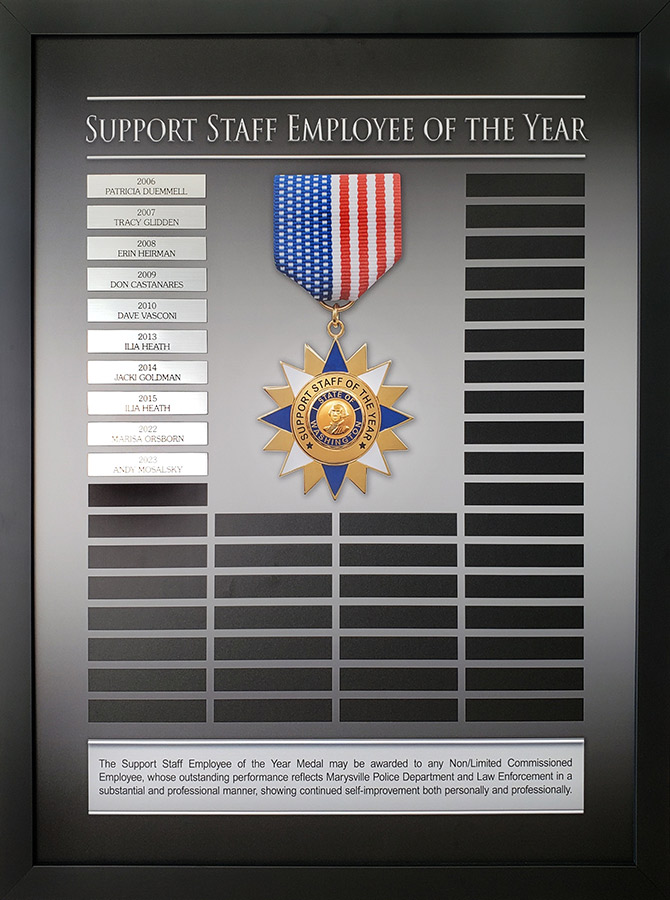
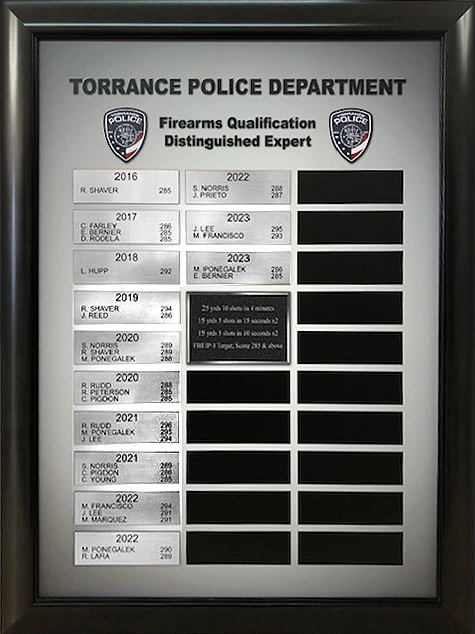
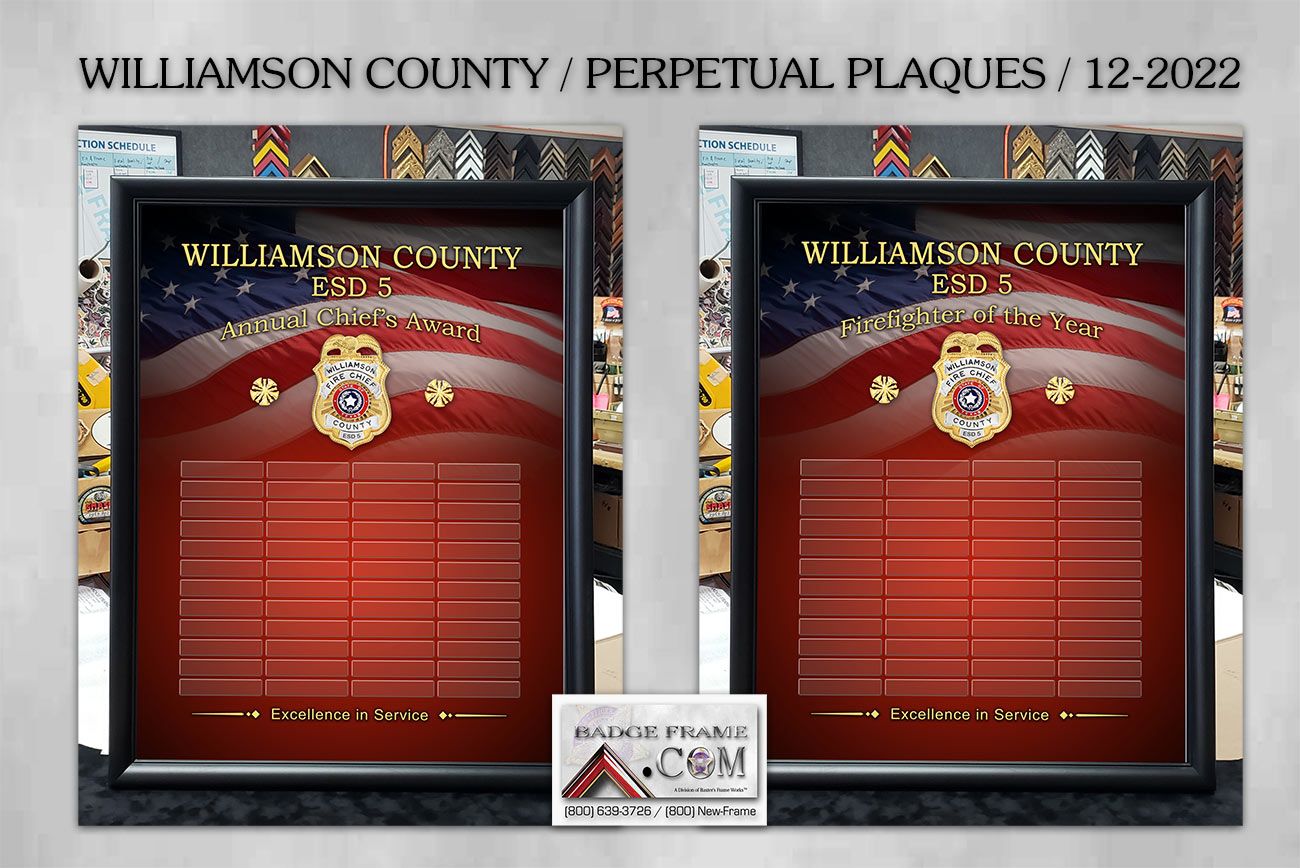
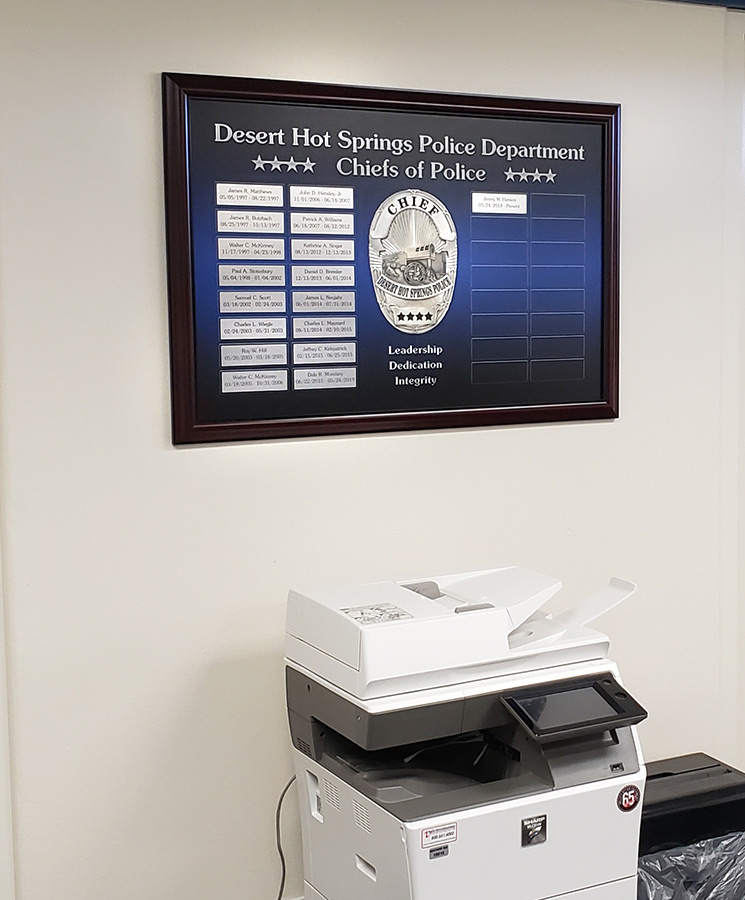
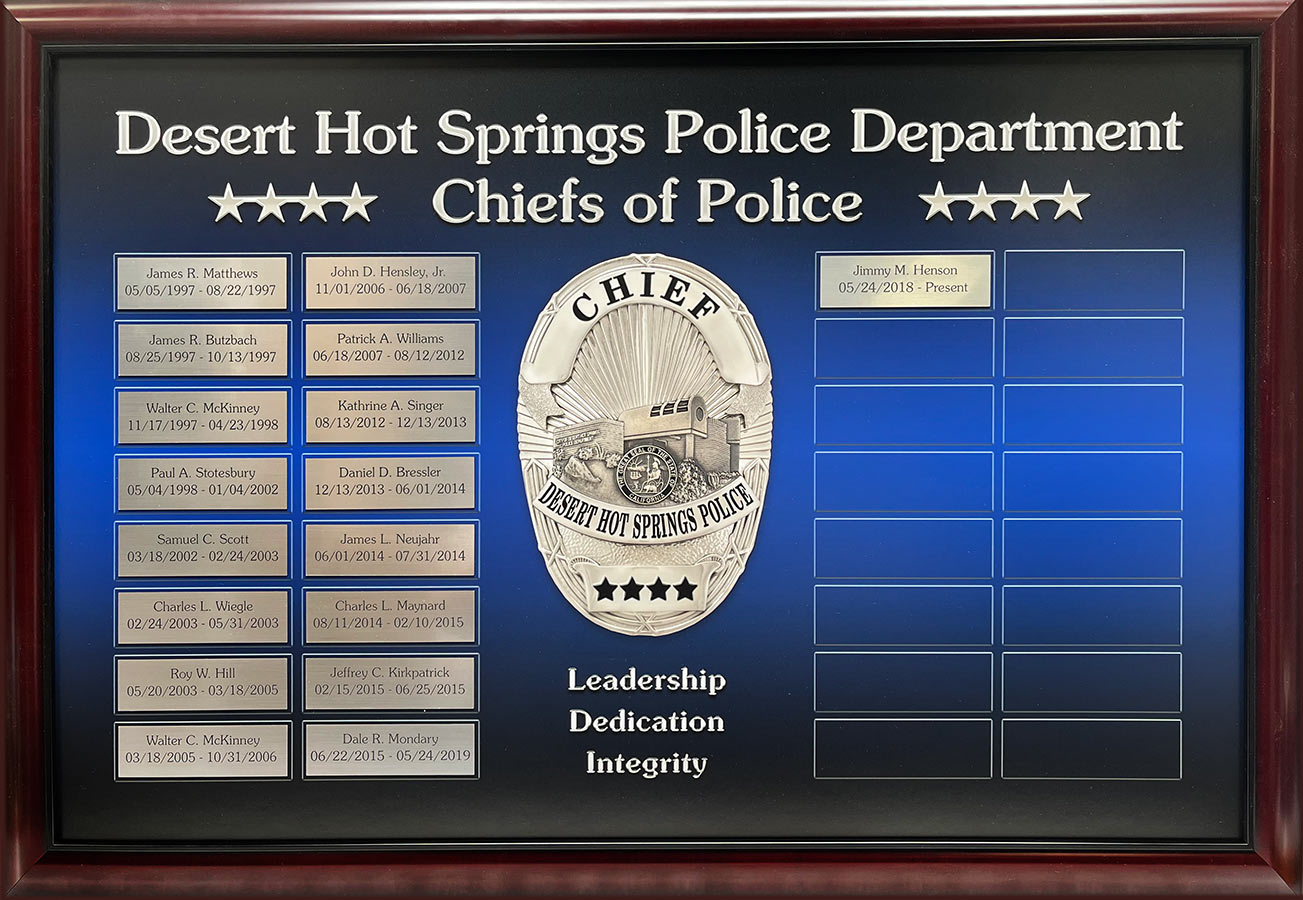
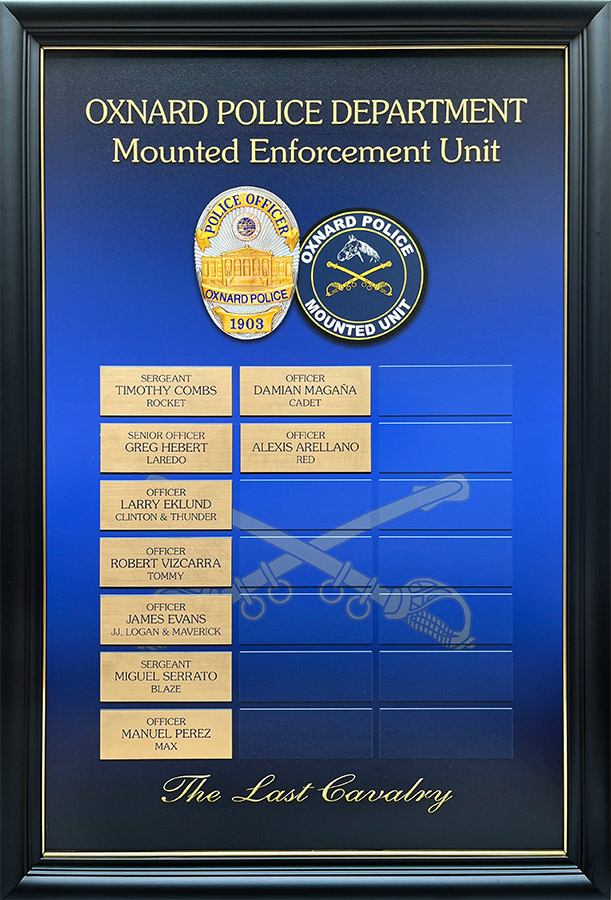
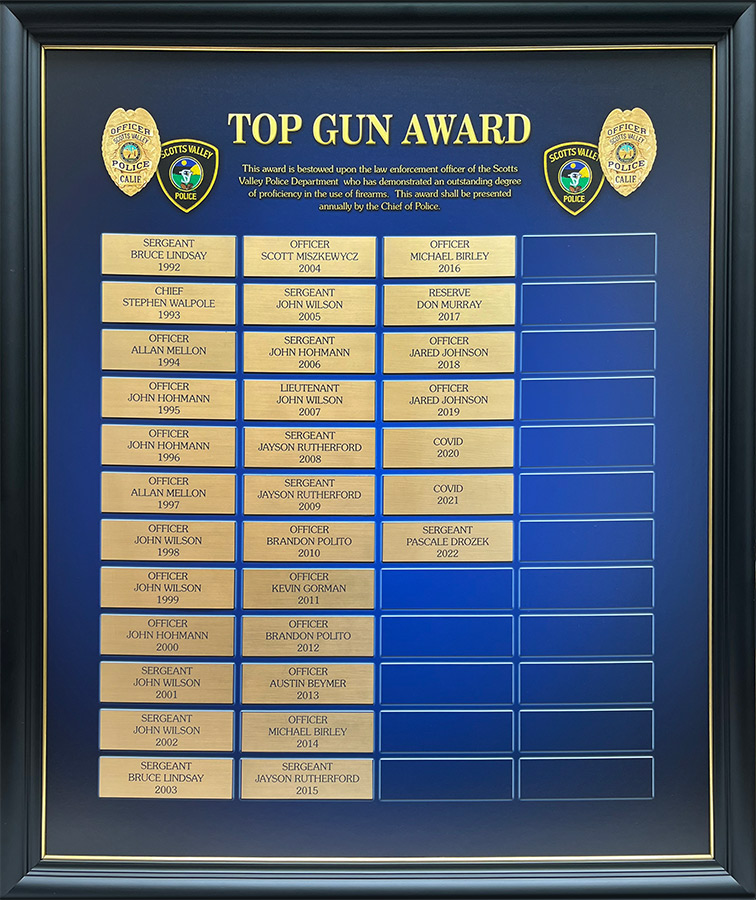
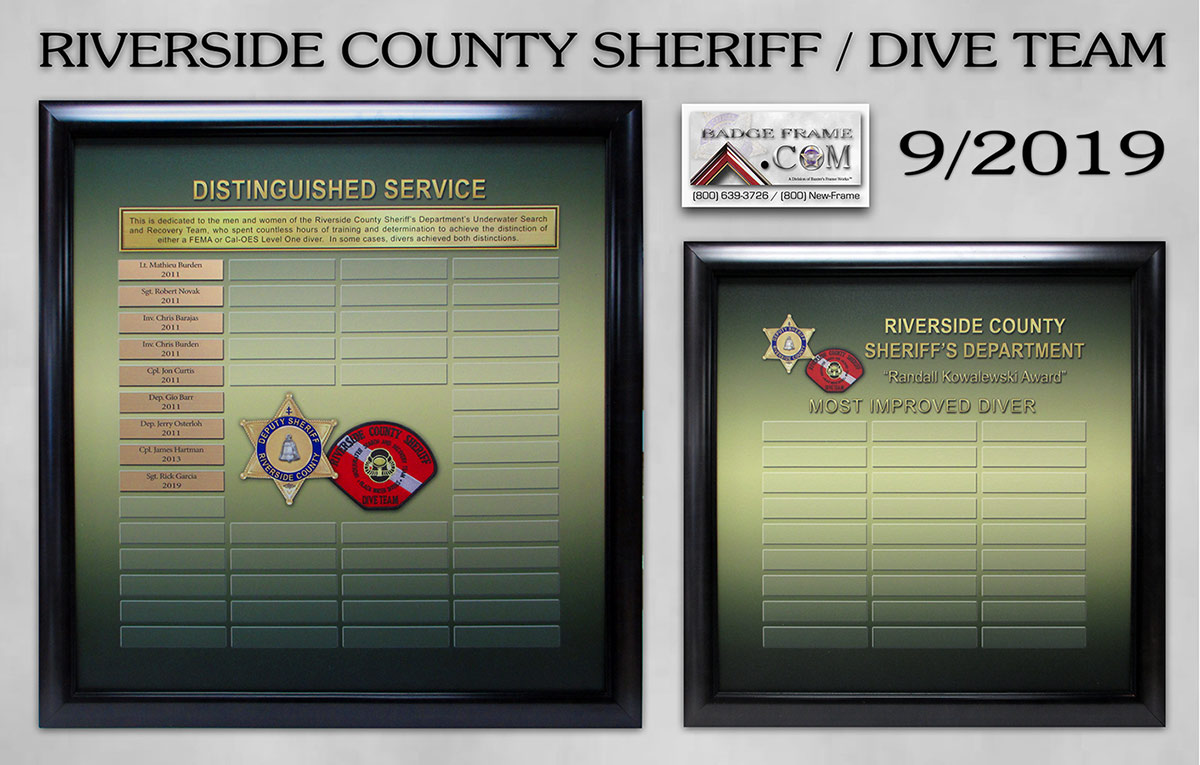
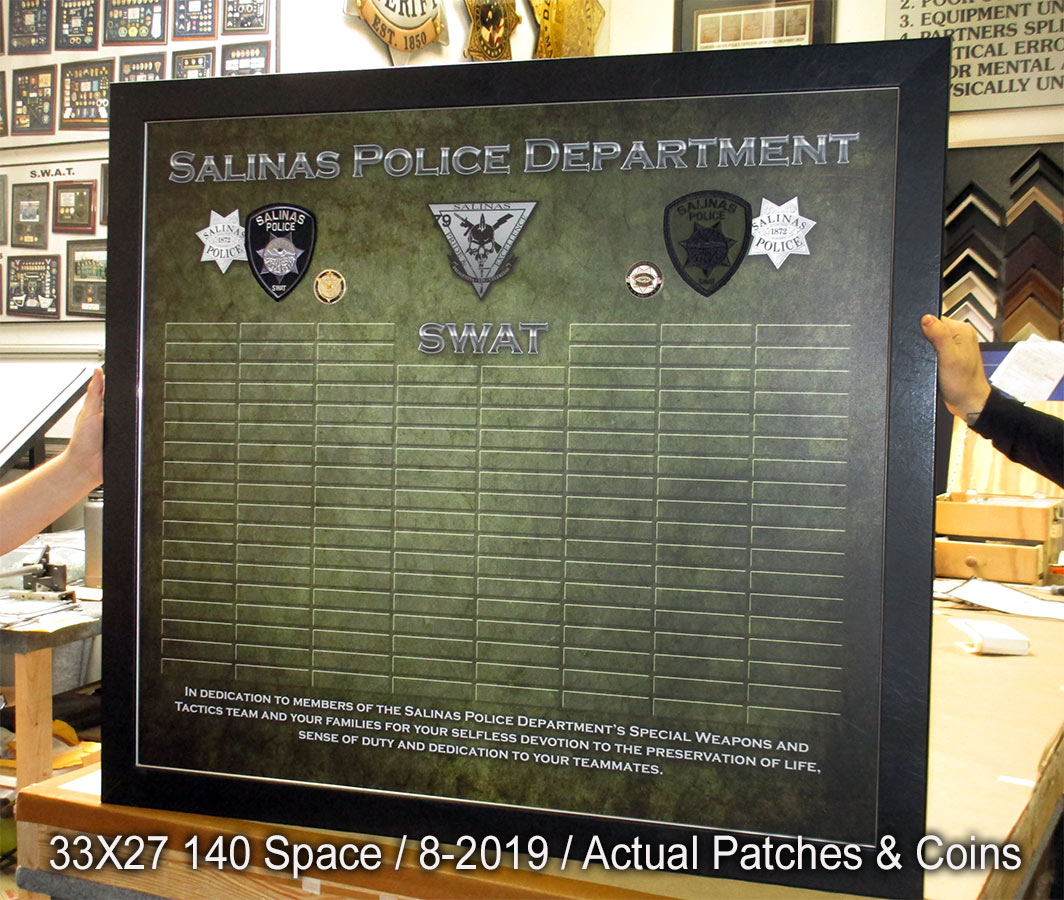
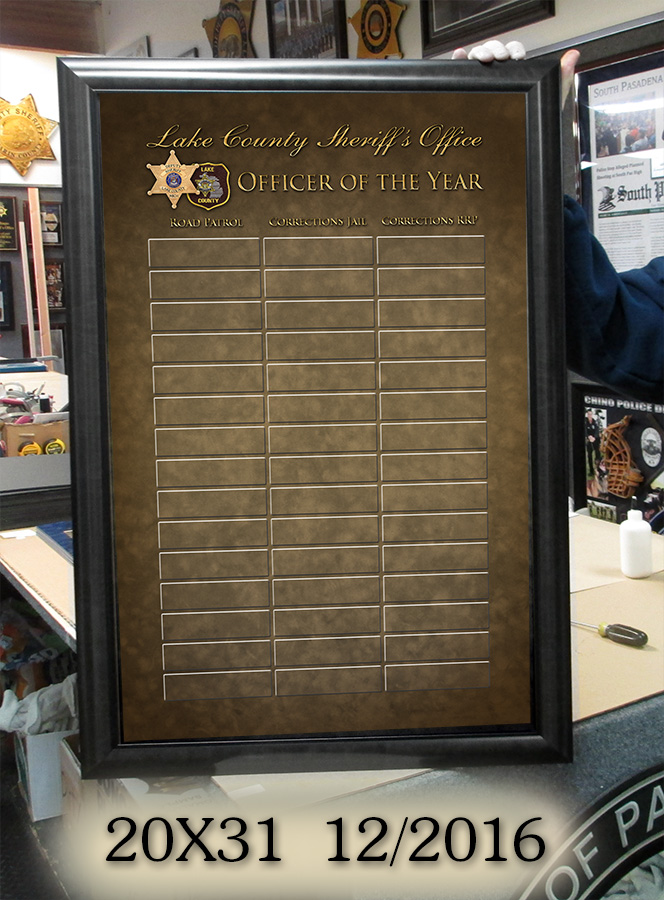
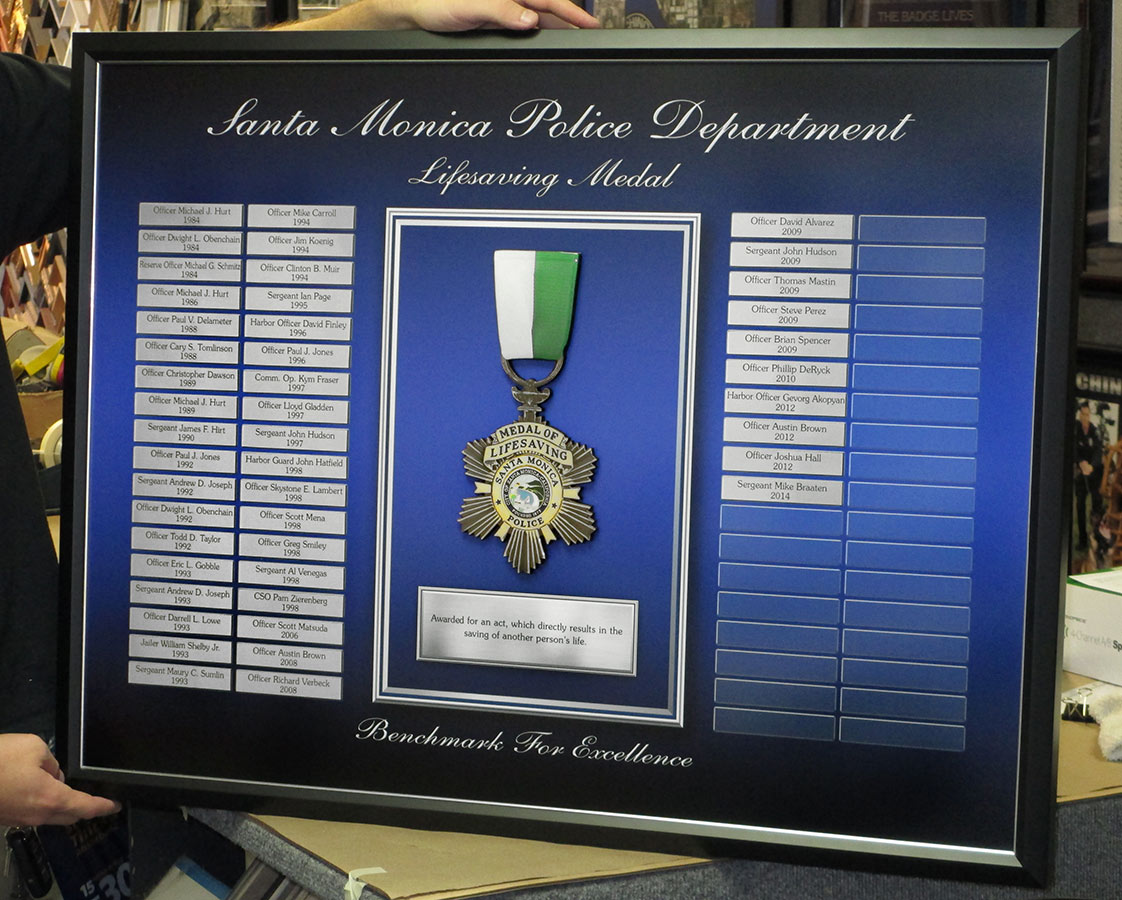
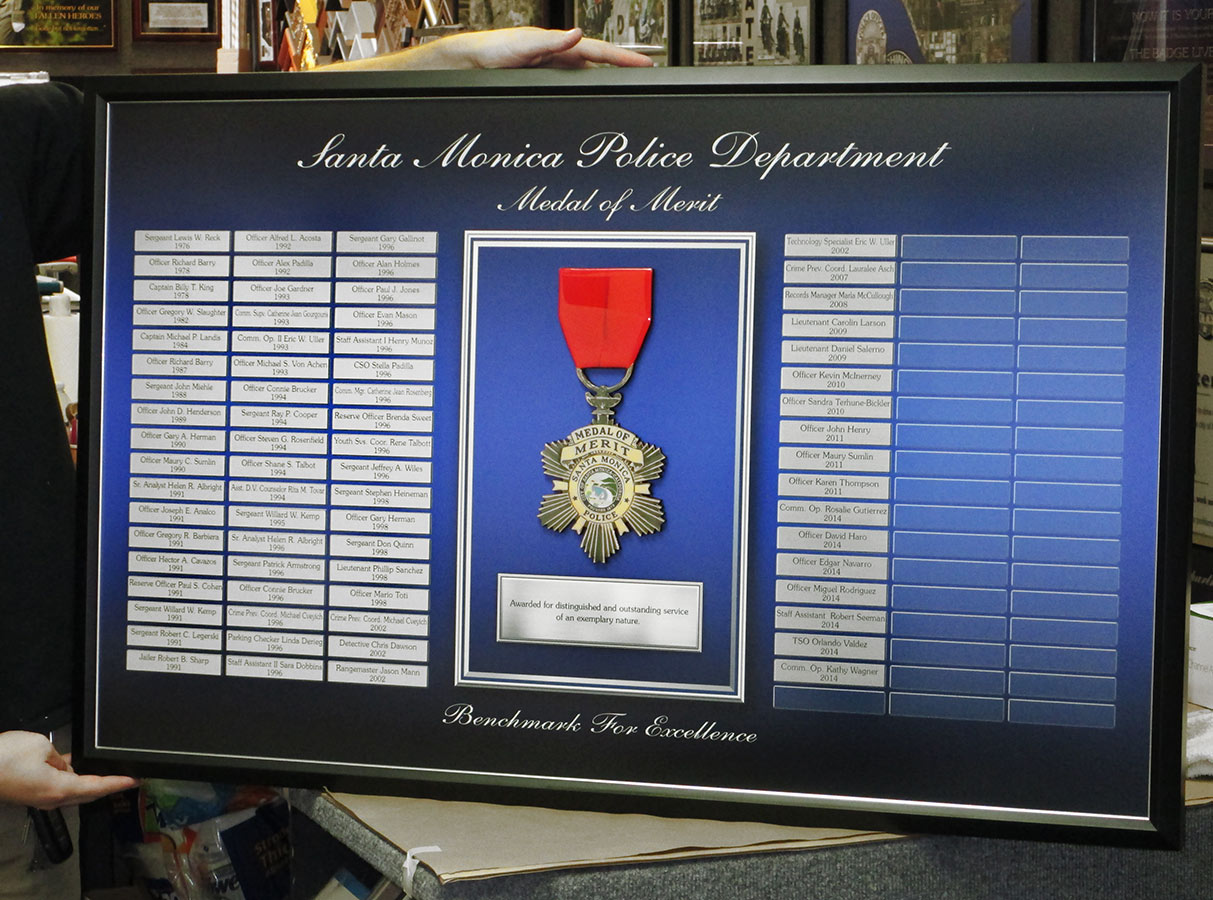
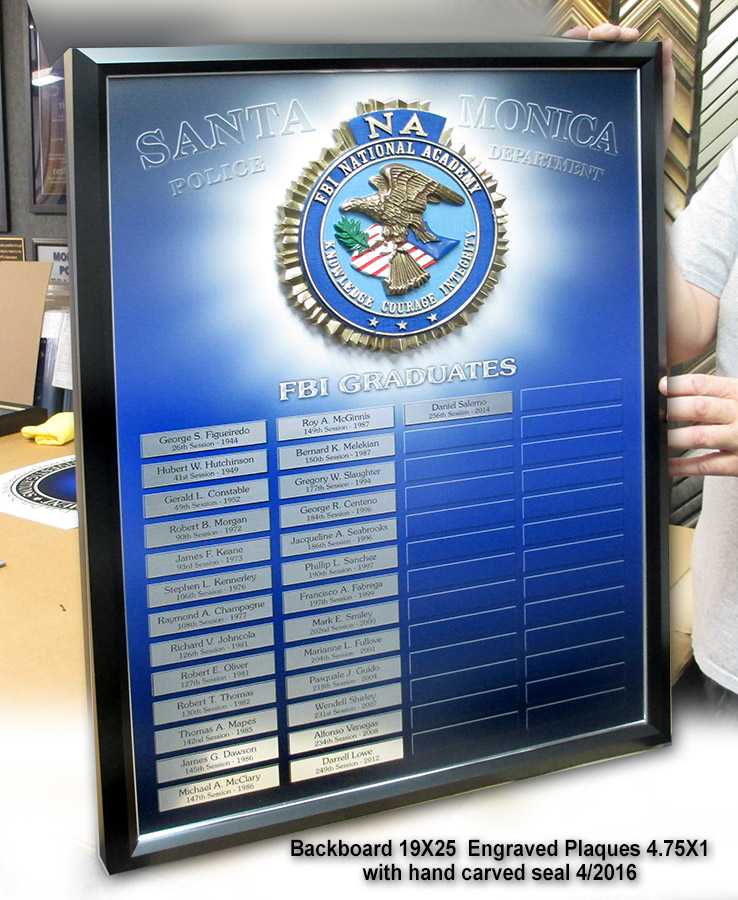
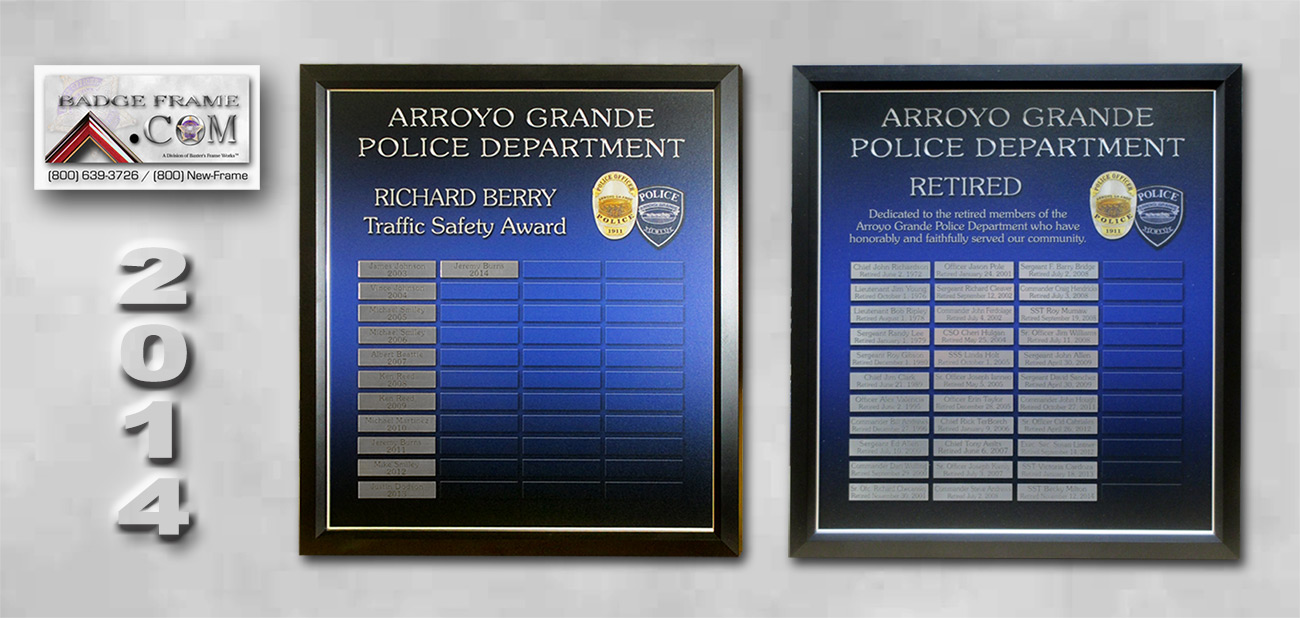
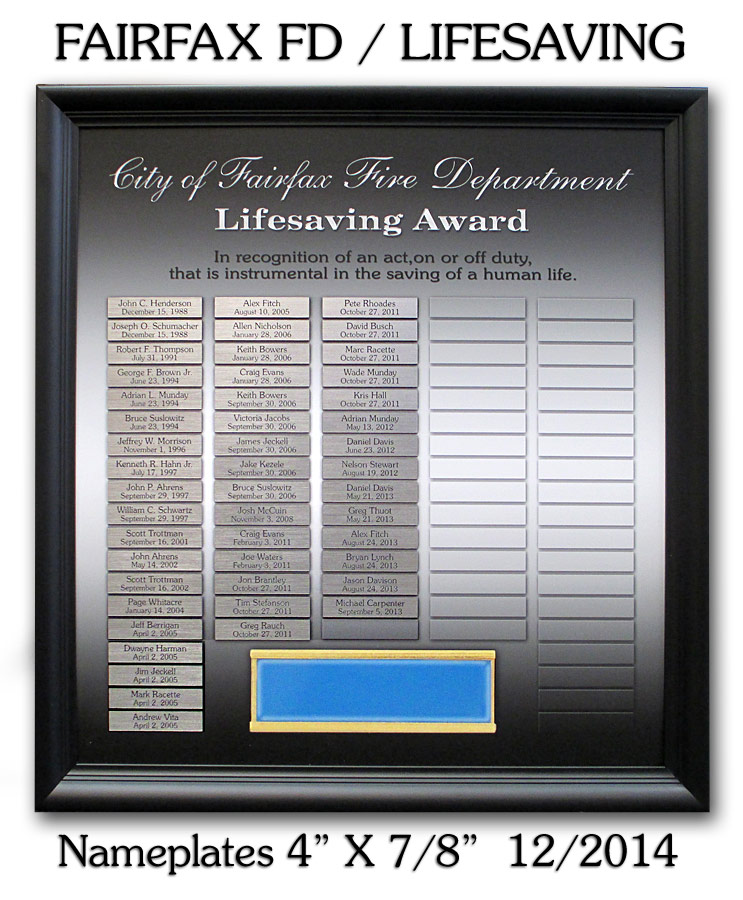
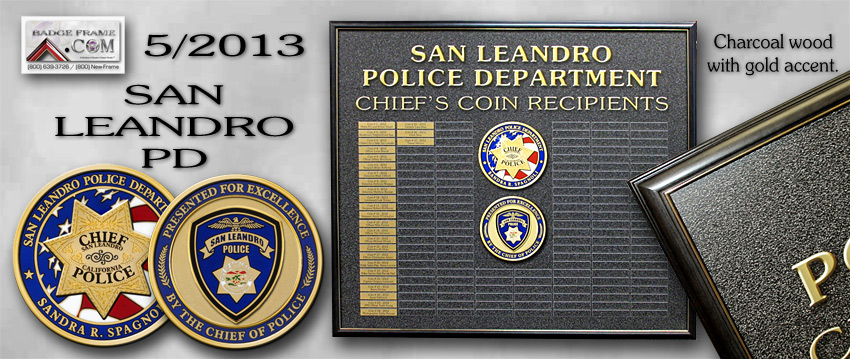
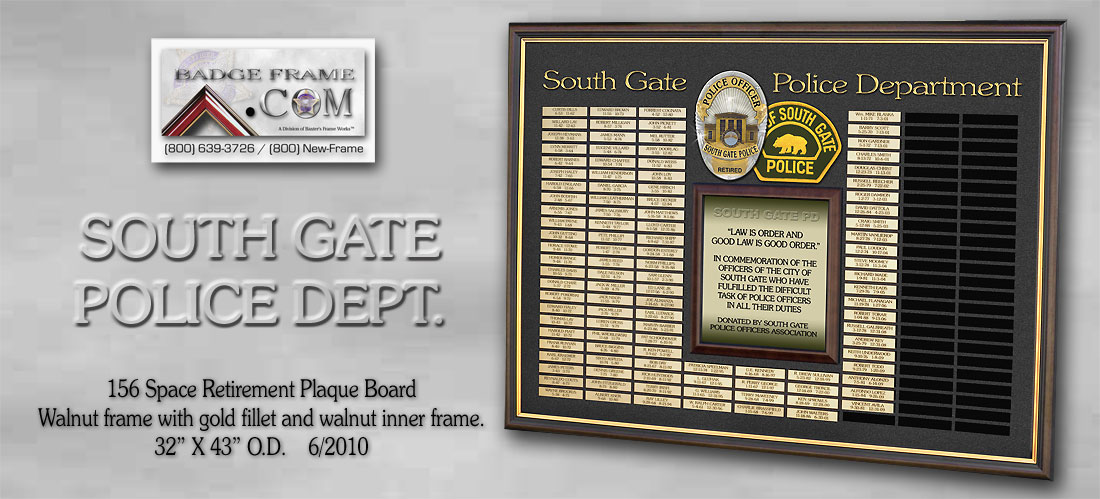
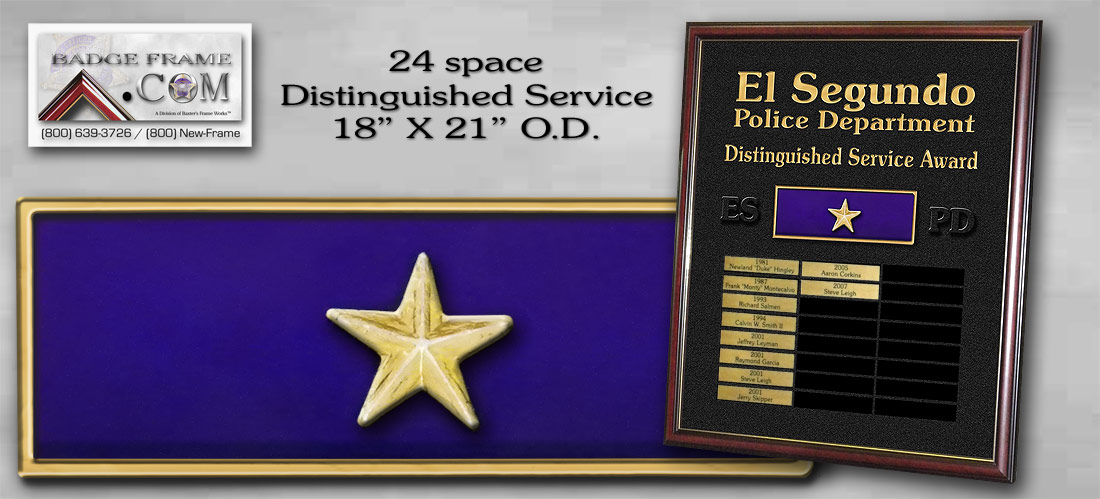
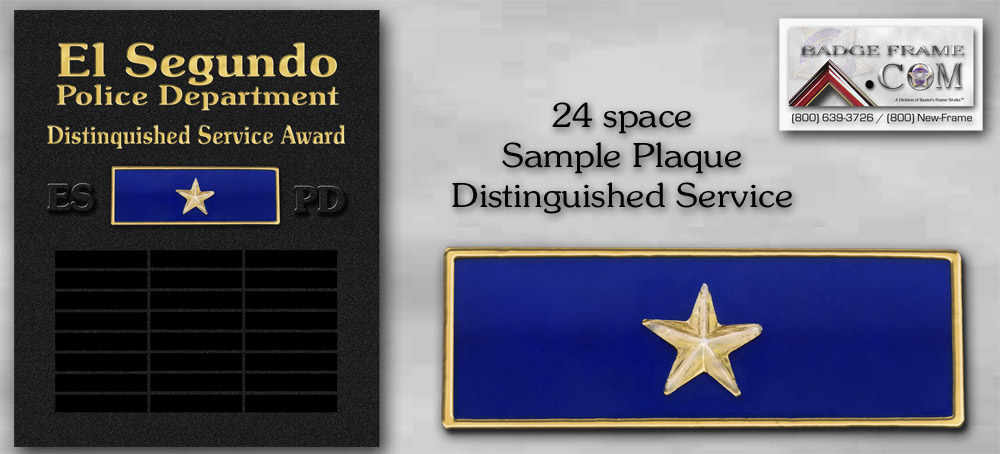
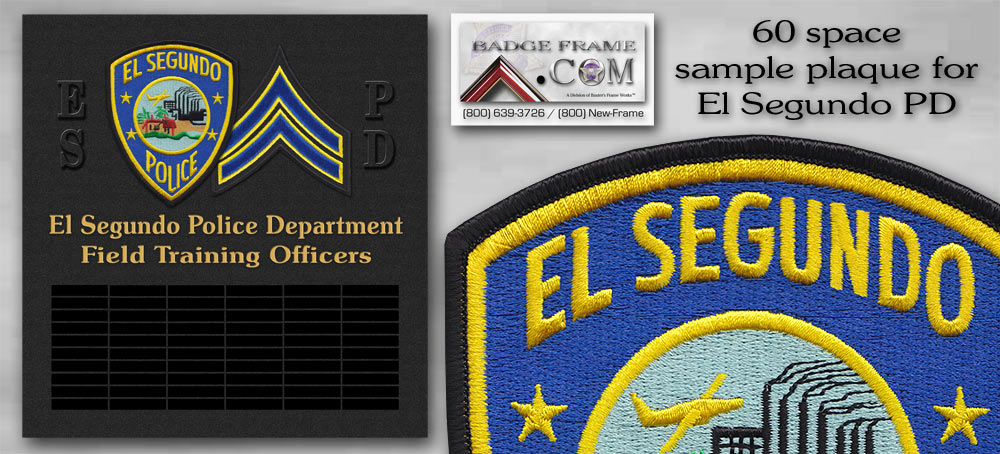
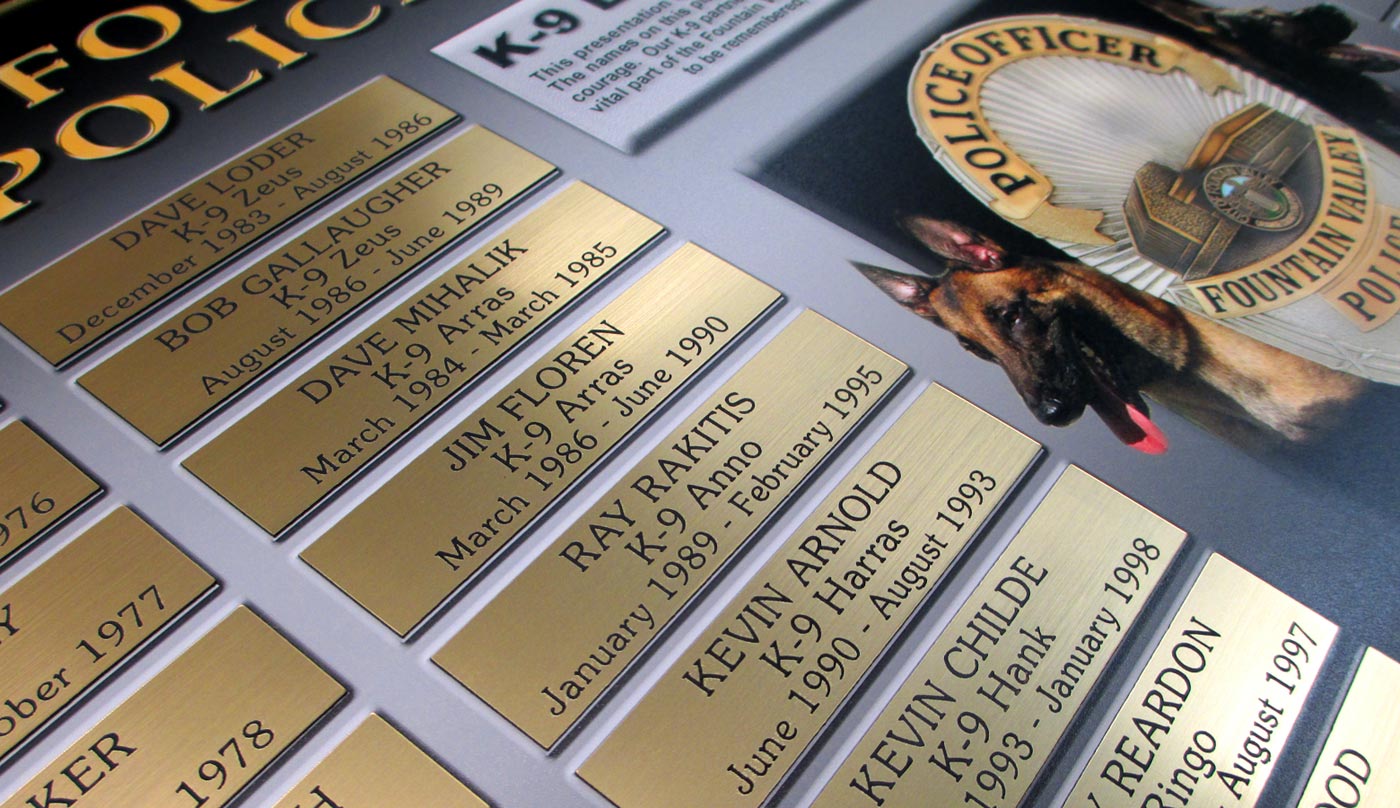
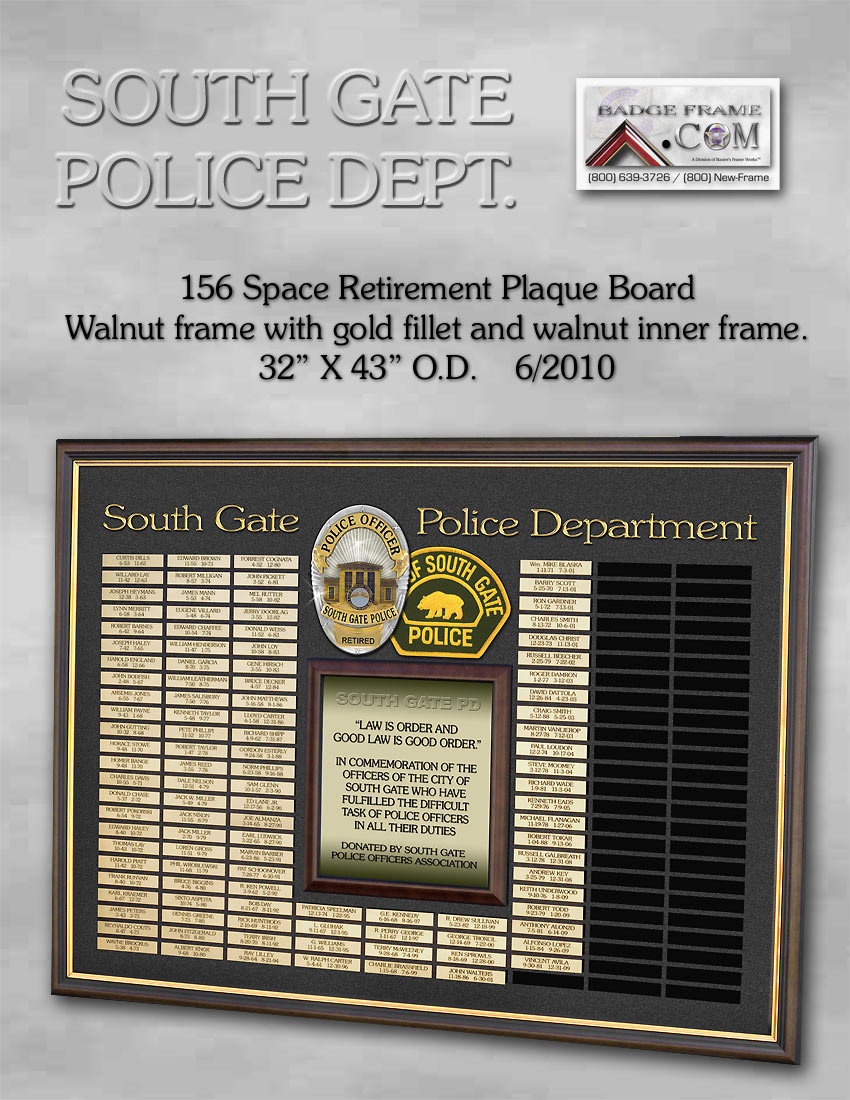
Pricing for the boards are based on overall size and
the engraved plaques (at 4" X .75"). We will engrave
future plaques as you need them so they all match the old ones.
They will have adhesive on the back and you just stick them
on. There are "ghost space-holders" that will make alignment
easy.
So for now, lets just get some numbers (plaque quantities) and
sizes from you and get you some proof ideas started.
Call us (800) 639-3726 or E-Mail us Bill@Badgeframe.Com
Info on "REMOVING NAMEPLATES" at the bottom of this
page.
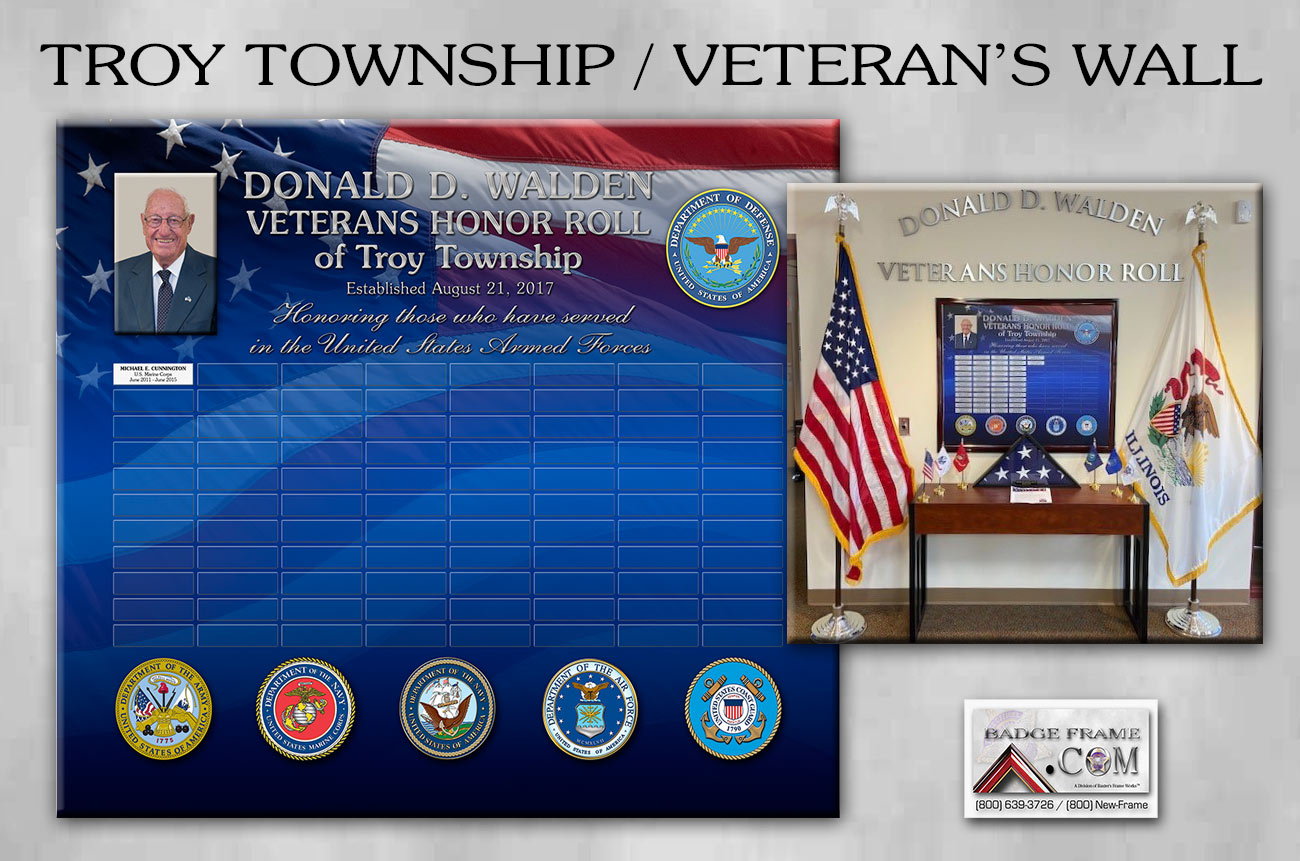
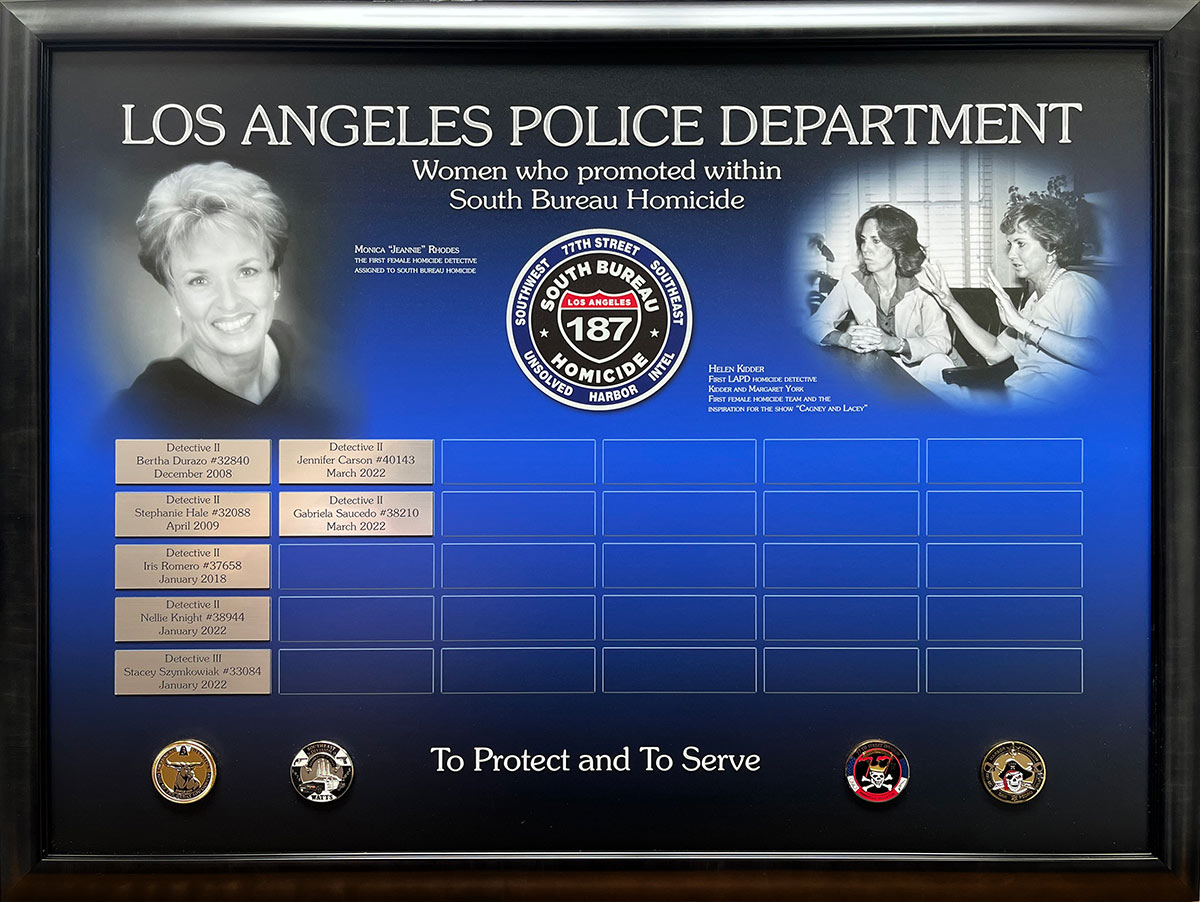
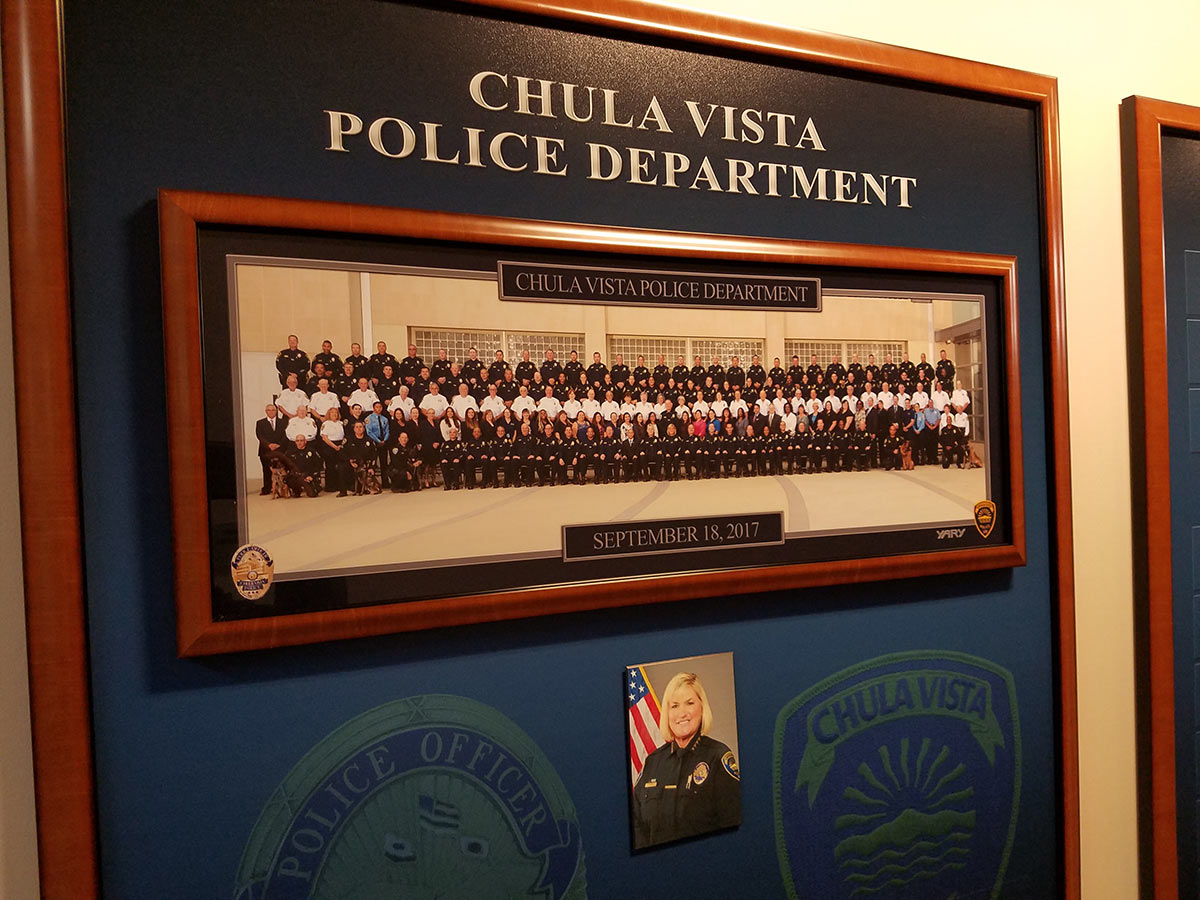
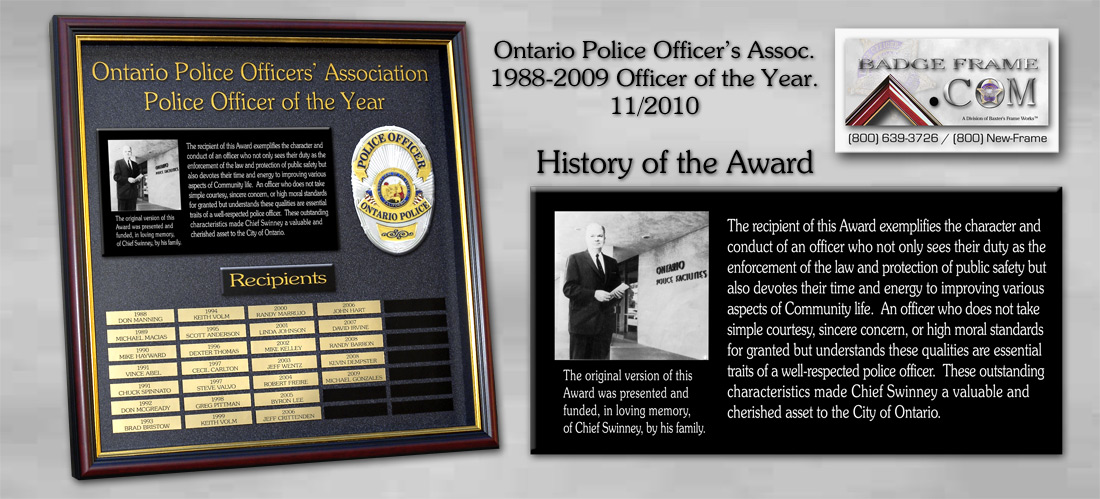
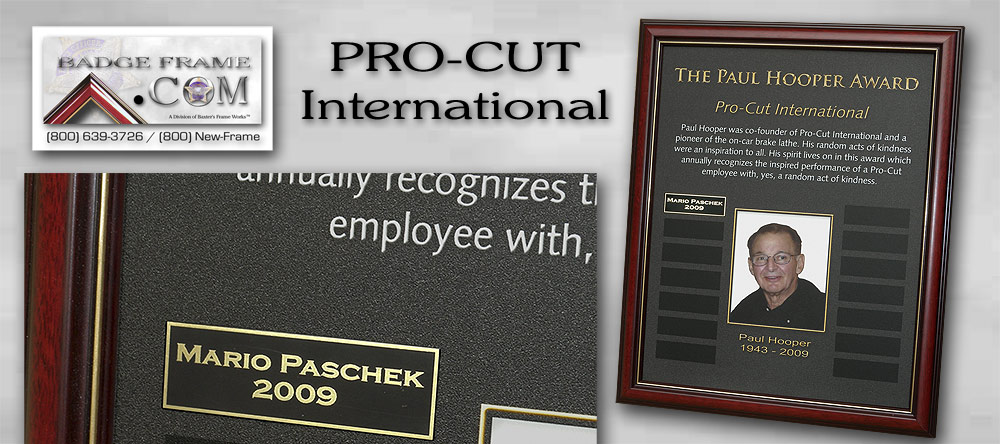
Interesting in that this presentation was AFTER the current ones
honoring those
who were not initially included. A smart way to recognize
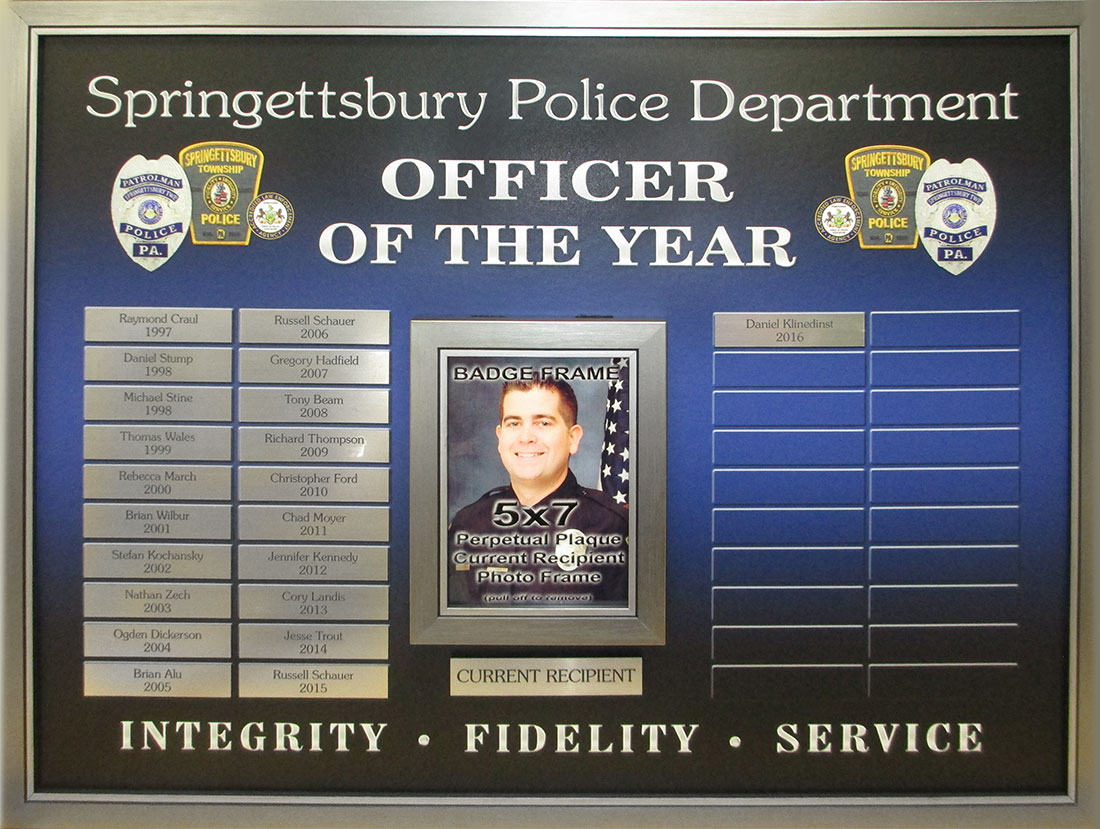
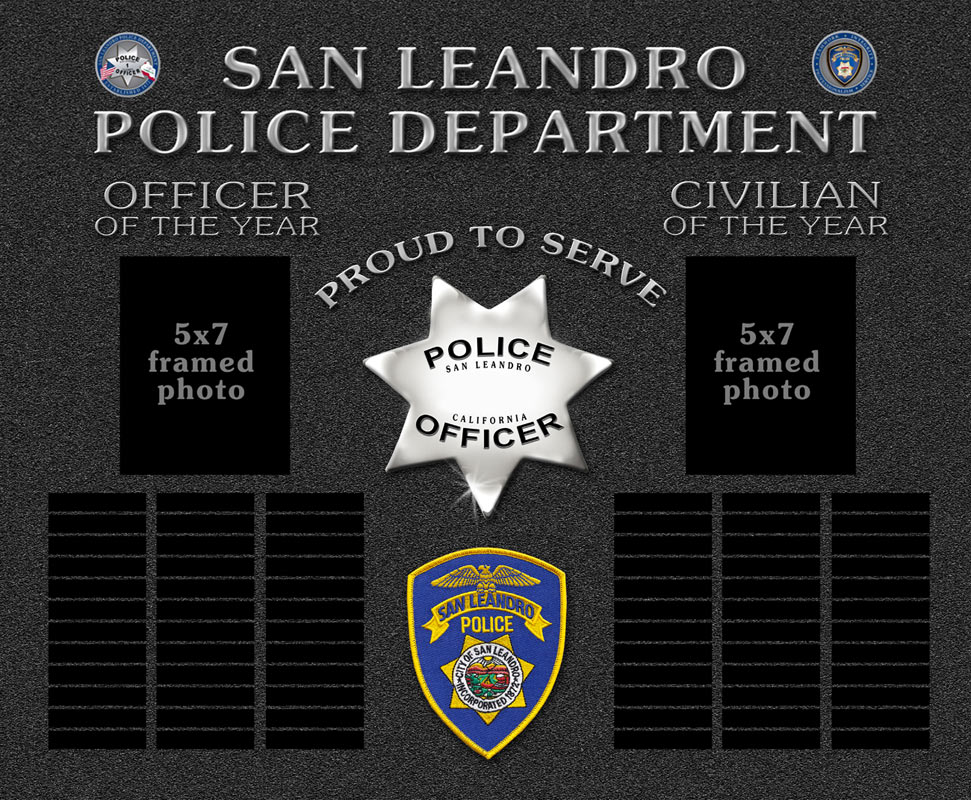
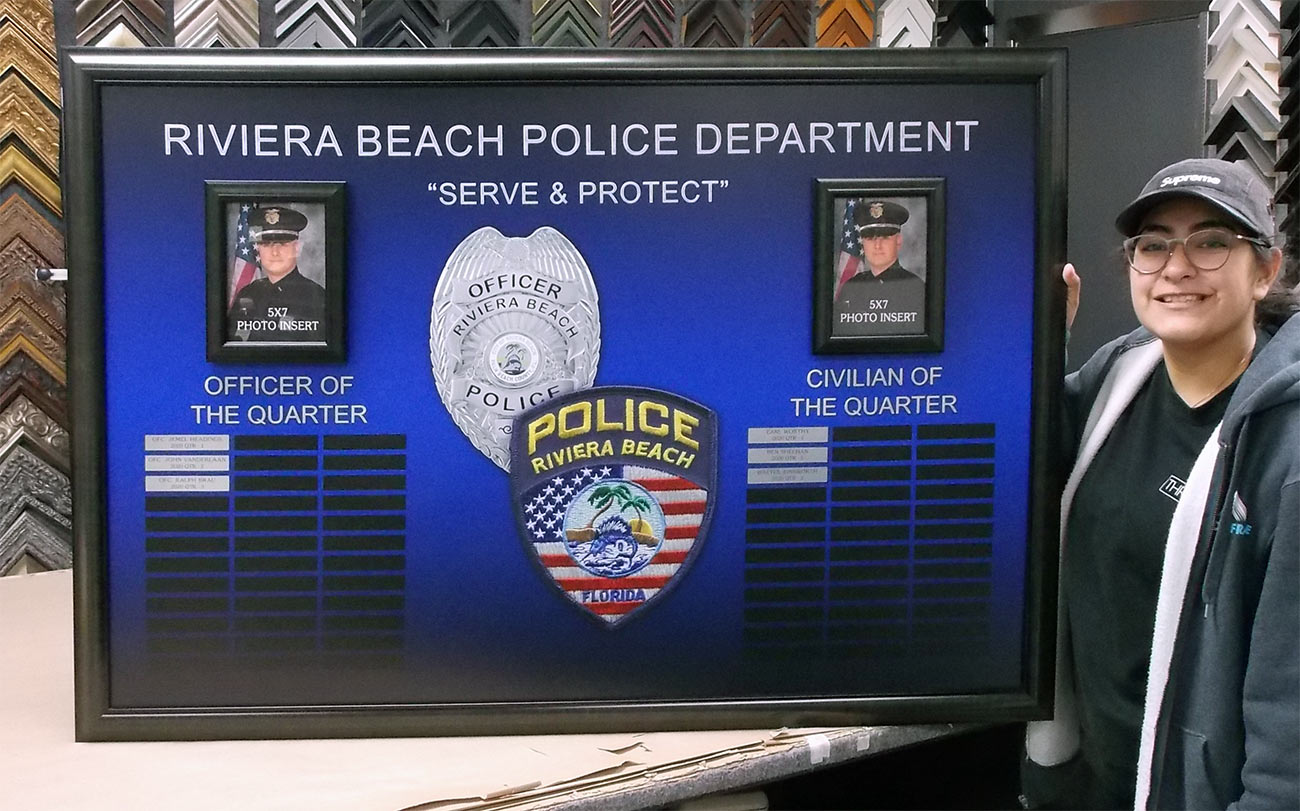
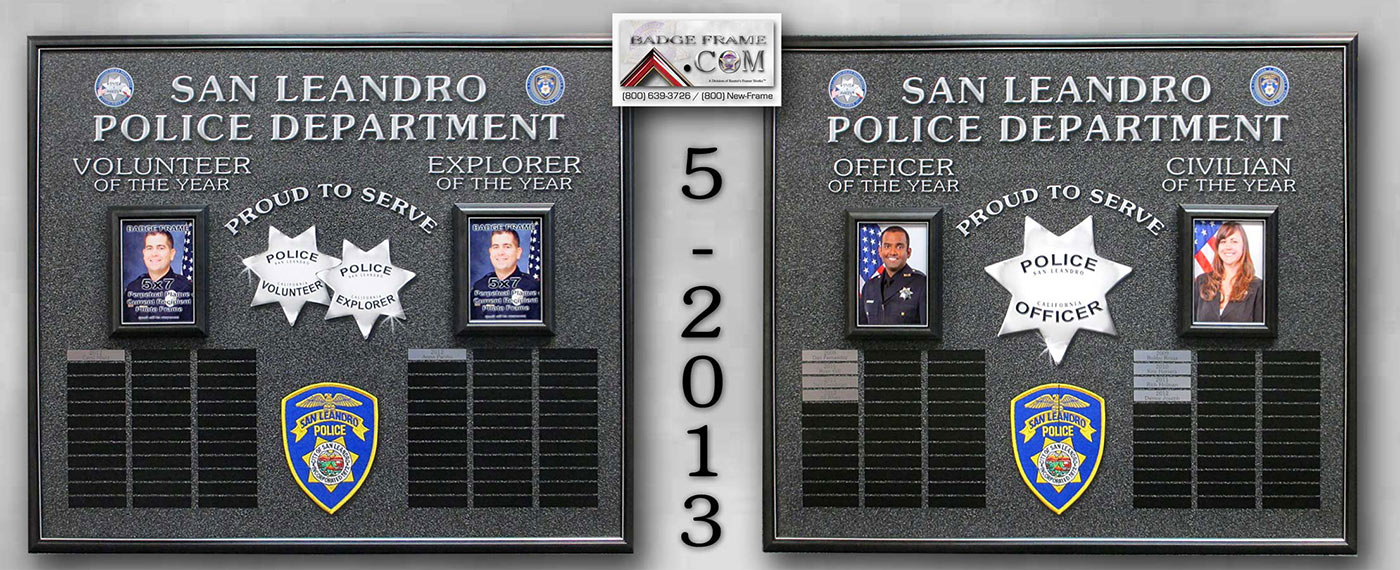
newly found past records. Of The Year Section
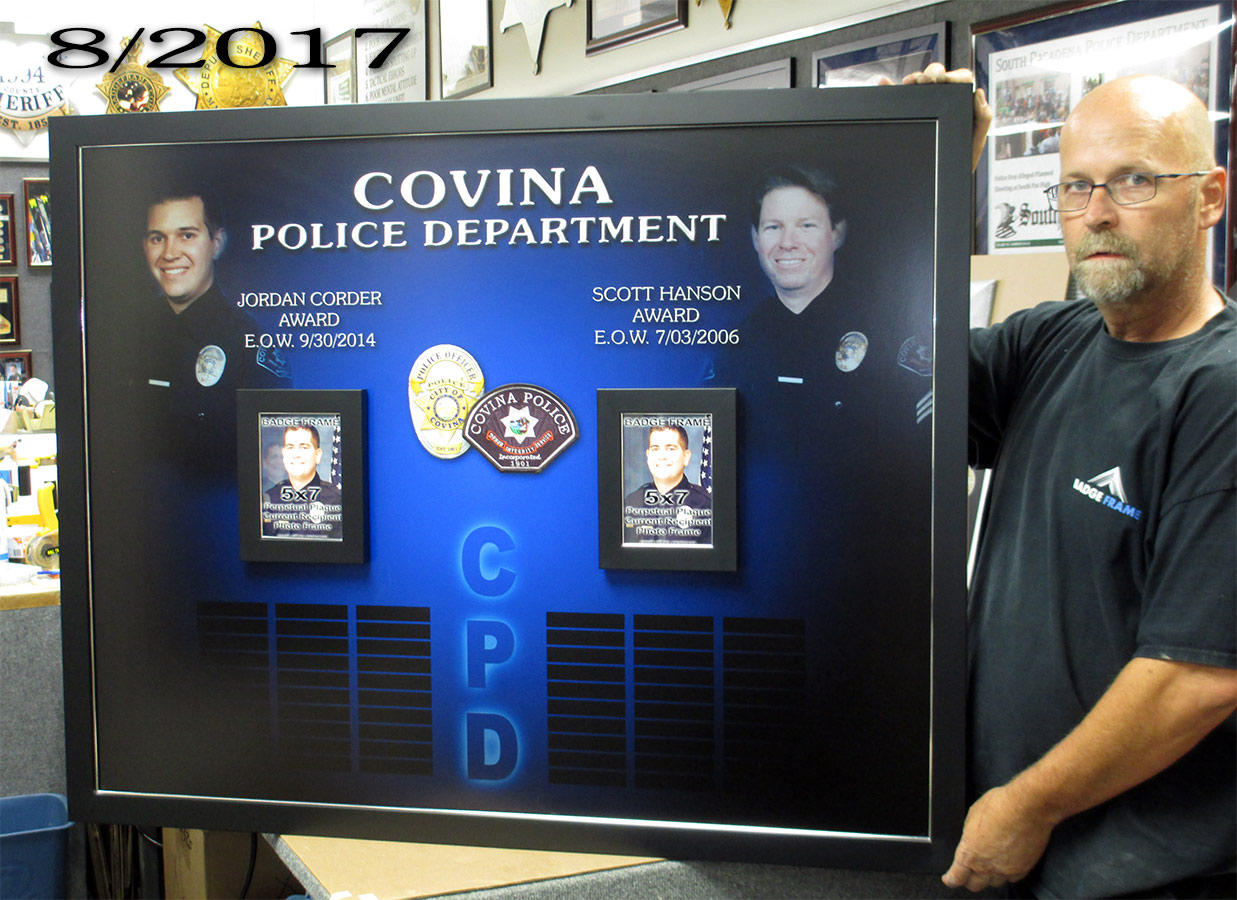
Outstanding recognition presentation featuring
10 - 5X7 current recipient frames
surrounded by a outer larger profile
frame. Background is laminated and
washable.
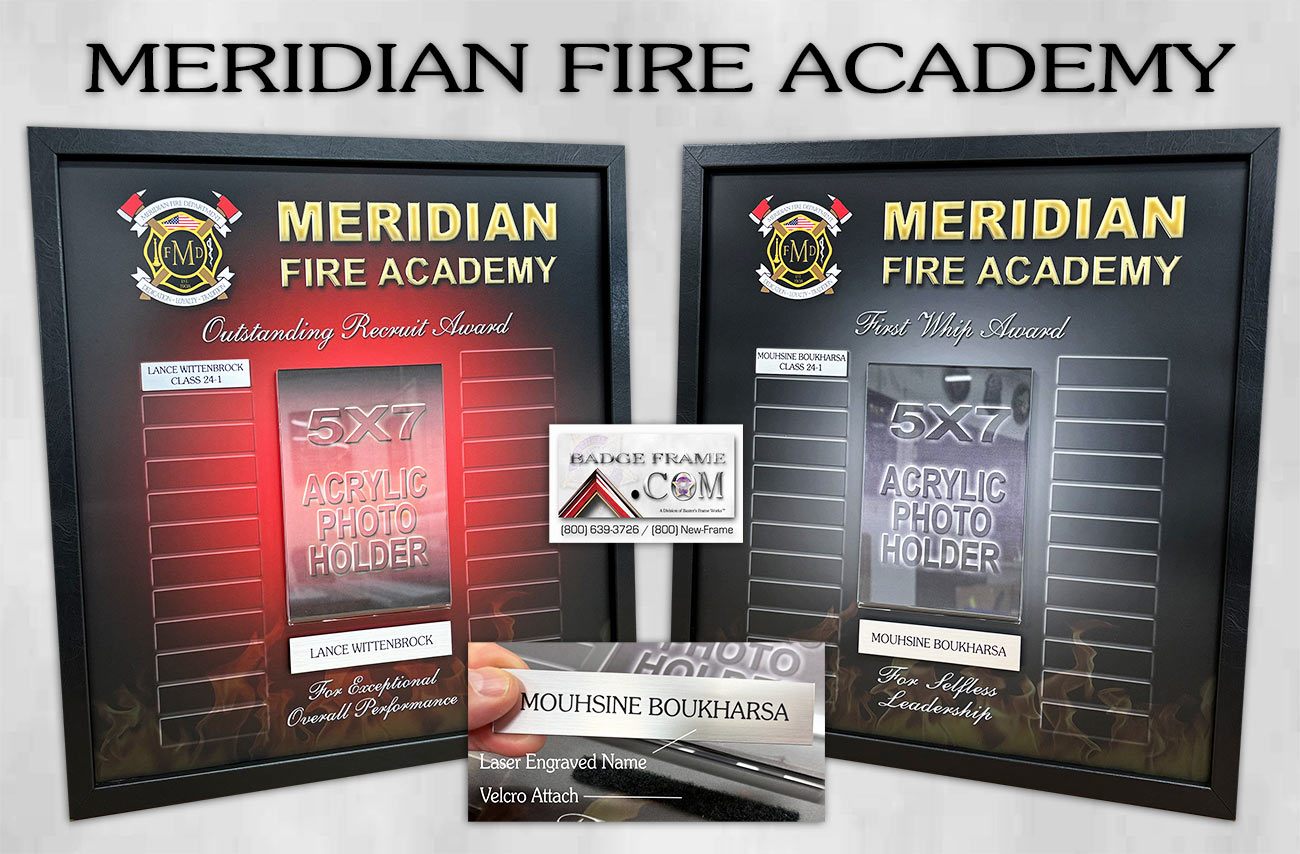
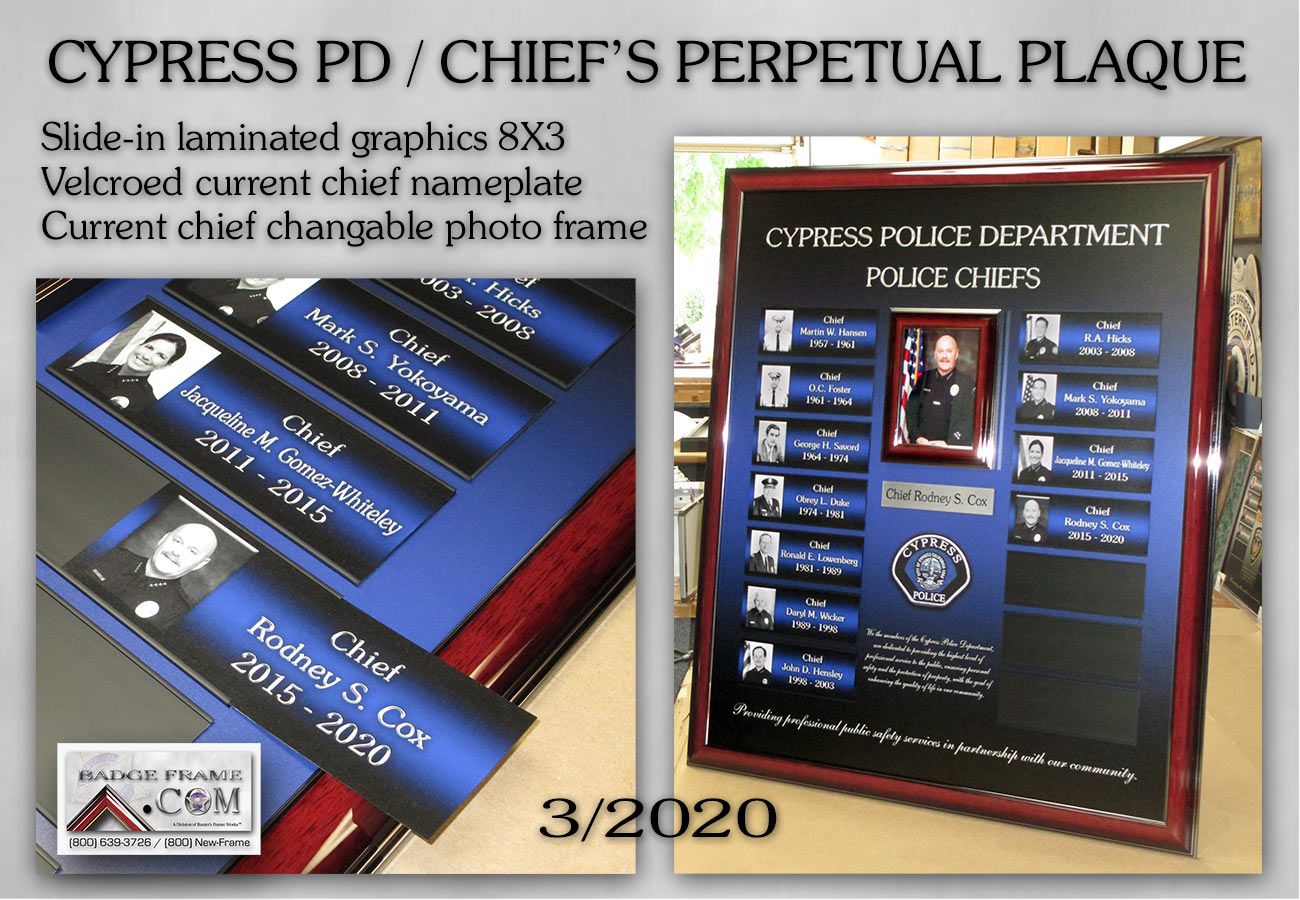
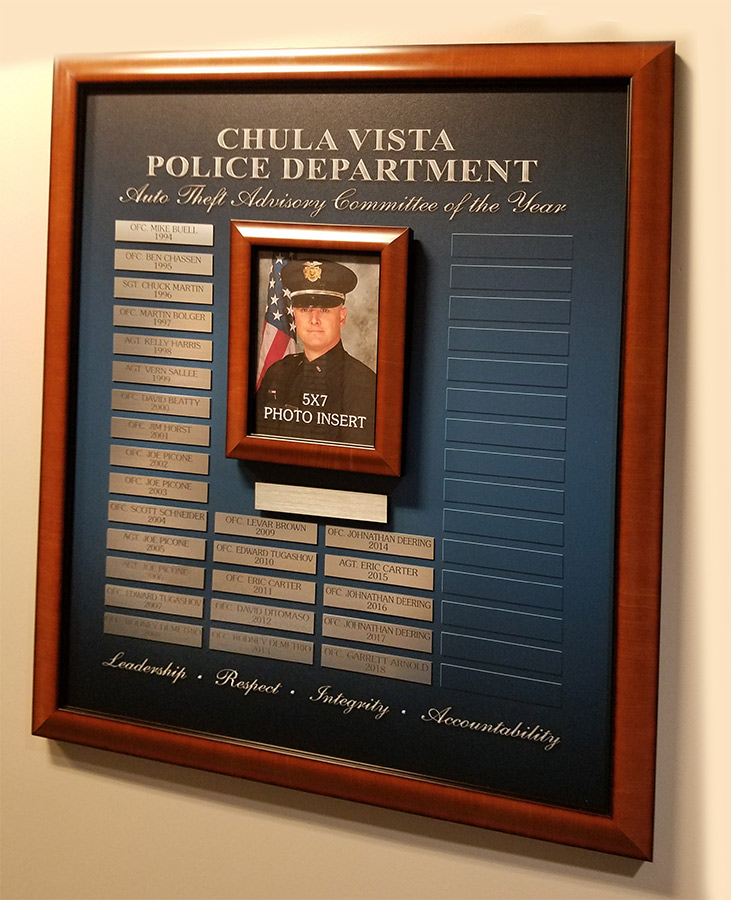
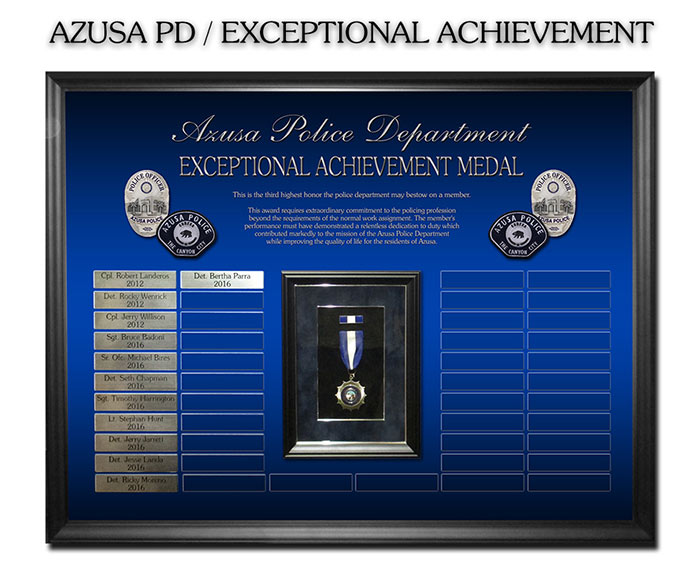
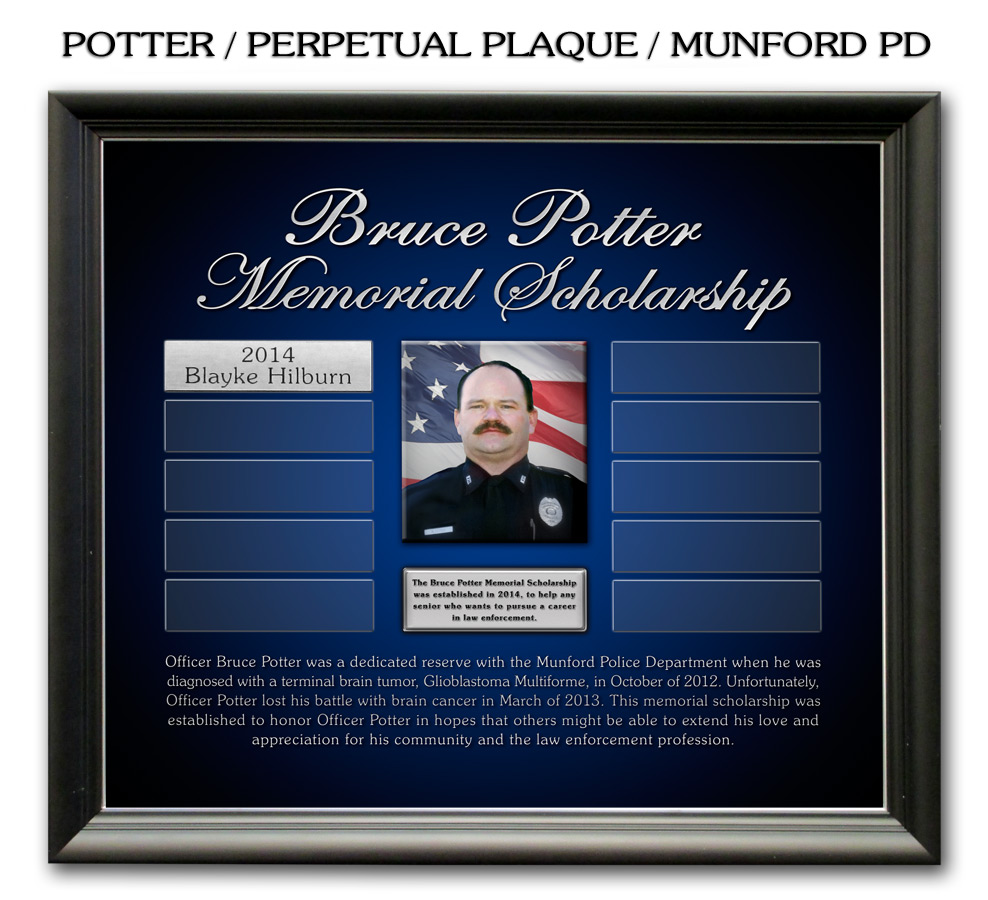
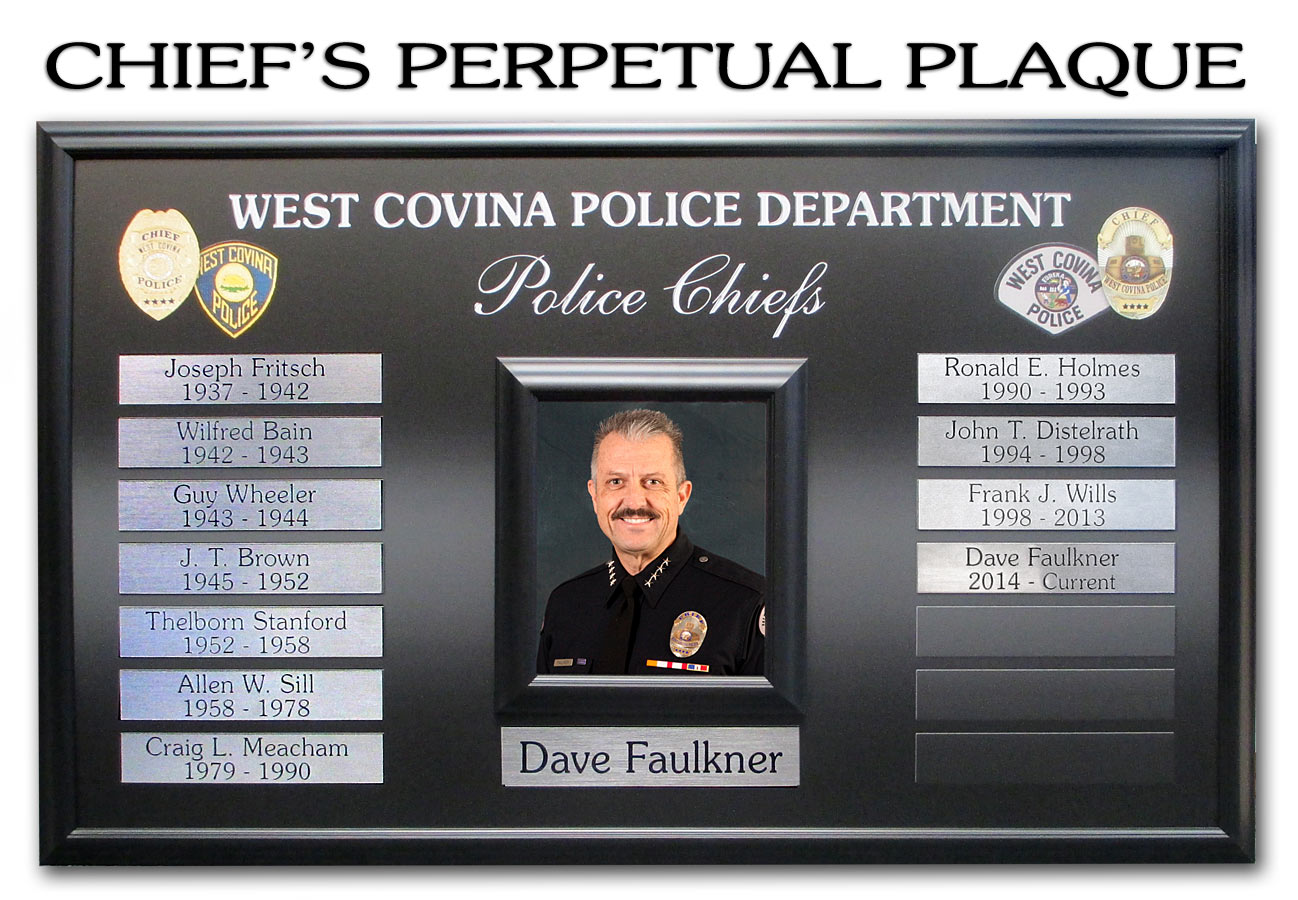
Plaque with 5X7 current recipient photo and laser
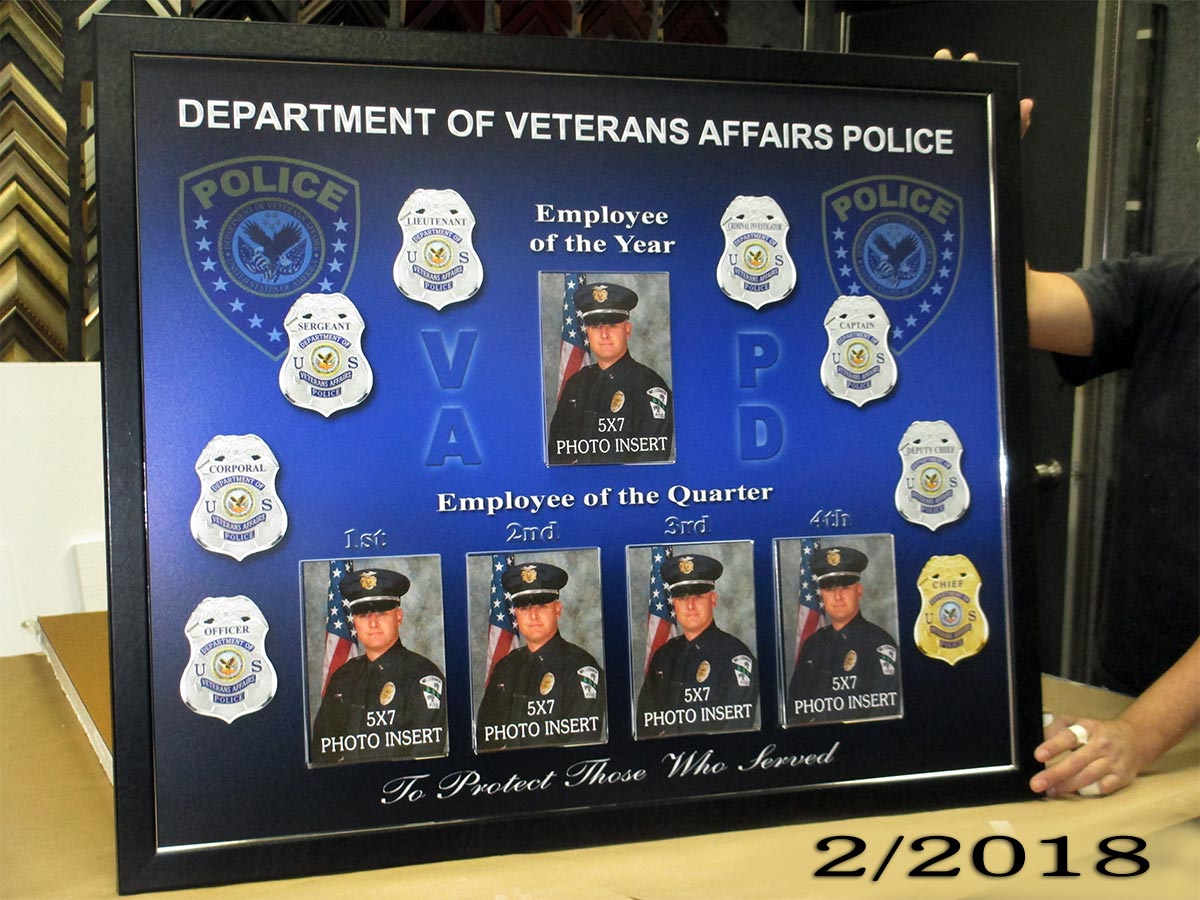
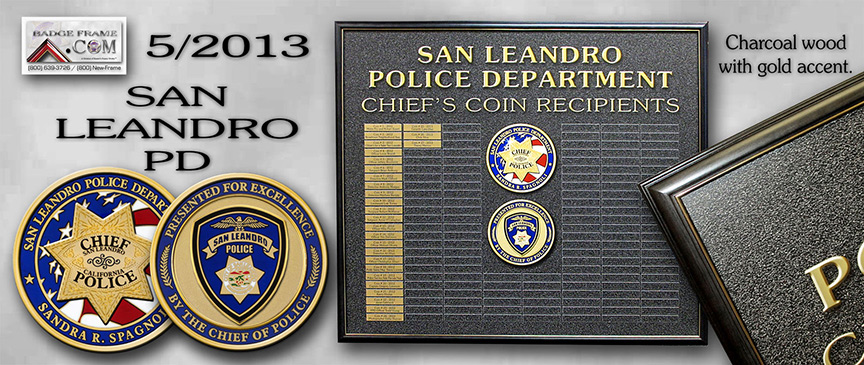
engraved plaque. Chief's Section here
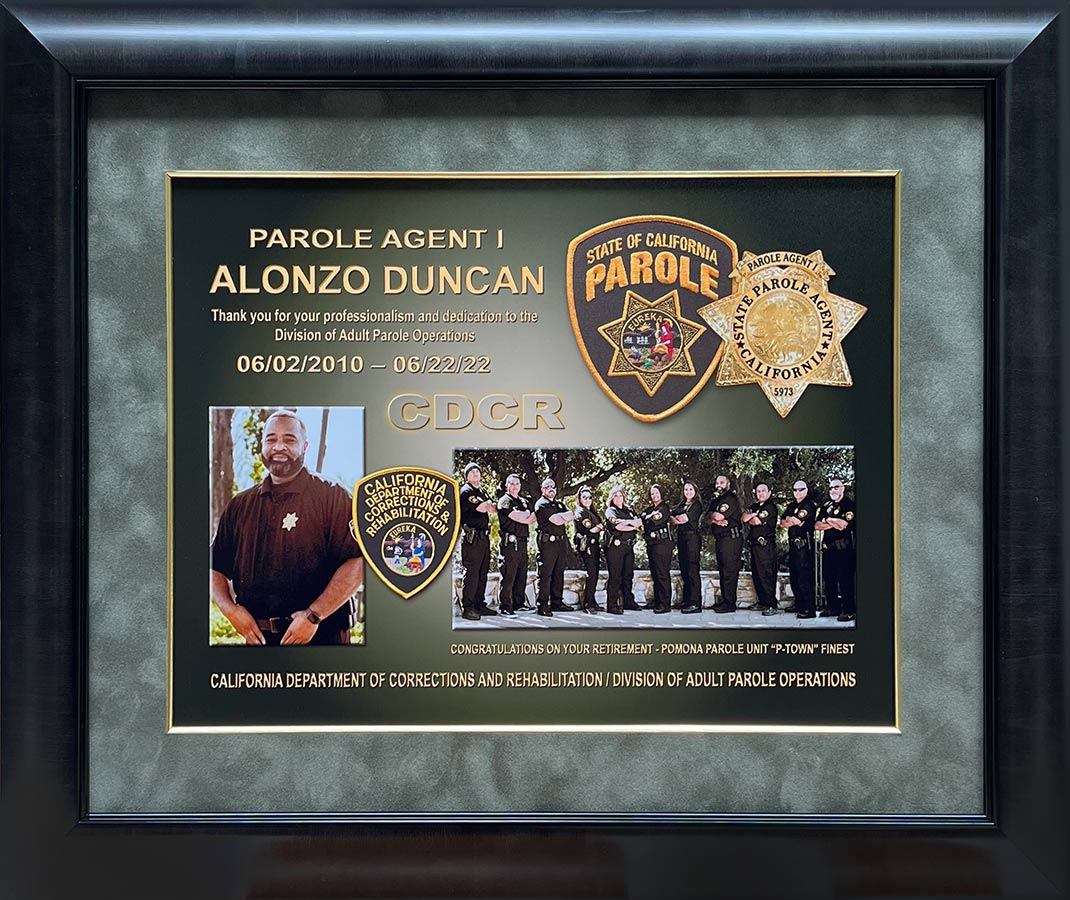
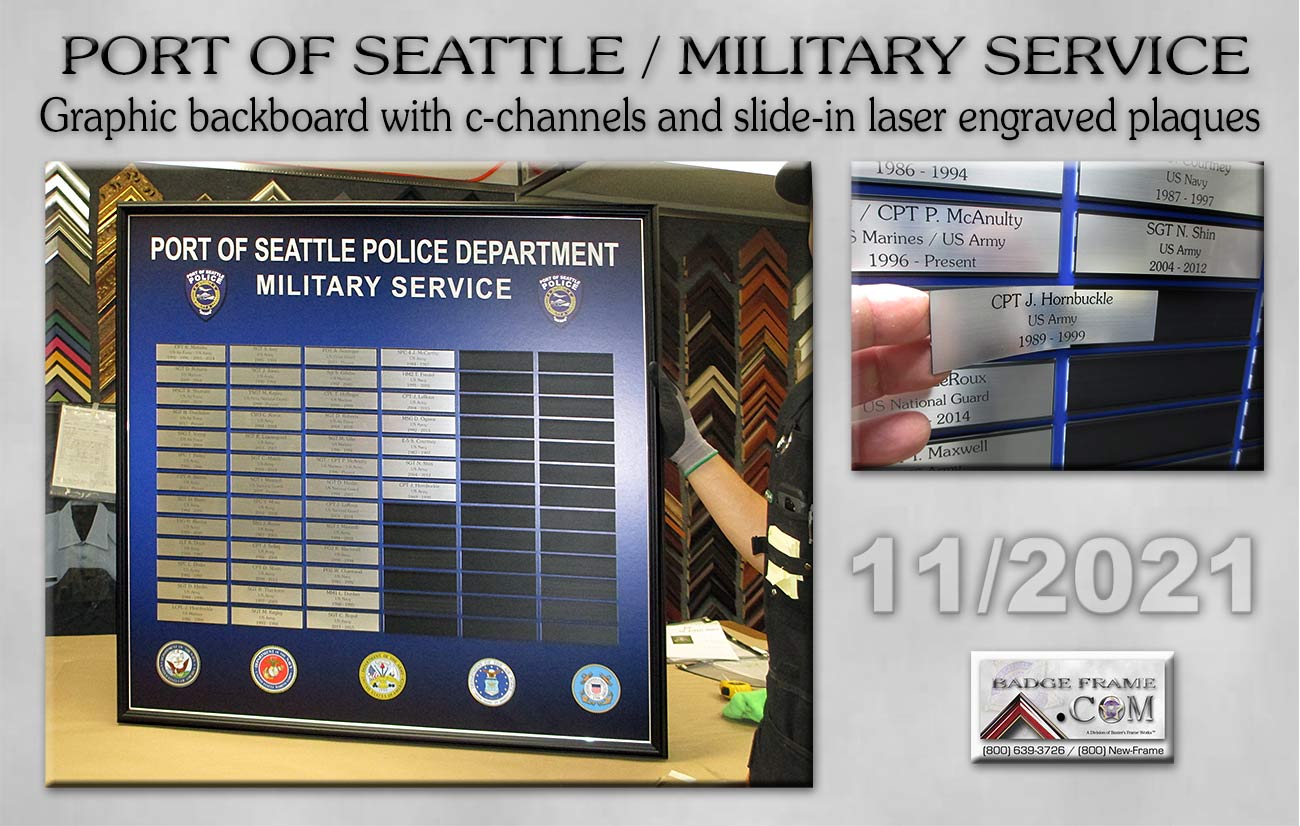
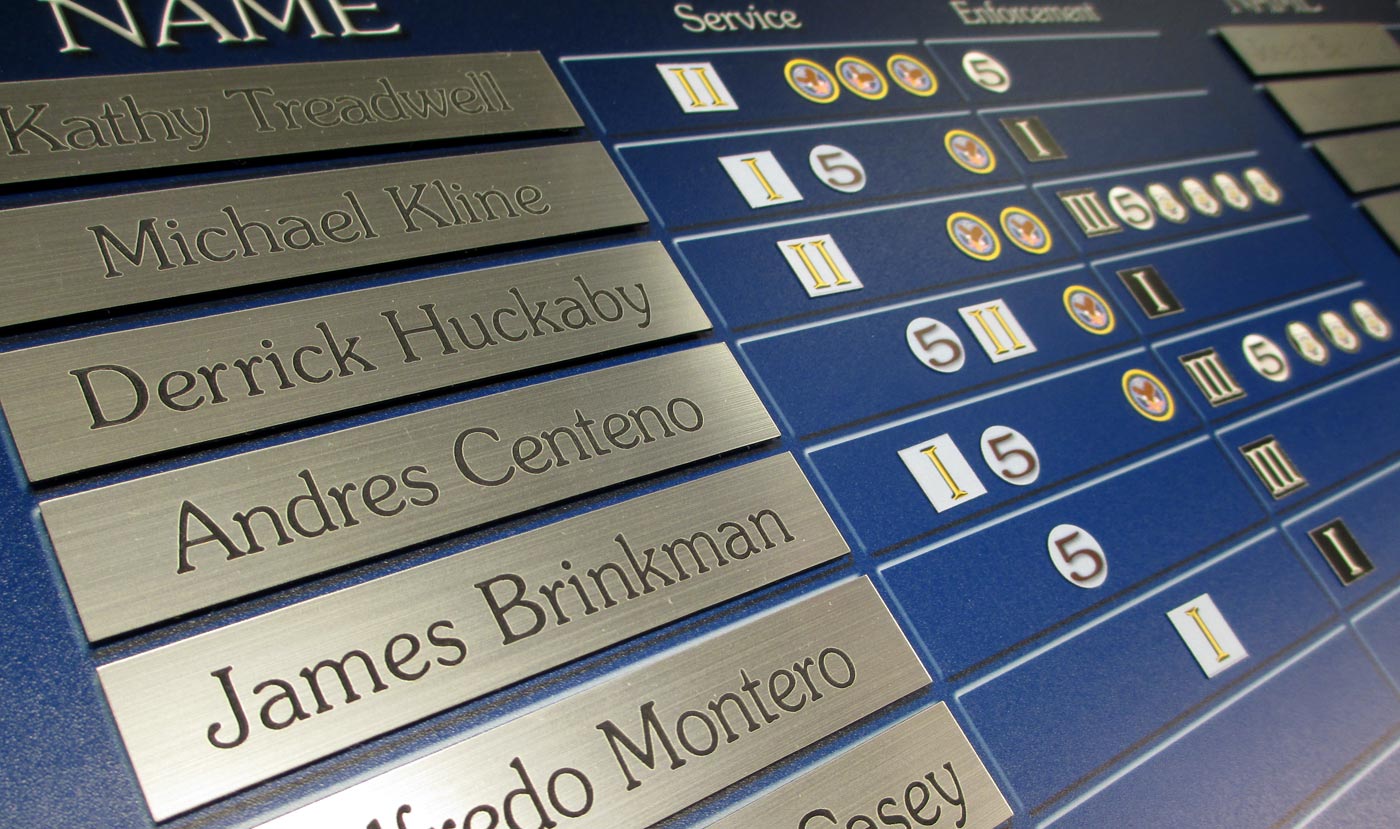
Department of Veteran's Affairs PD
Employee Recognition Presentation.
Interesting project incorporating magnetic,
laser engraved nameplates with square and
round printed magnets that symbolize
different levels of achievement
in various areas.
Backboard was magnetic, printed with custom
graphics,
laminated, and framed in black leather with
a silver
accent fillet. 11/2013
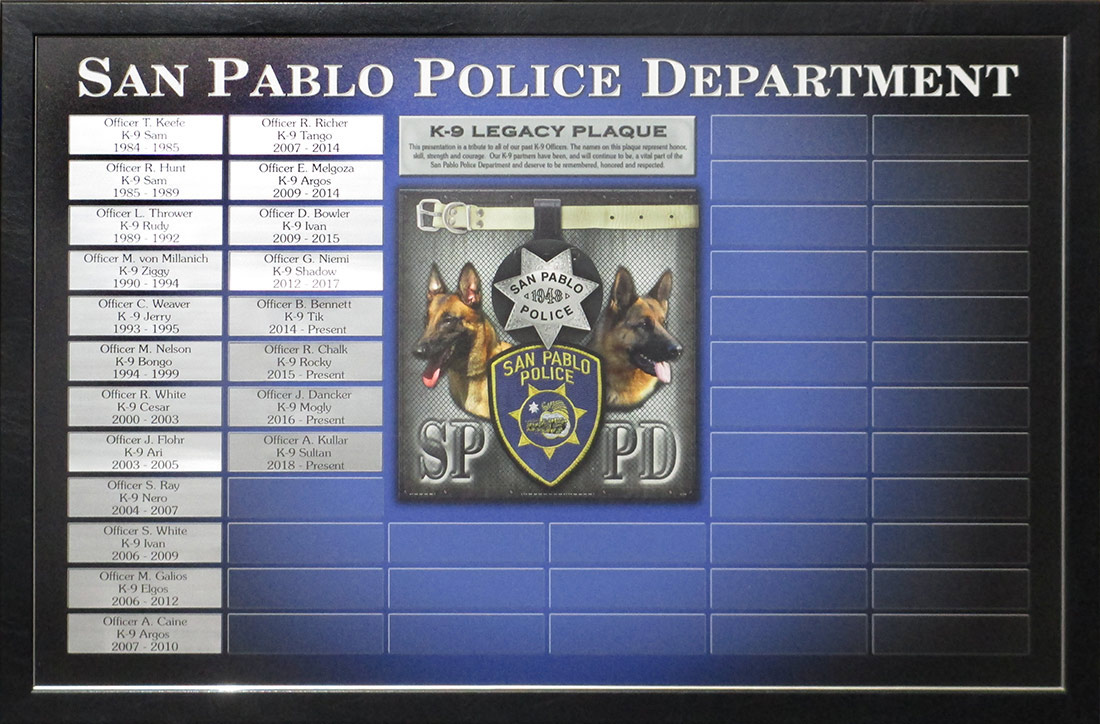
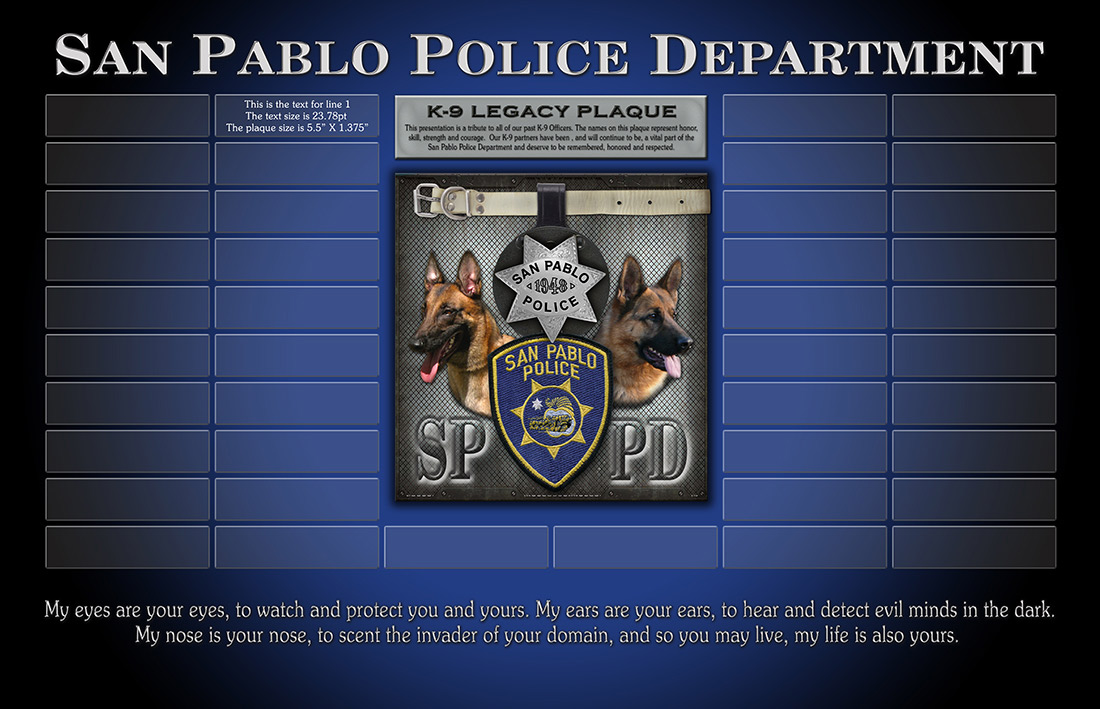
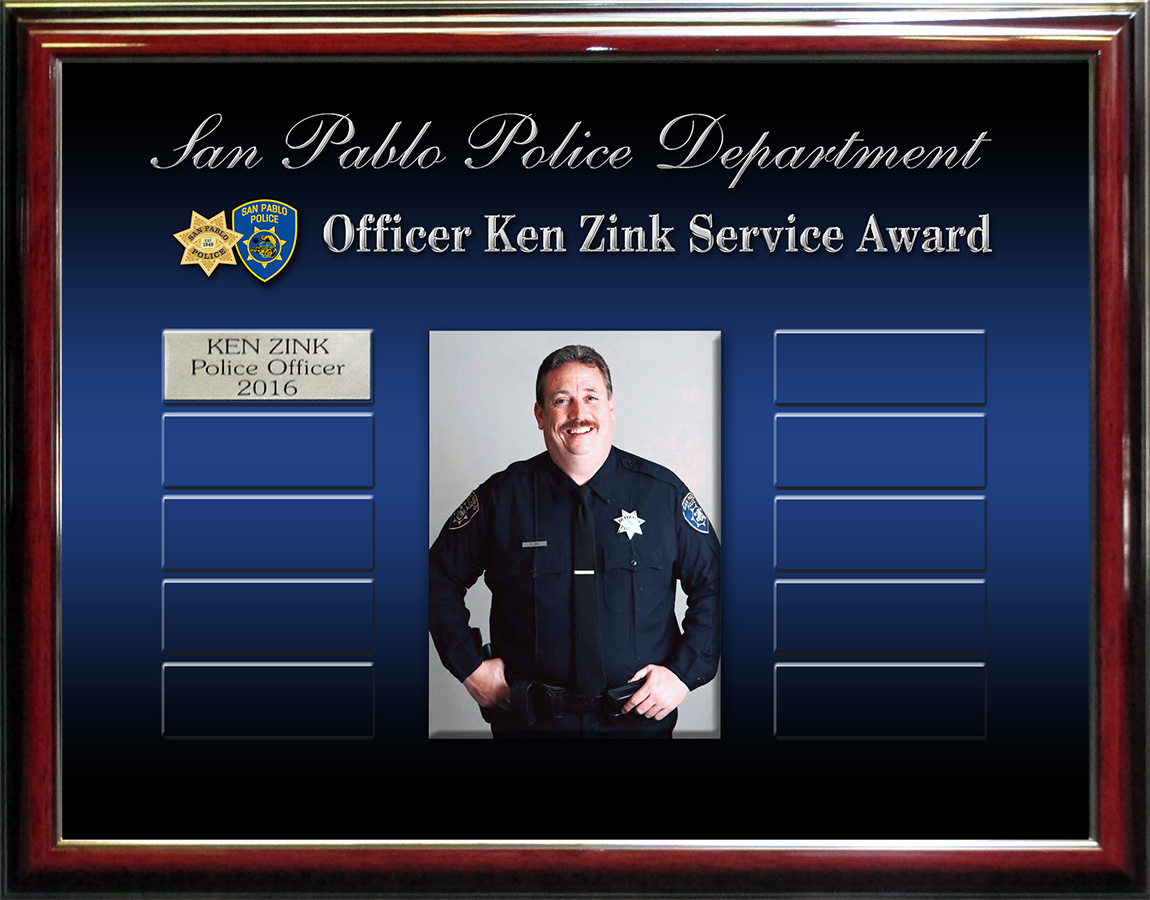
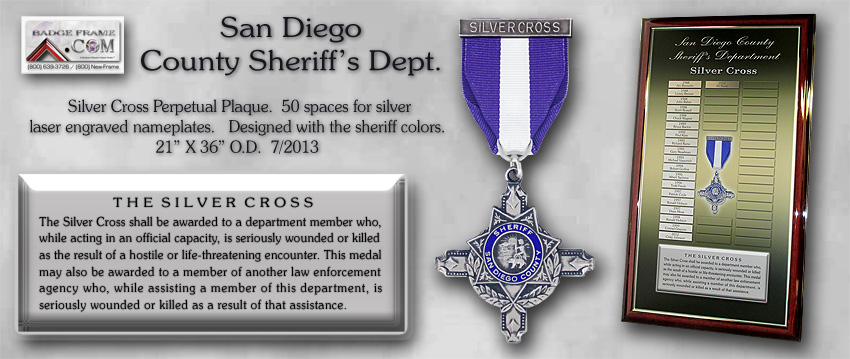
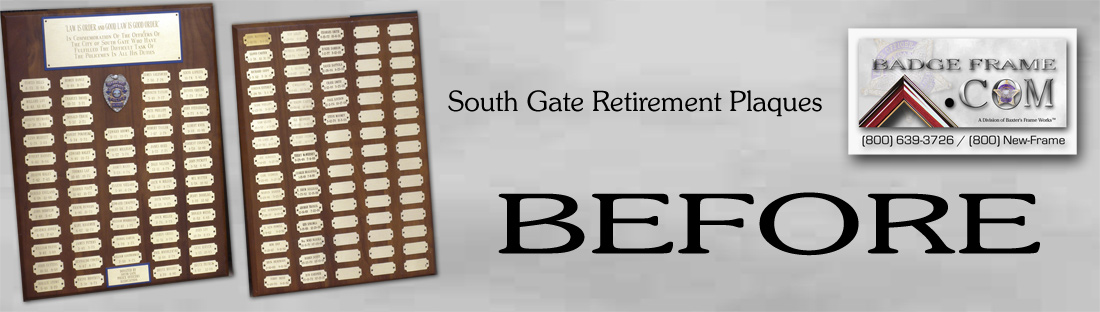
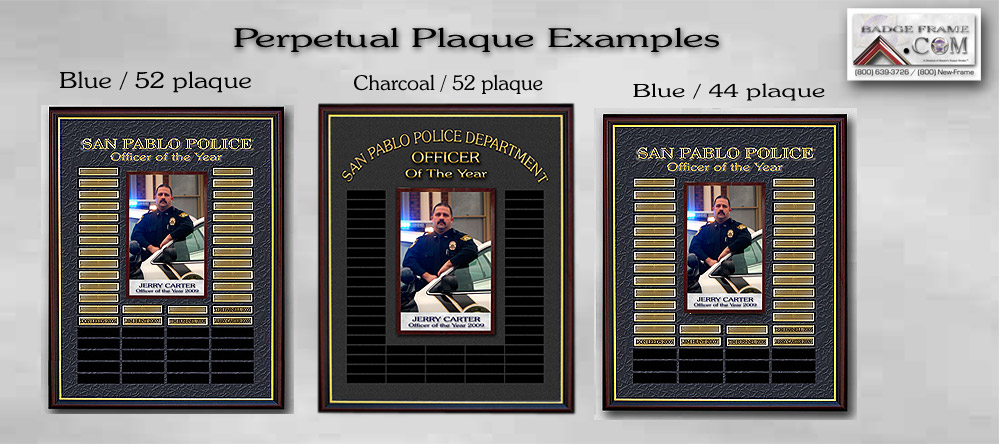
San Pablo
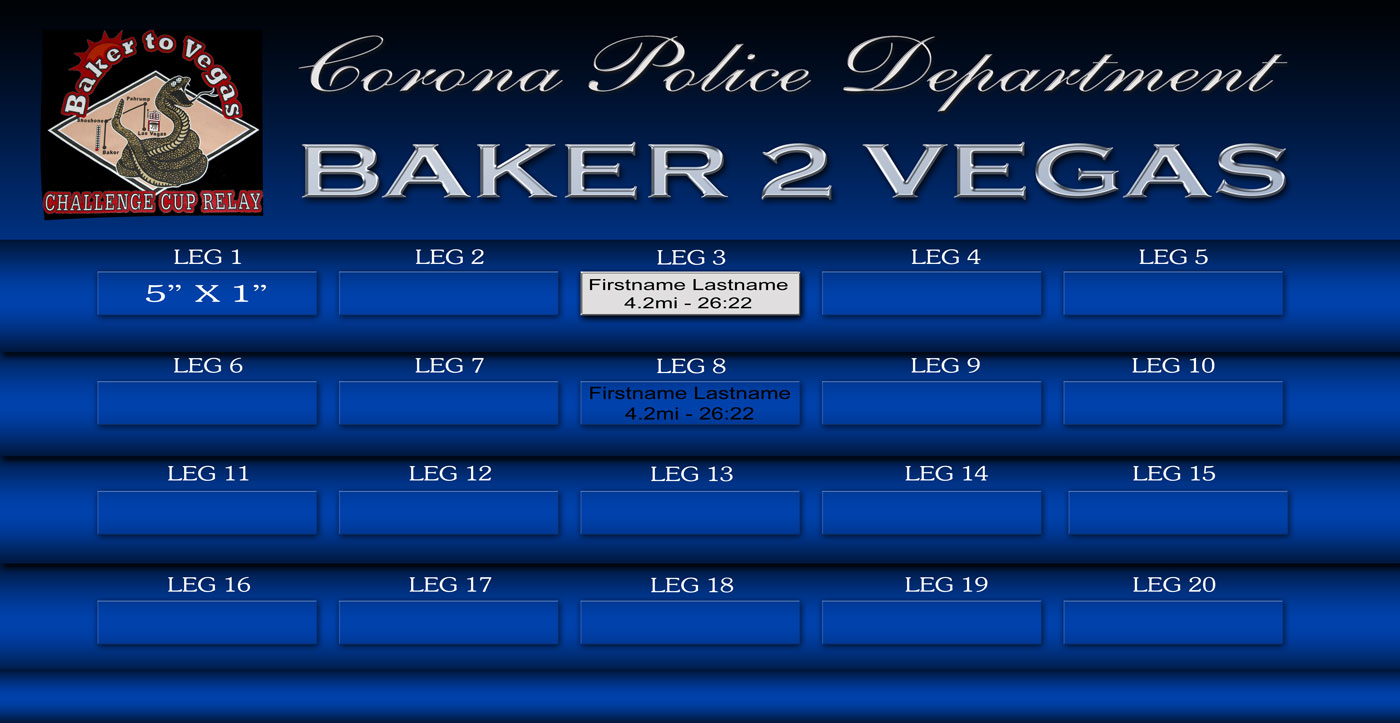
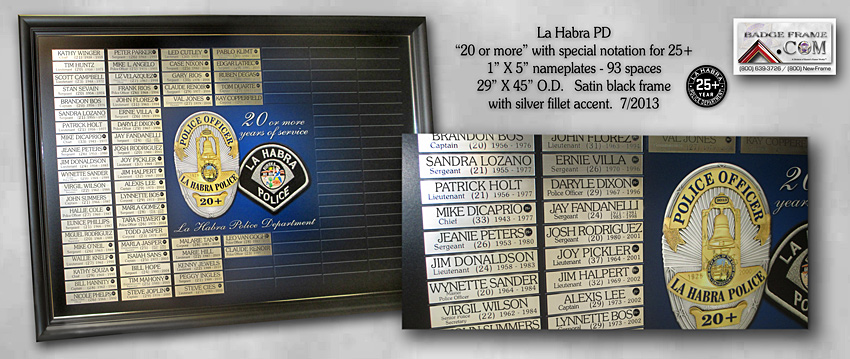
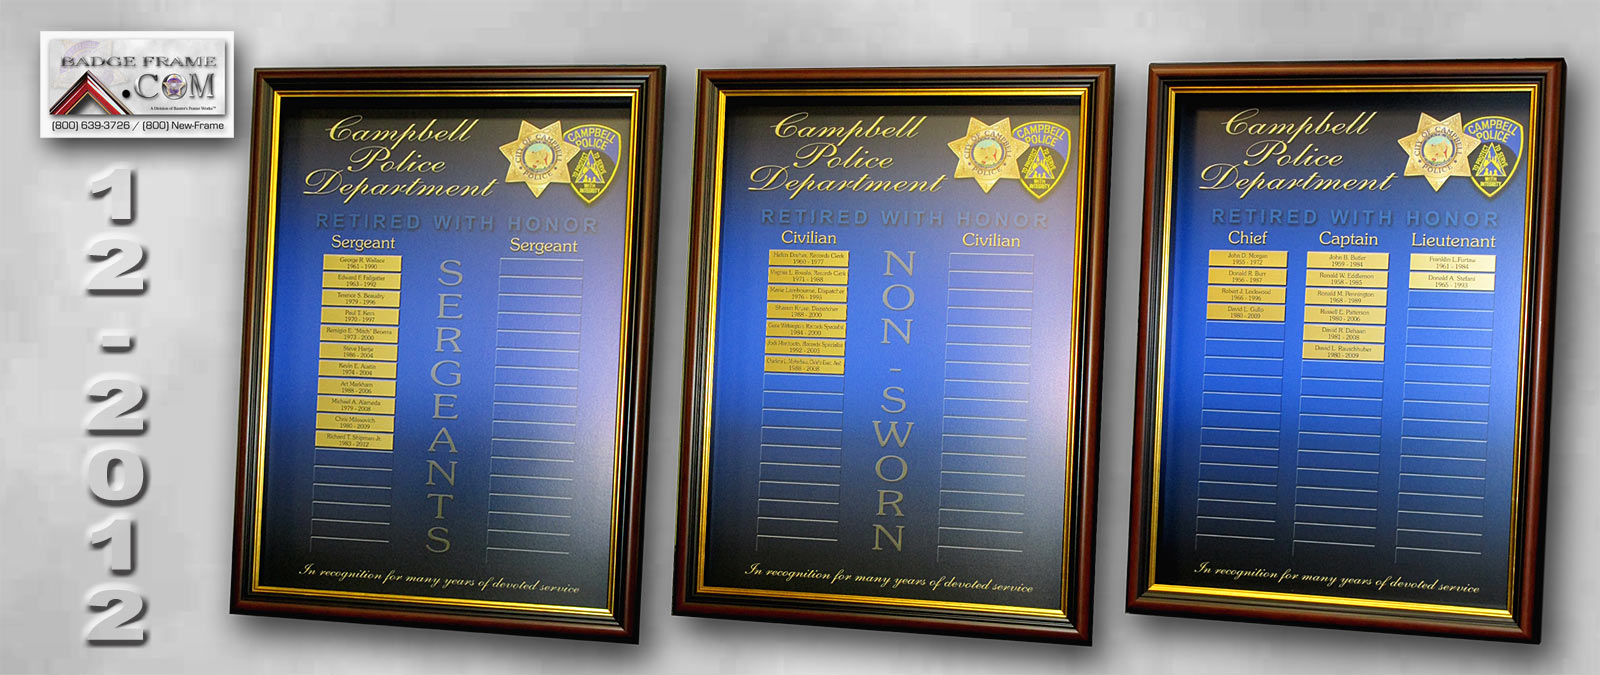
PD. Sergeants and above = 5" X 1".
Officers 5" X 5/8".
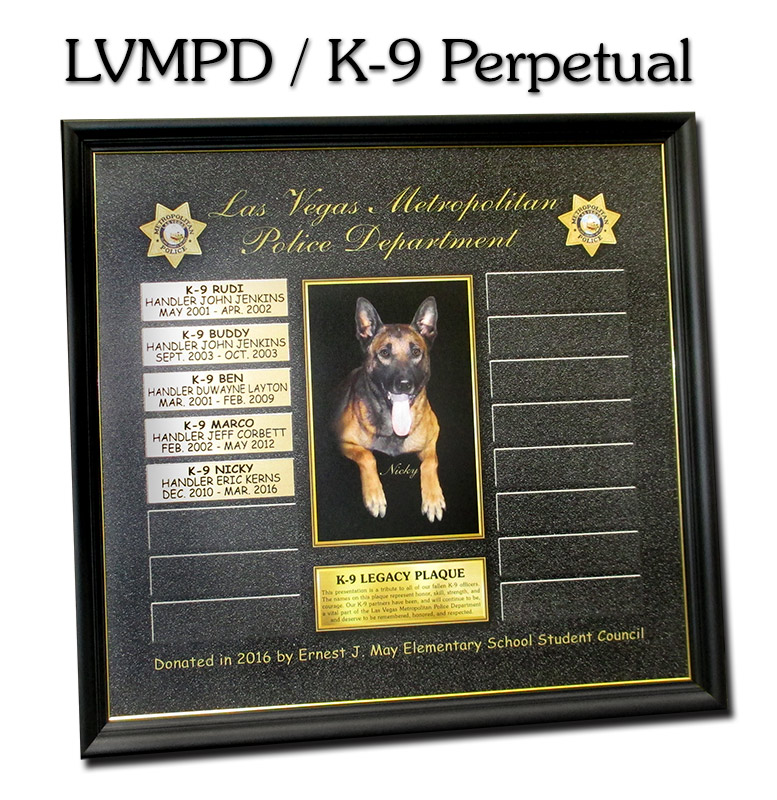
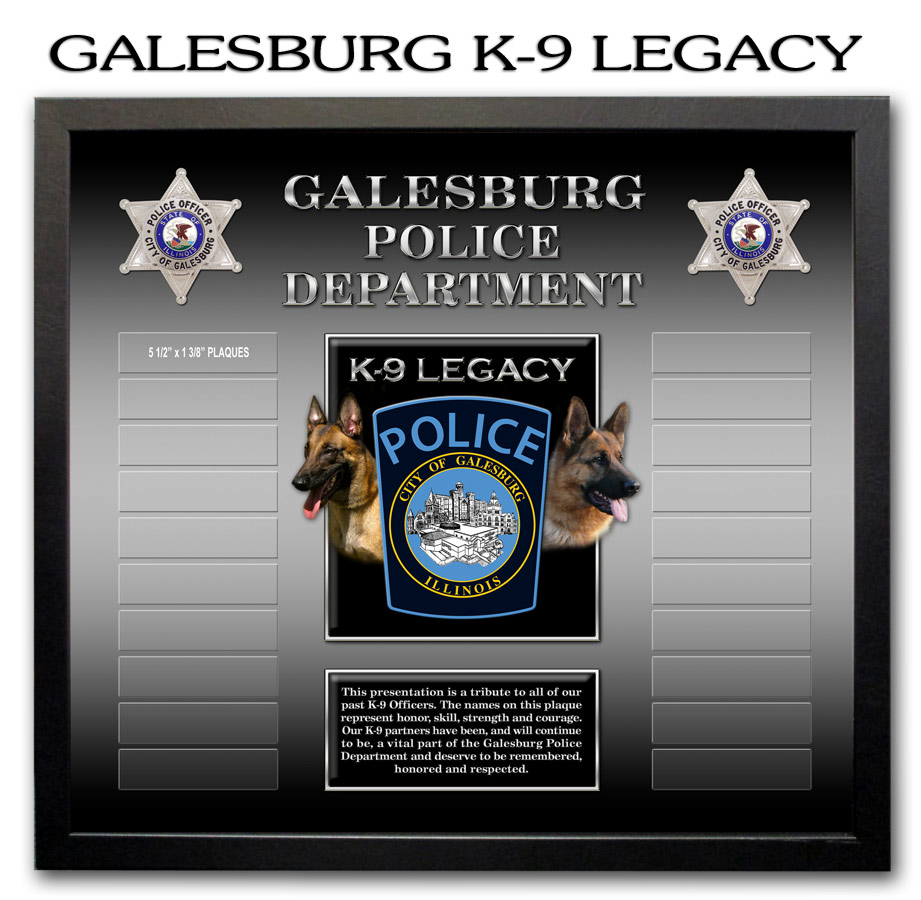
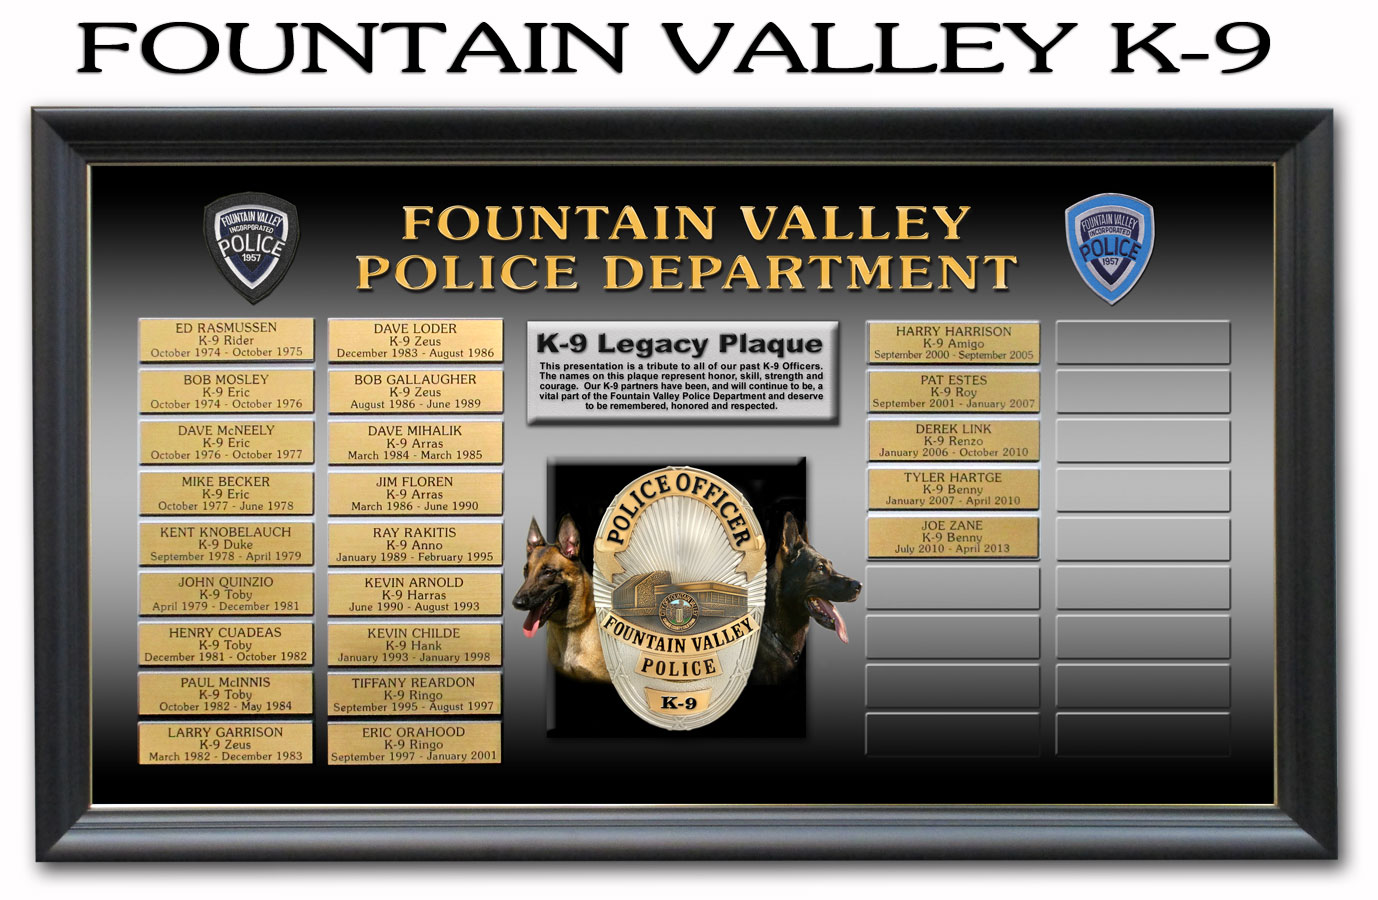
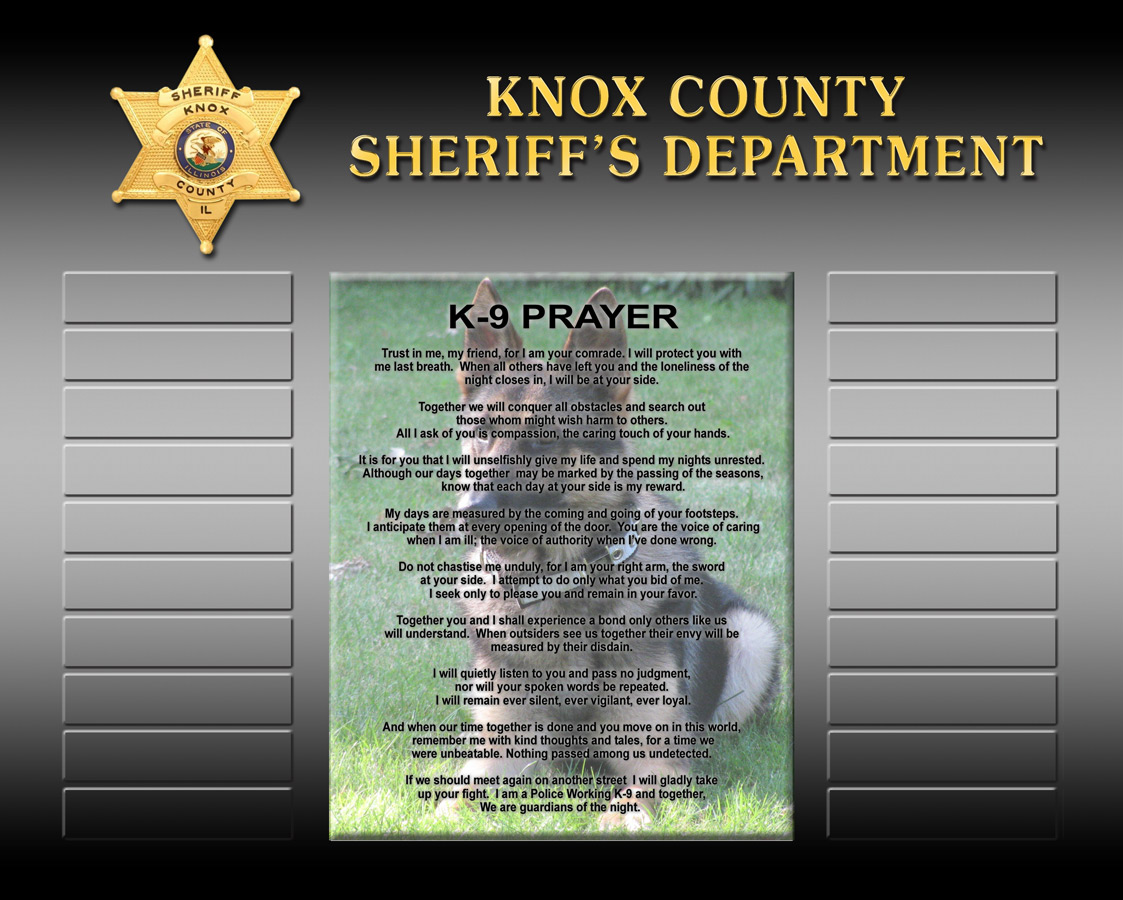
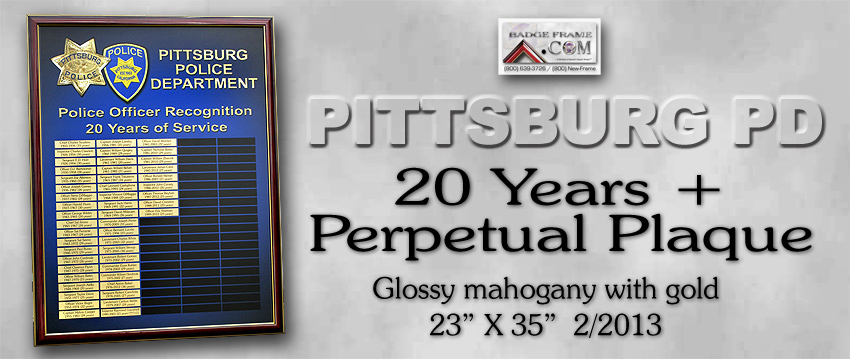
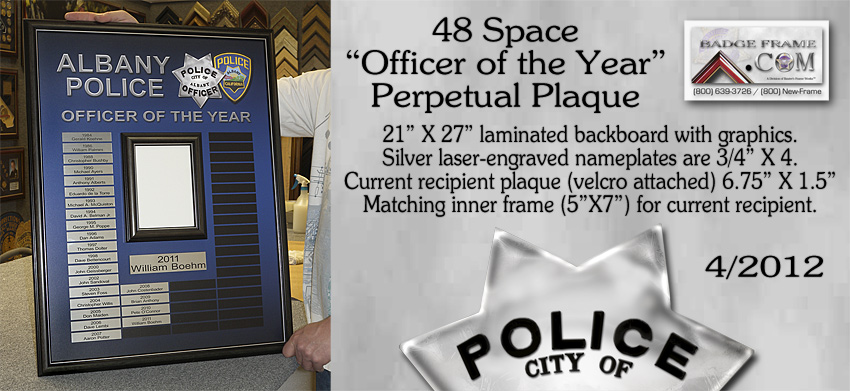
Knox County 20
space K-9 Perpetual Plaque Options... Click to
enlarge.
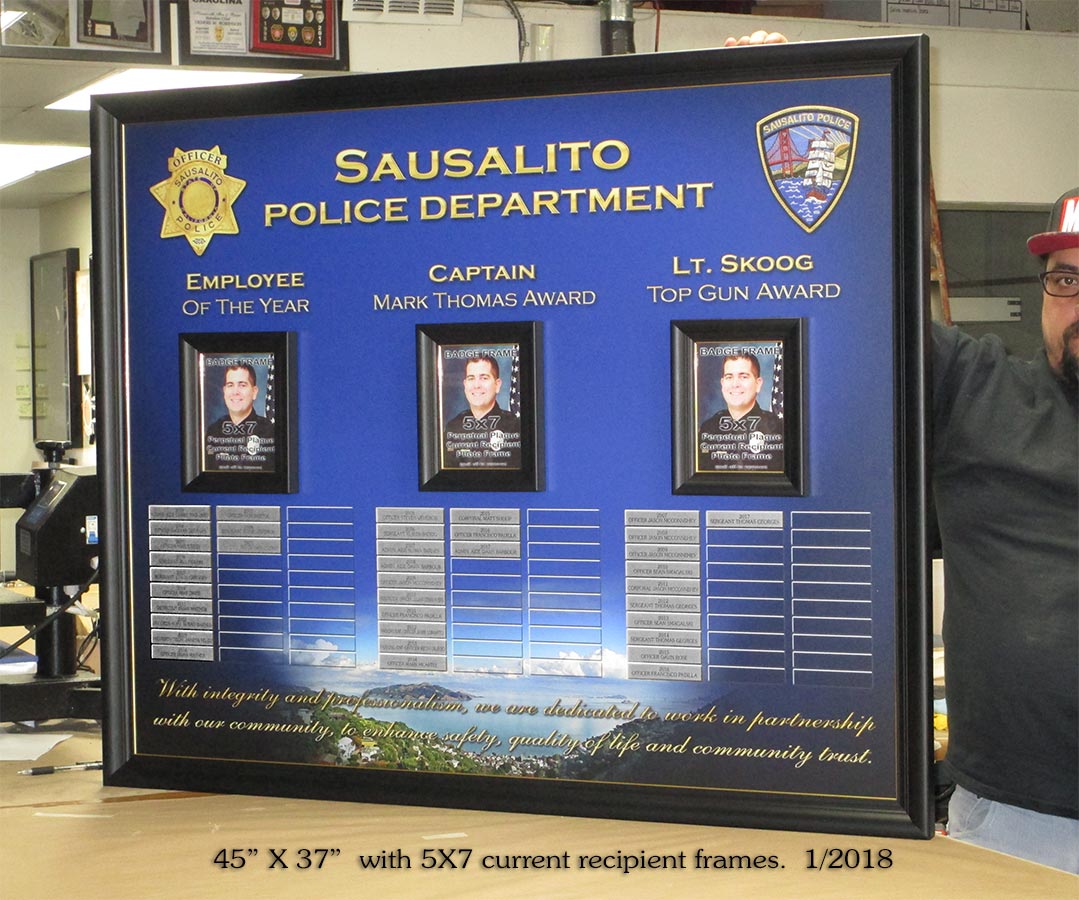
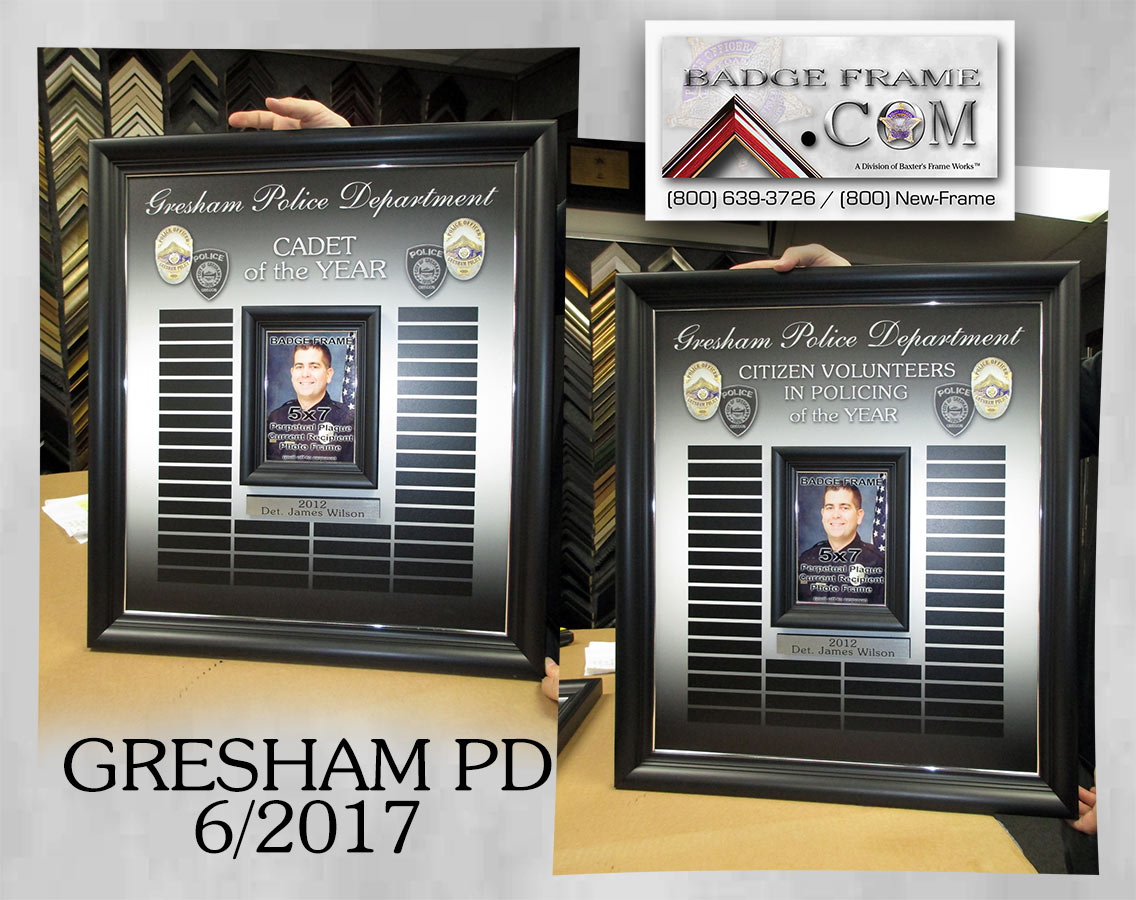
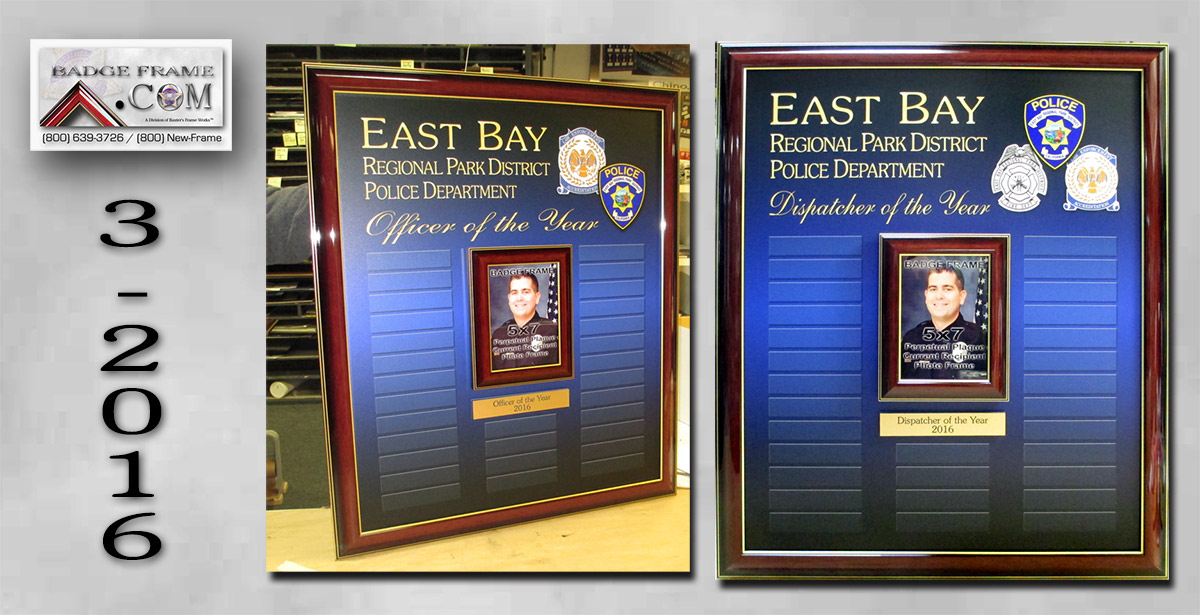
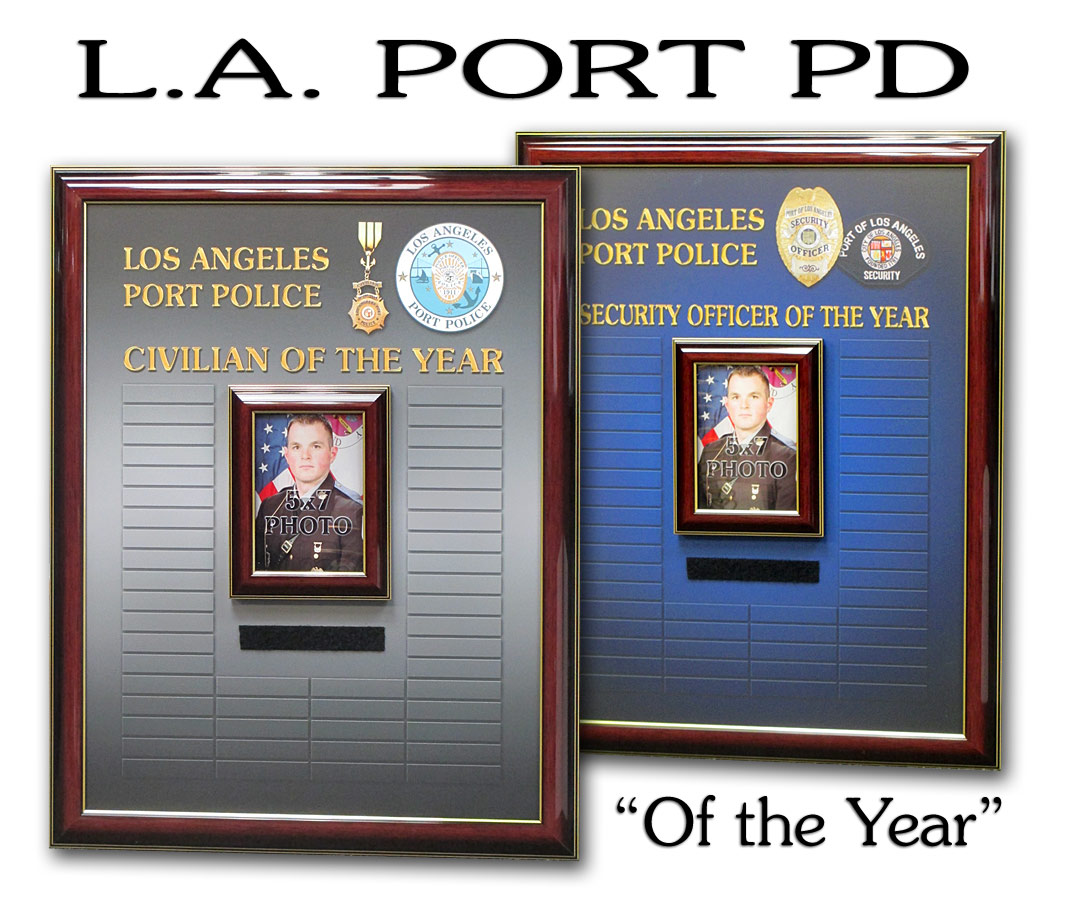
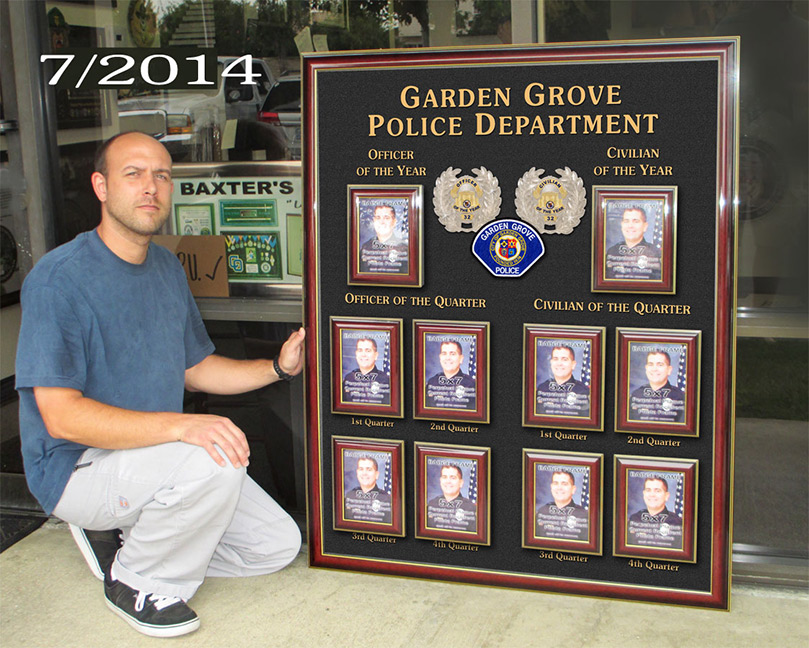
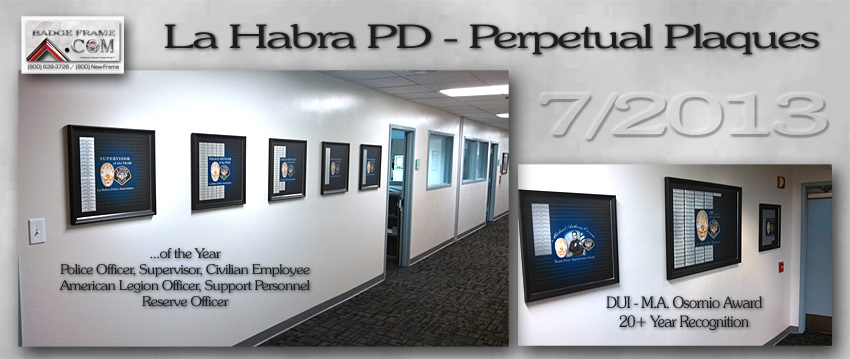
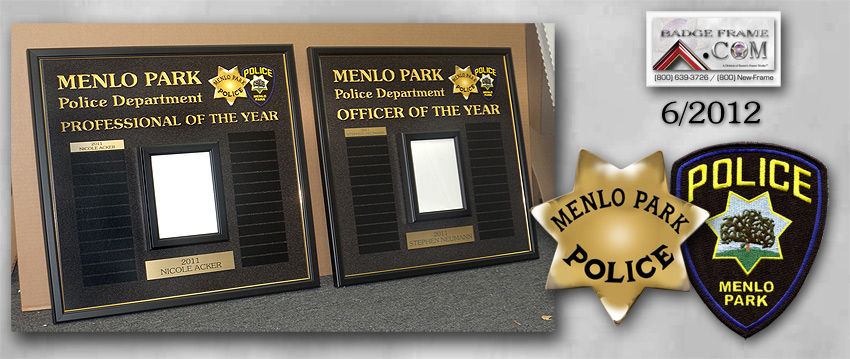
Menlo Park PD - Perpetual Plaques "Officer of the Year"
& "Professional of the Year" with a 5" X 7" center
frame for current recipient. larger
image here
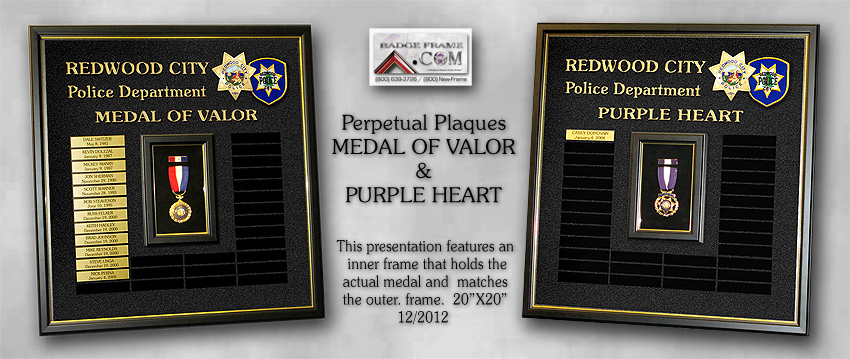
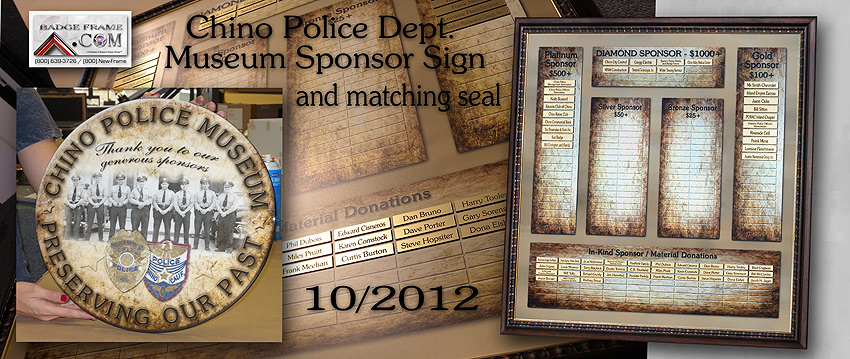
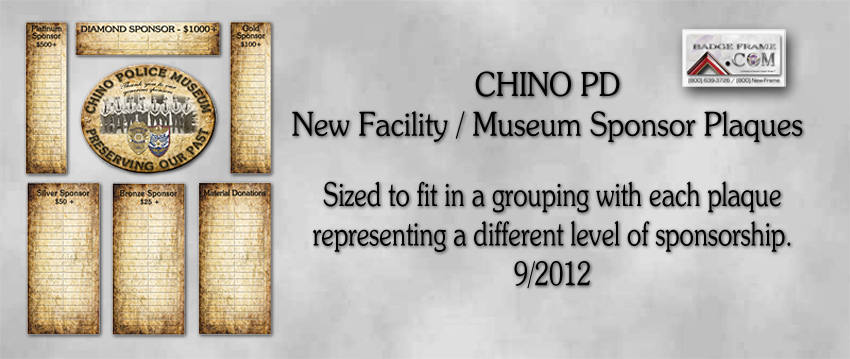
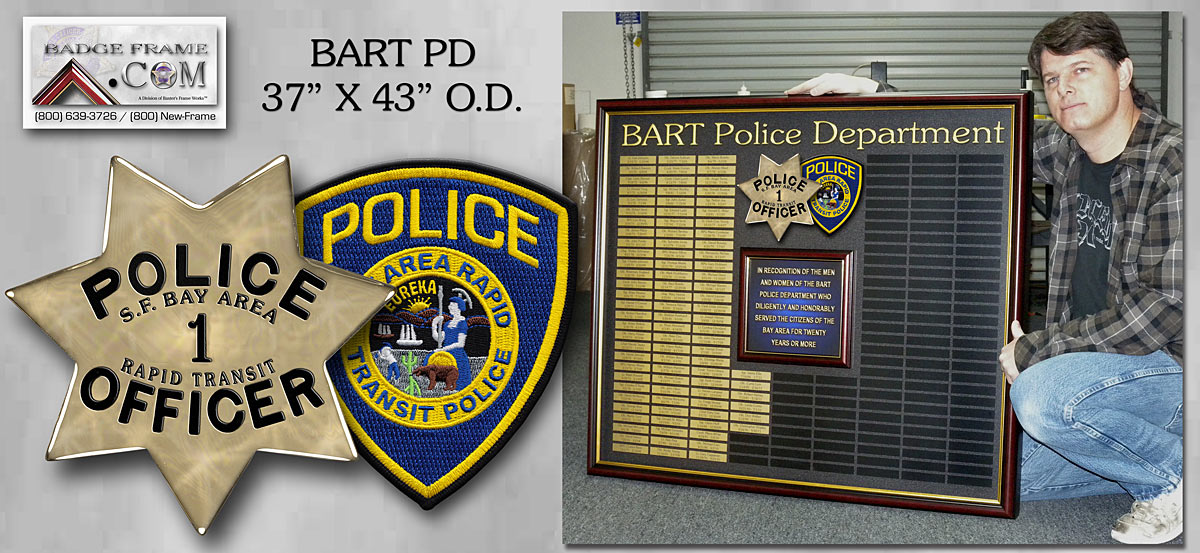
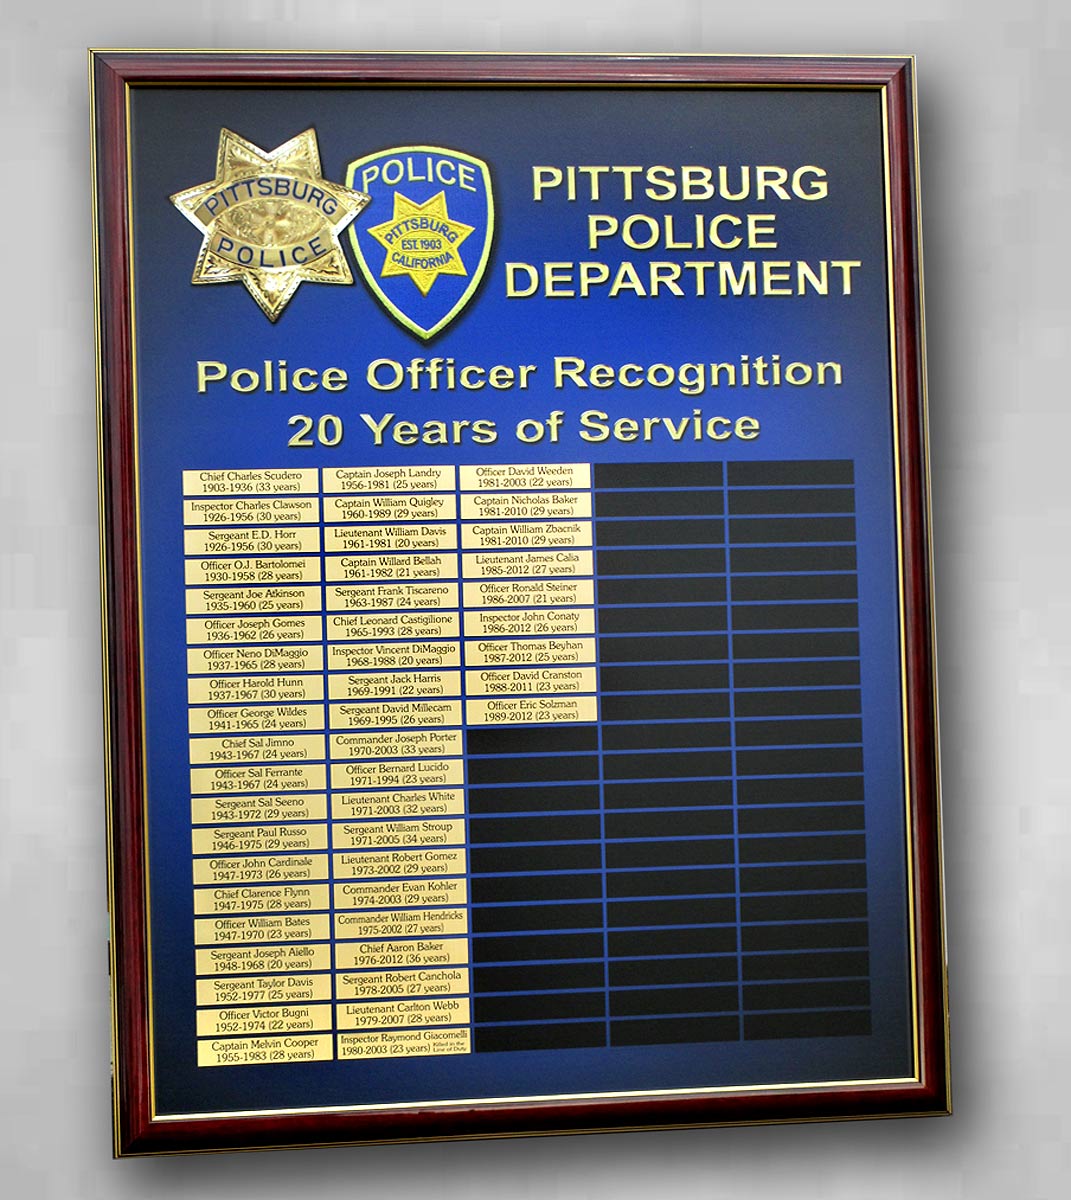
SECTION 3
Bart PD Perpetual Plaque displaying
names and dates of those with 20 years or more
service.
Framed in mahogany shadowbox with gold fillet
inside main frame and inner frame describing
presentation.
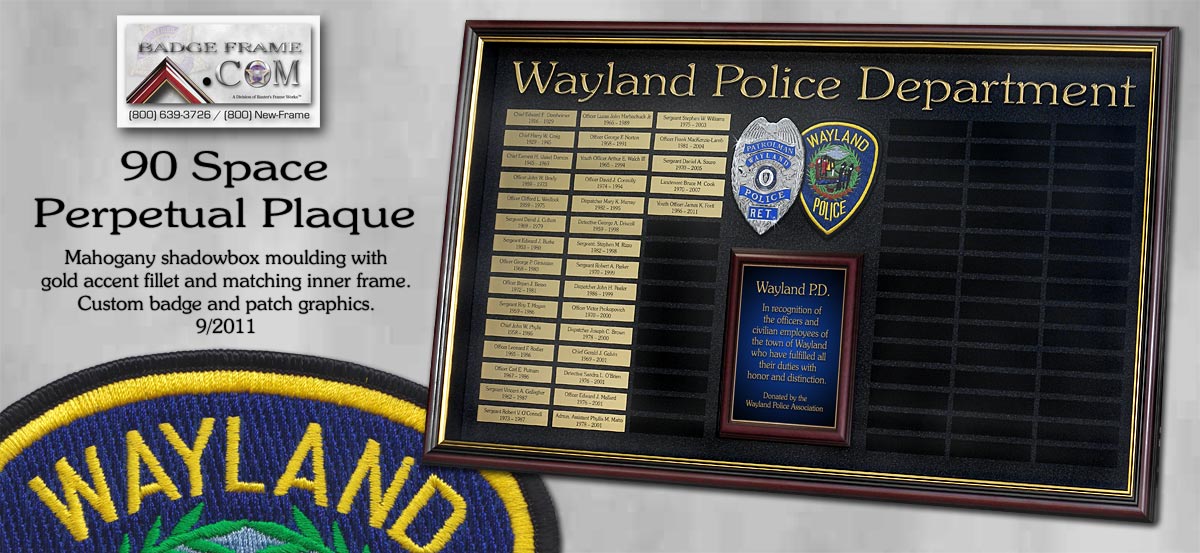
"Received
the plaque today. Came out great.
Thank you.
Our fire department may be contacting you
for one of their own." - Robert Irving / Chief /
Wayland PD
Bill and Sarah:
You are awesome! The Chief loves it, the Captains love it, I
love it and the ranks are gonna love it too!
Thank you so much. Best Regards, Dana
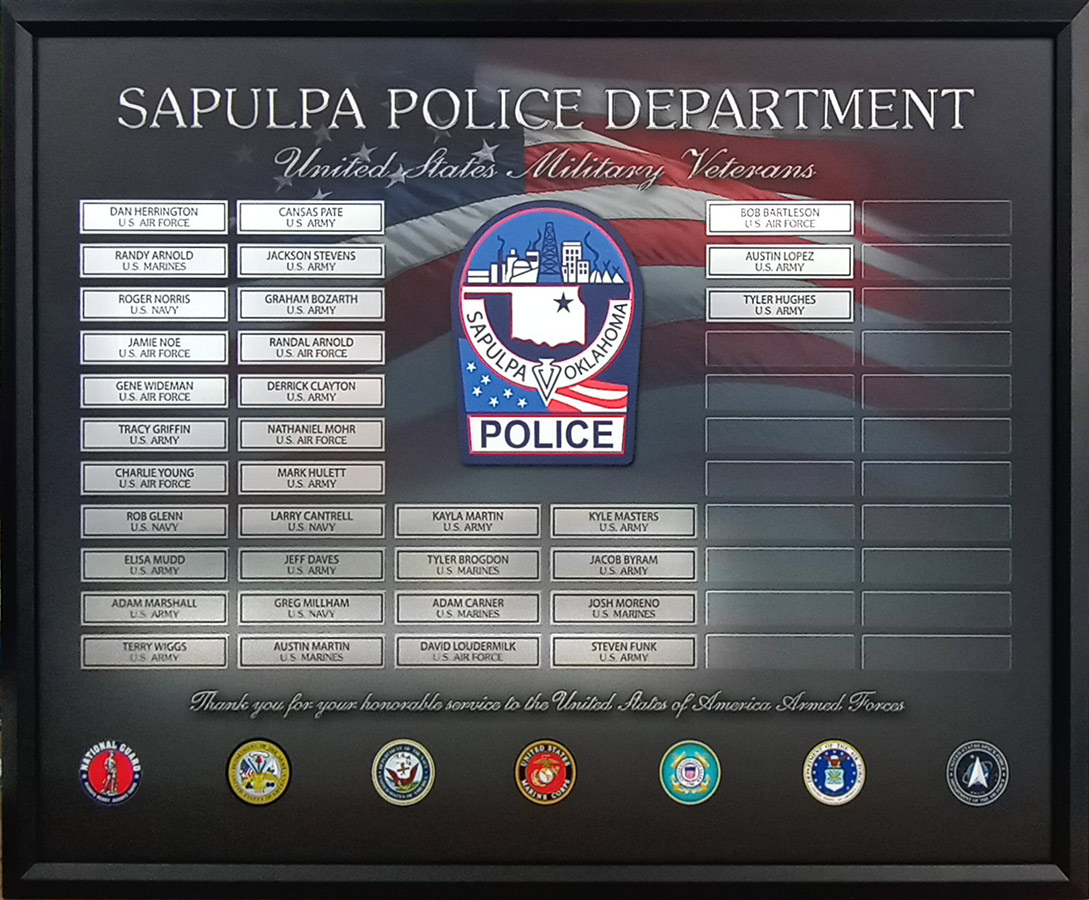
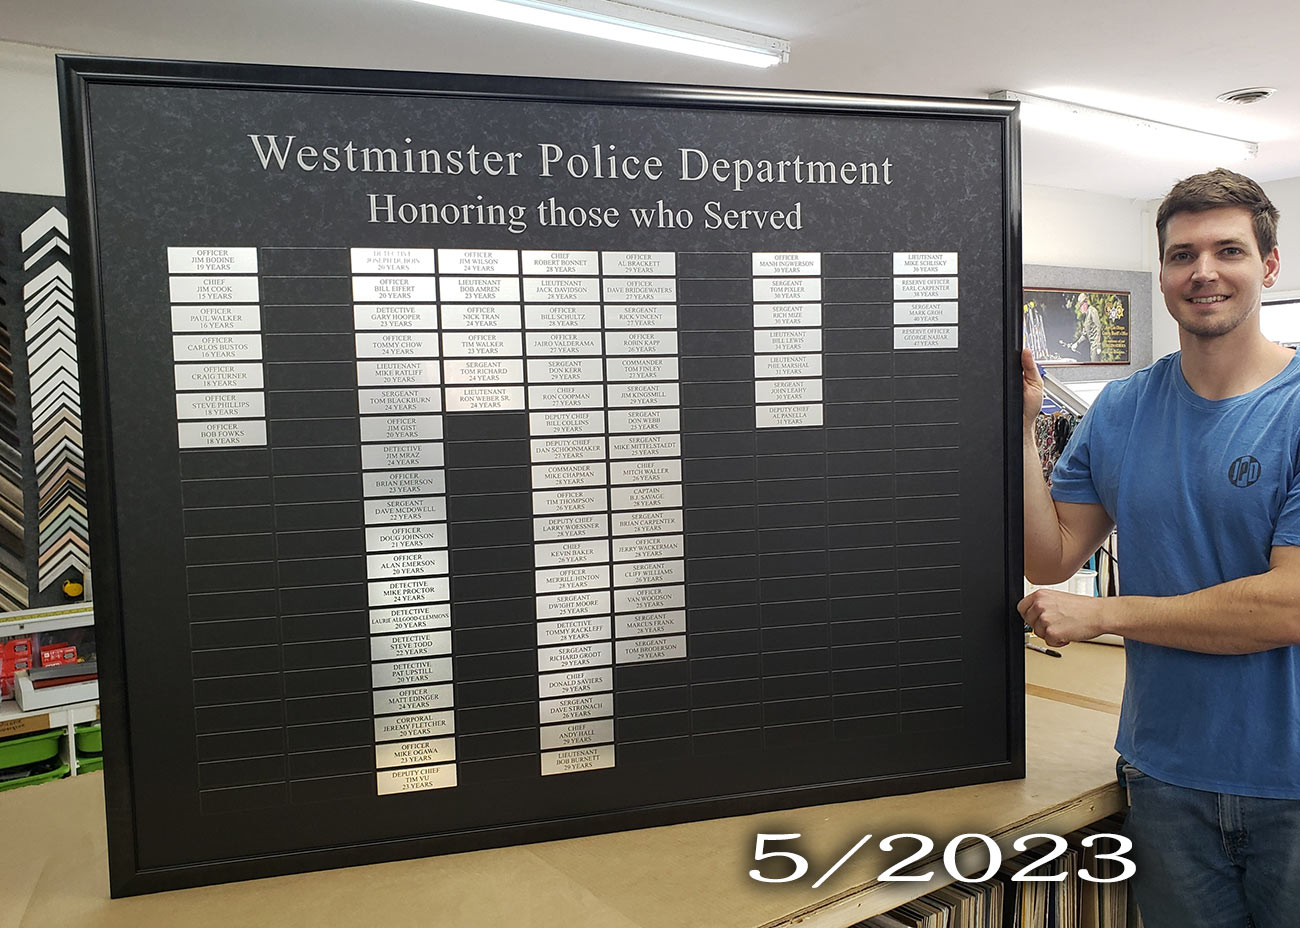
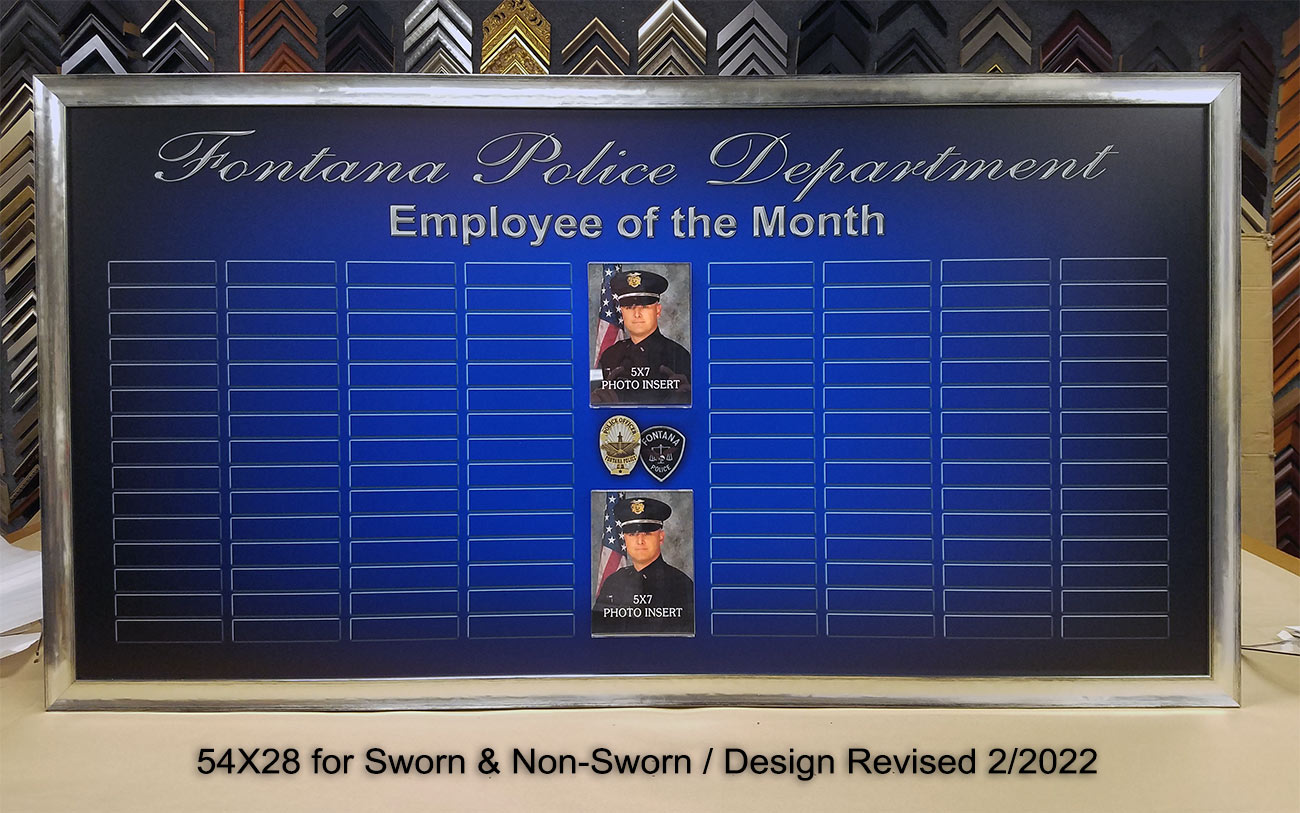
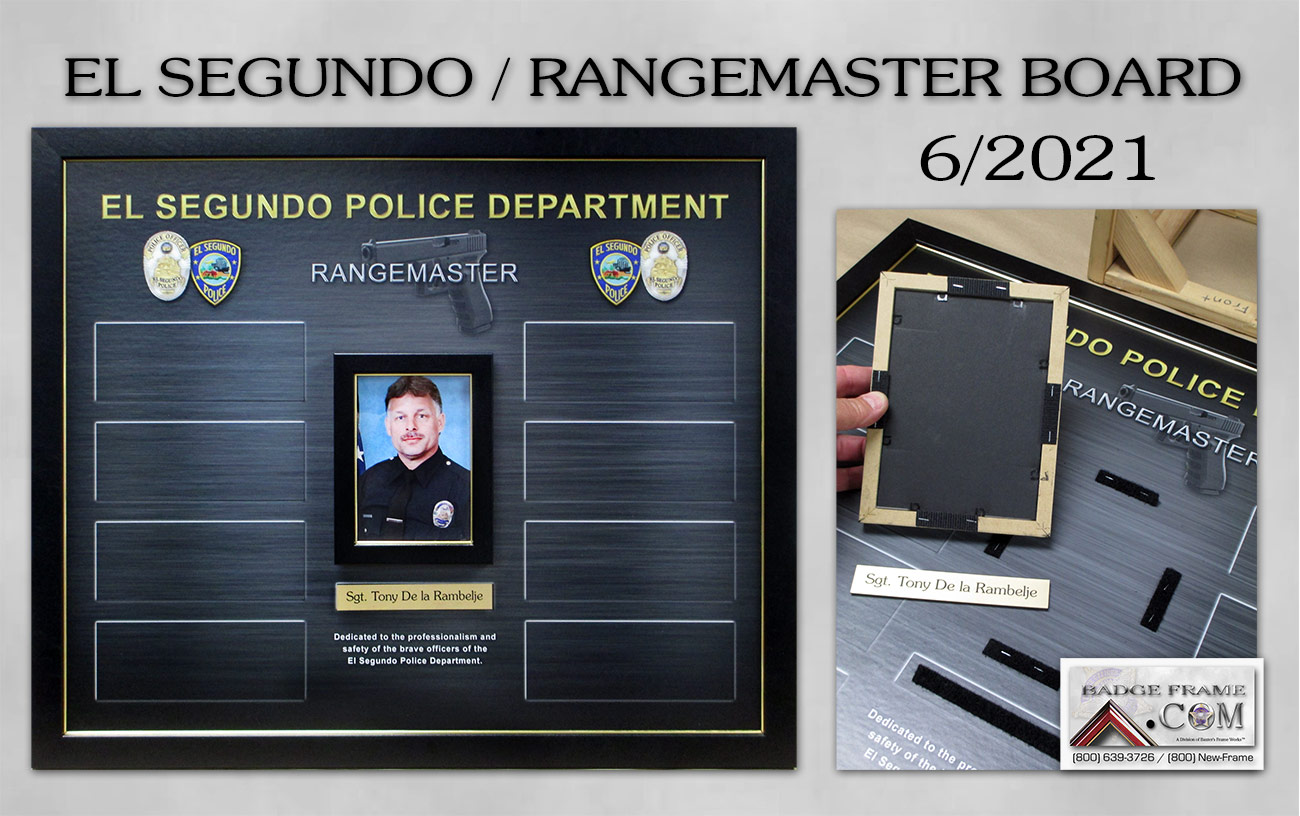
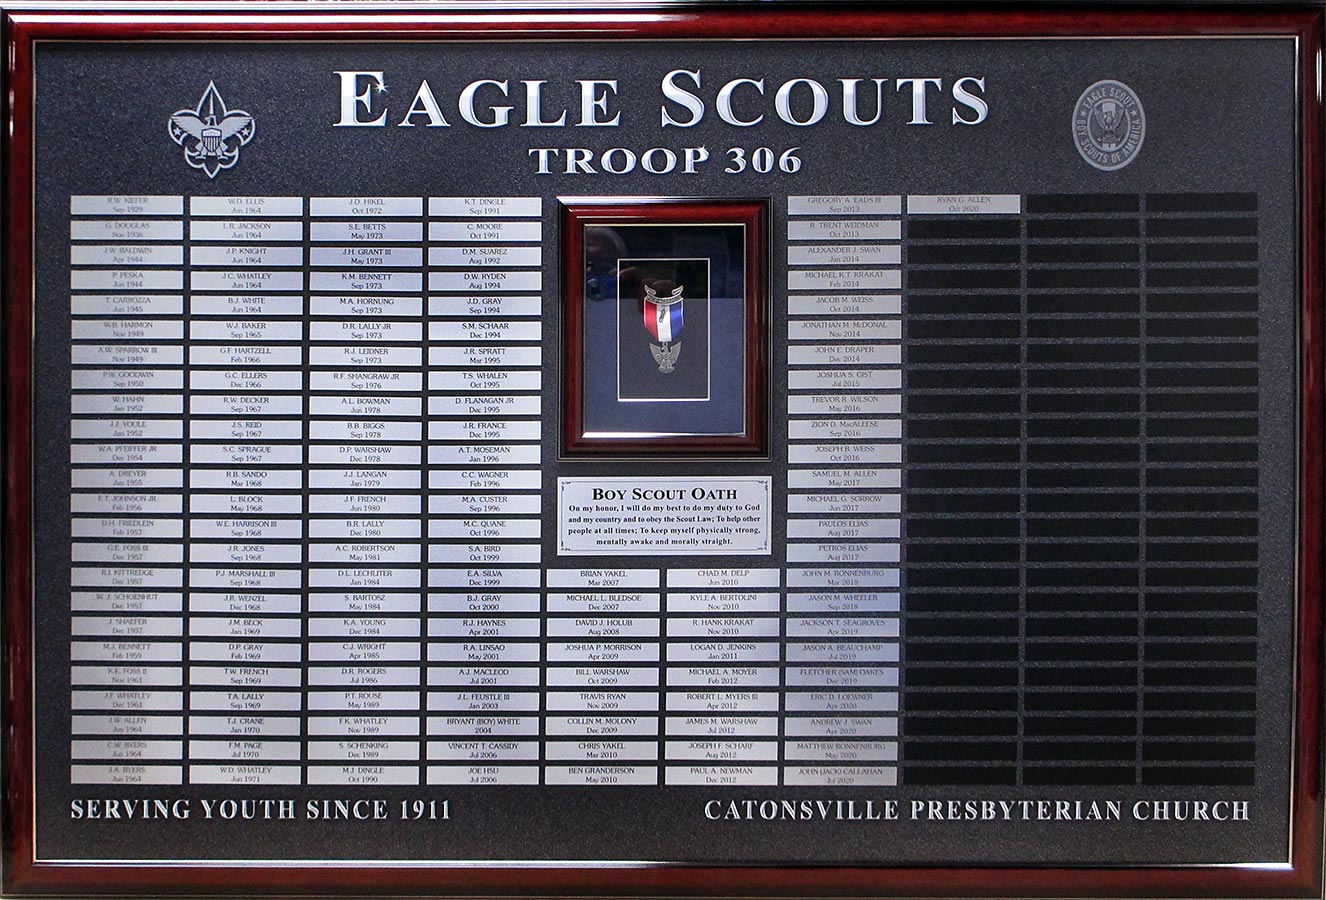
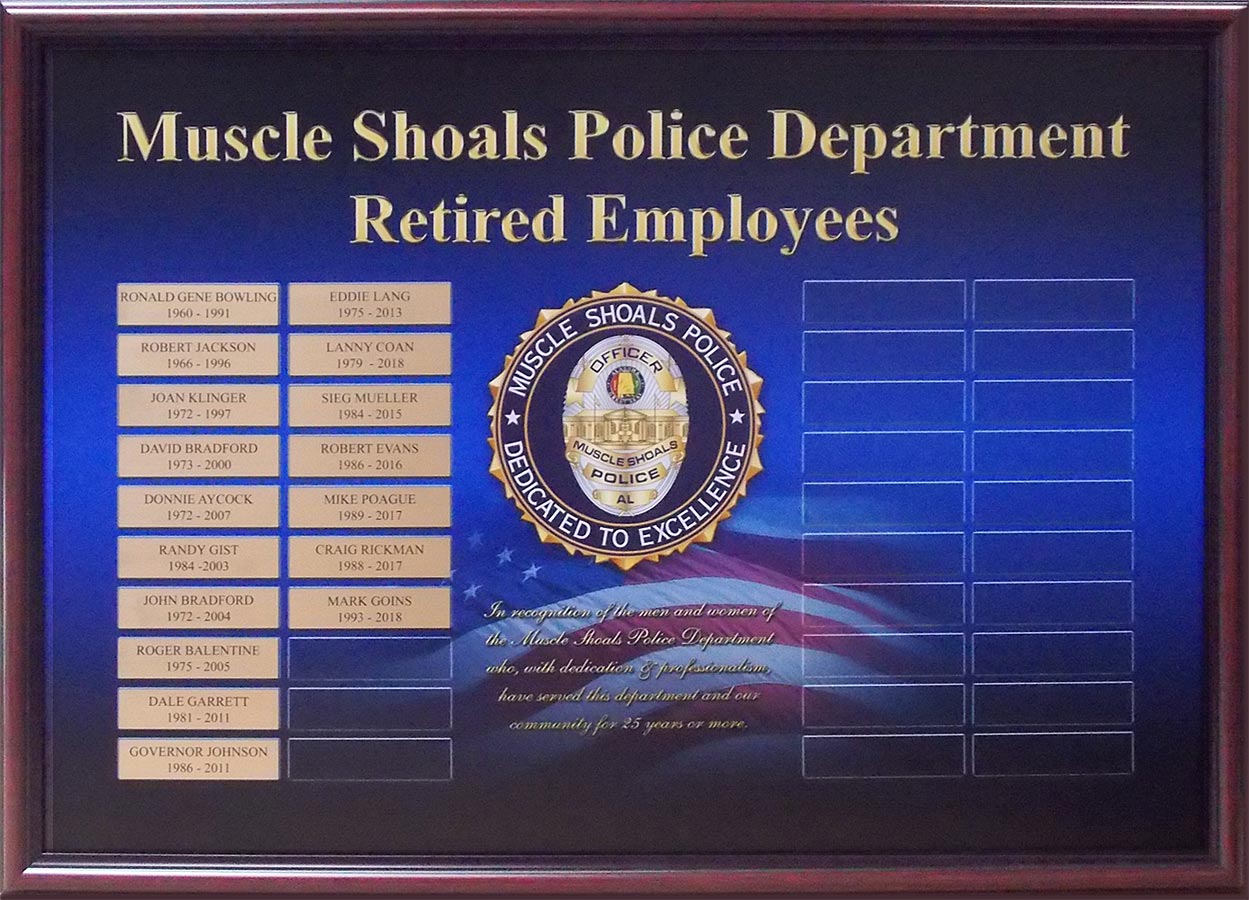
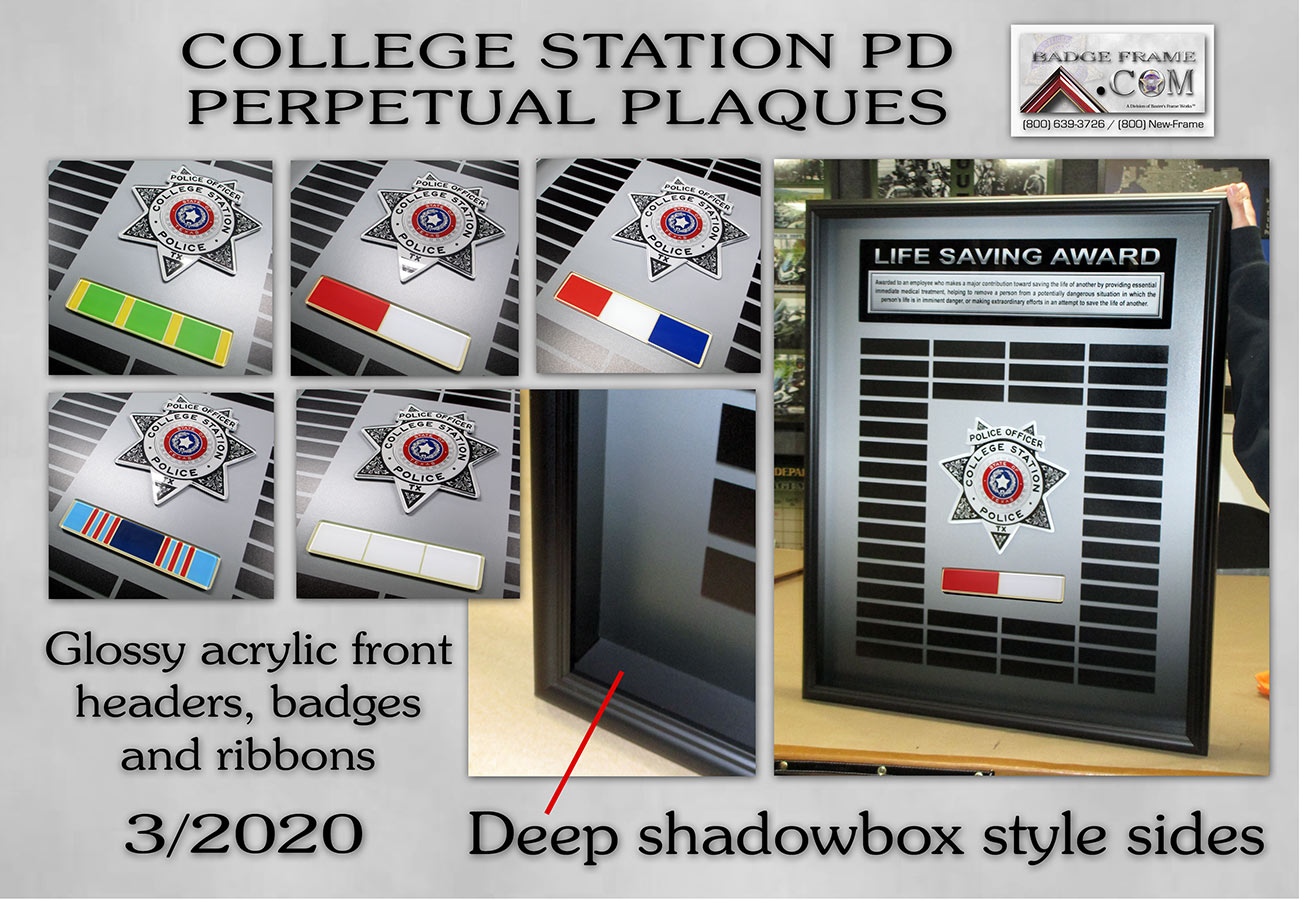
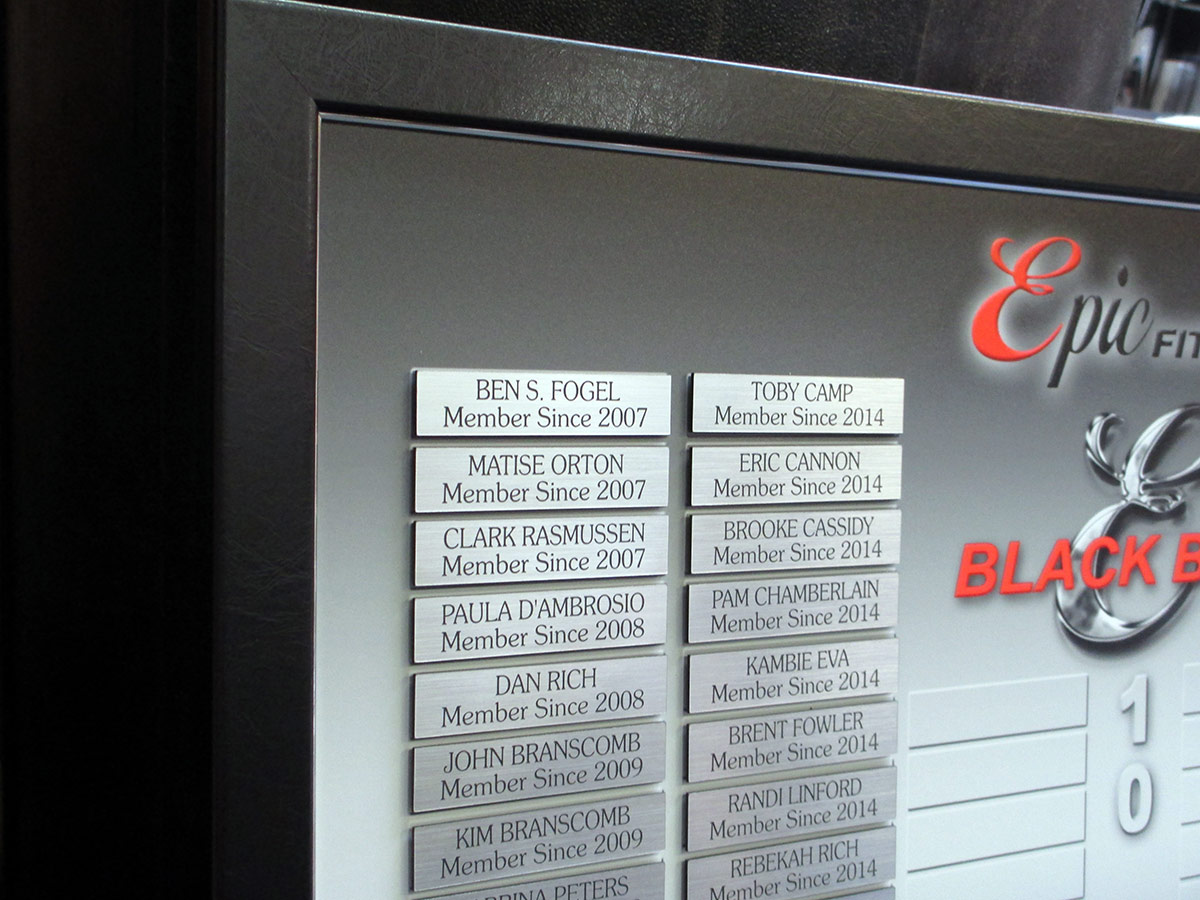
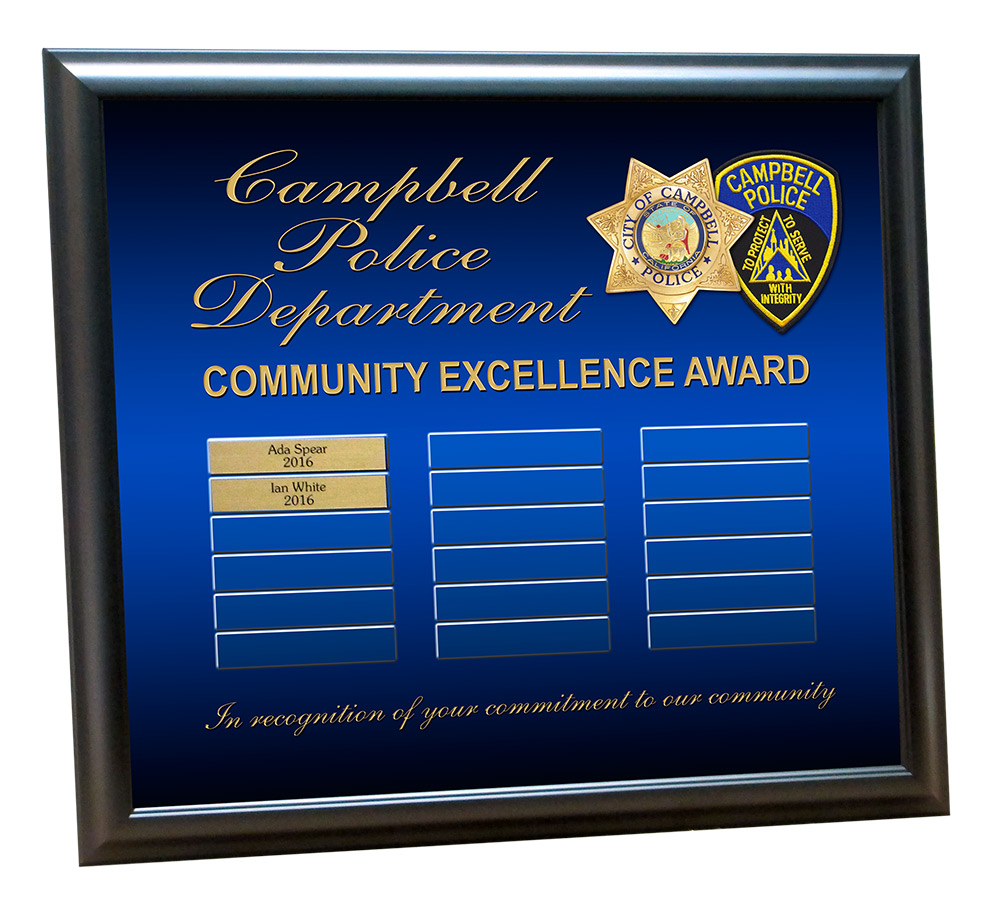
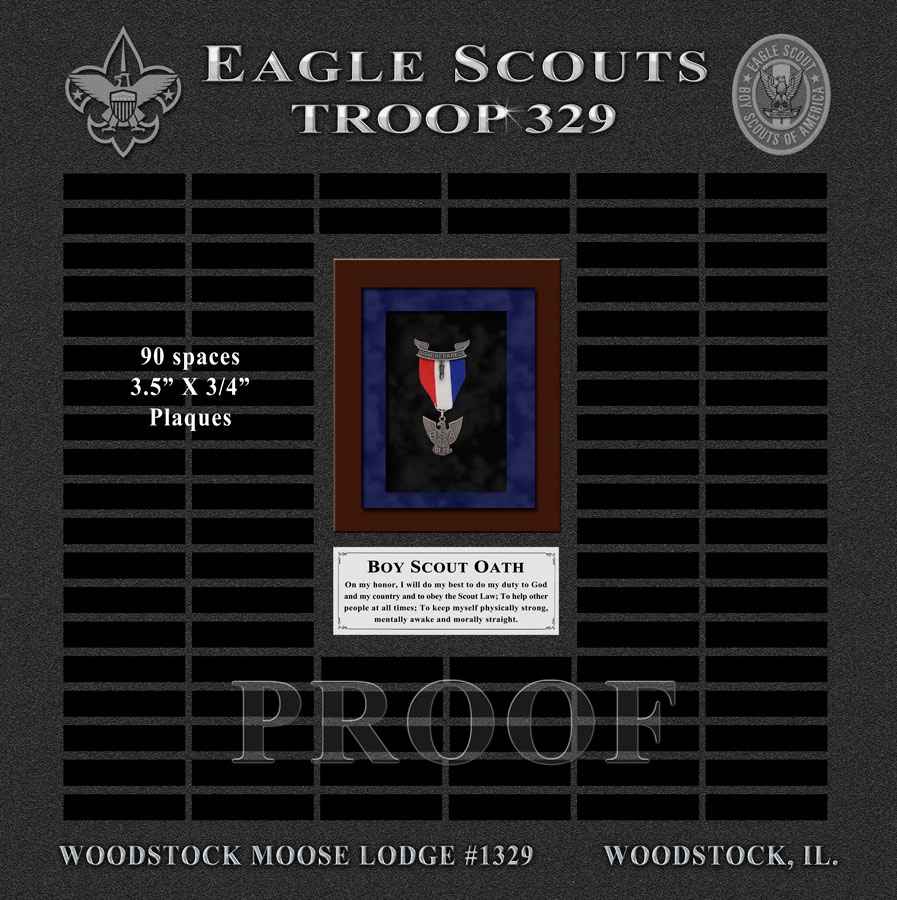
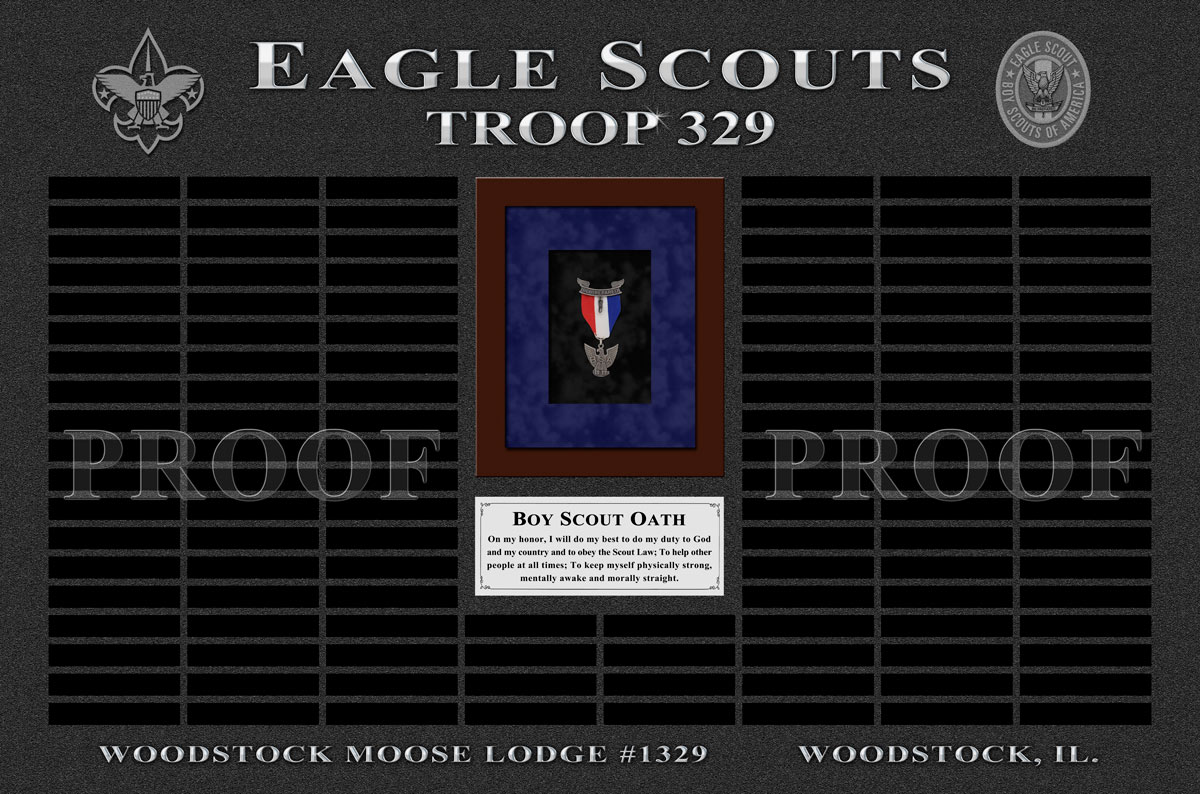
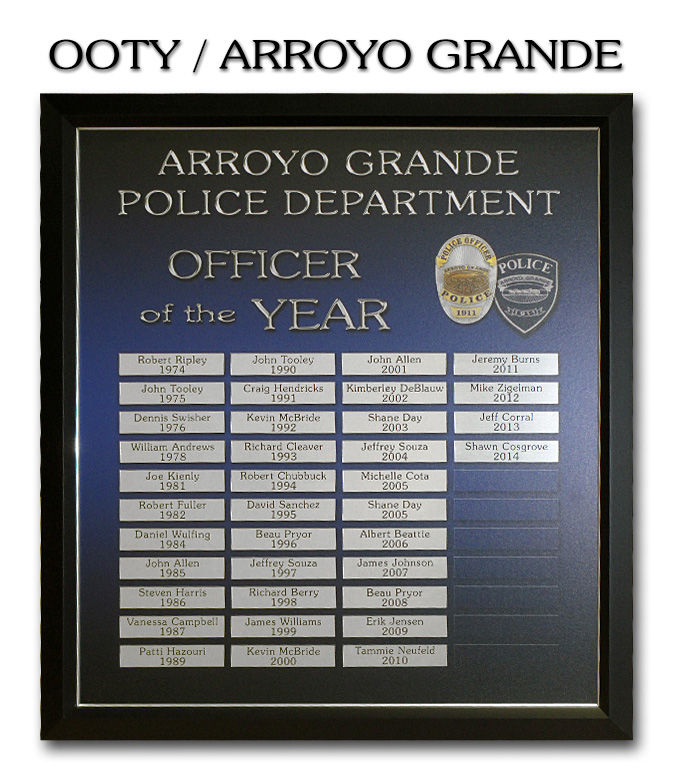
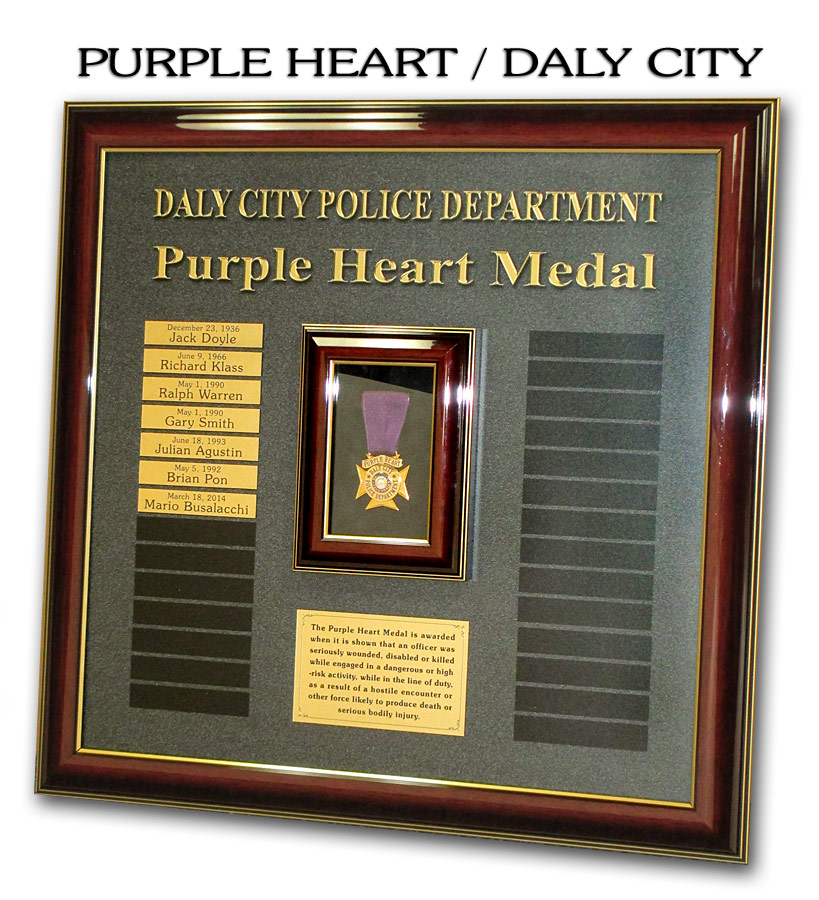
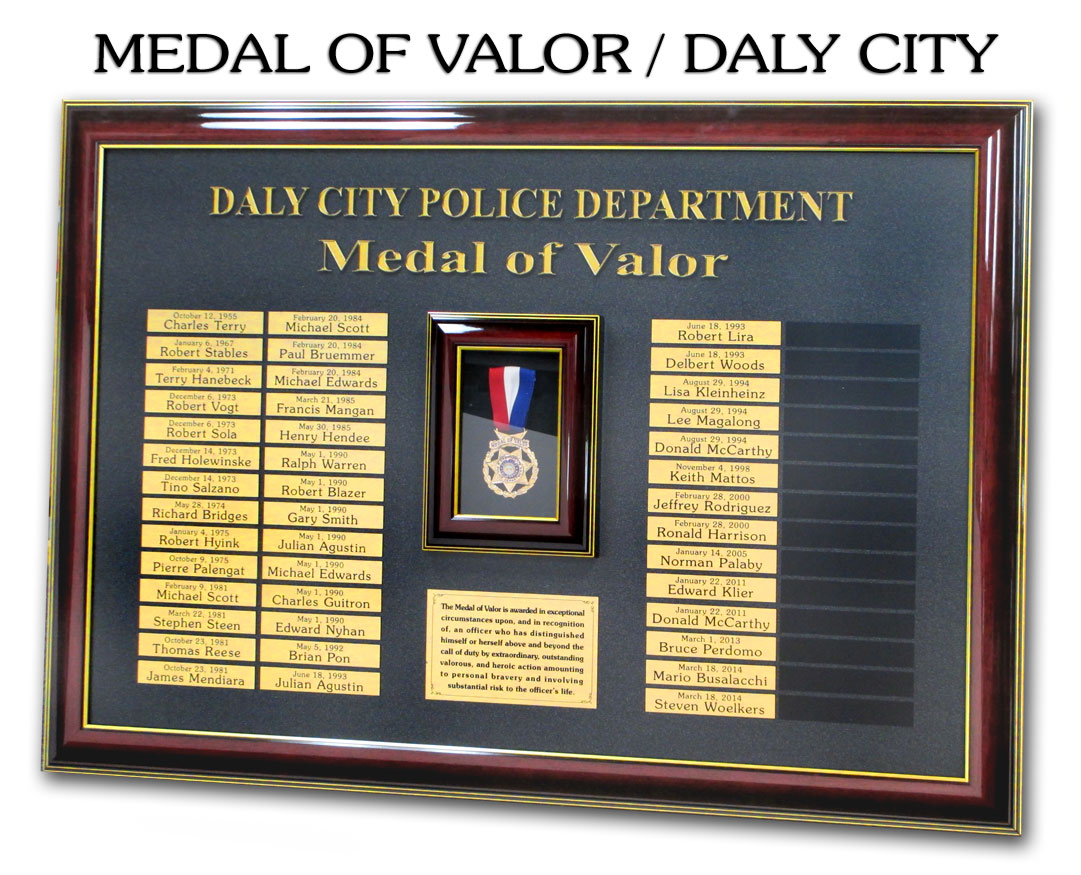
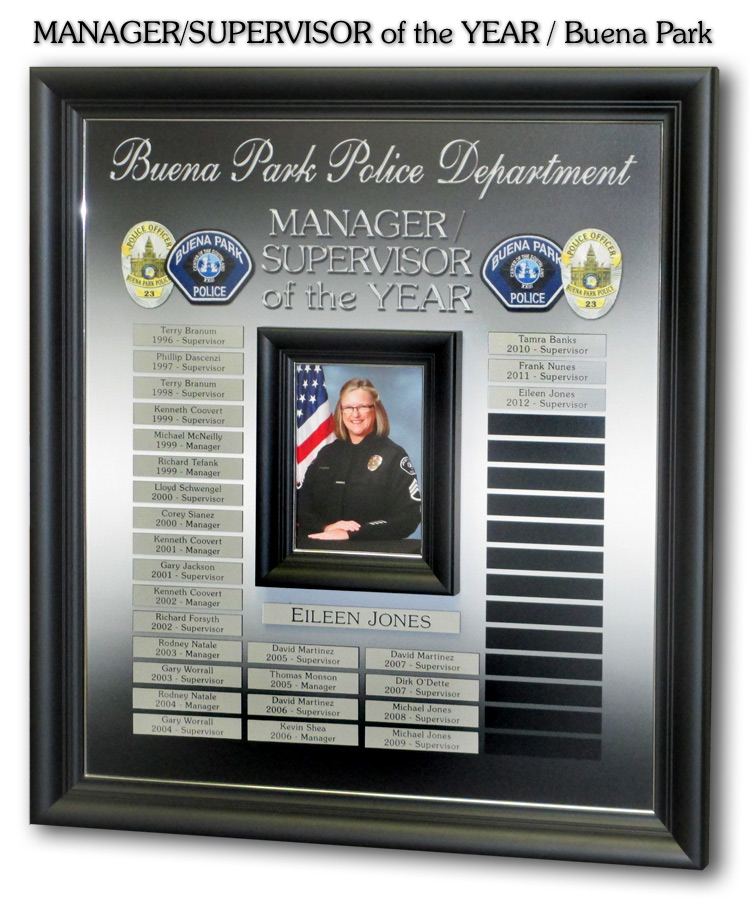
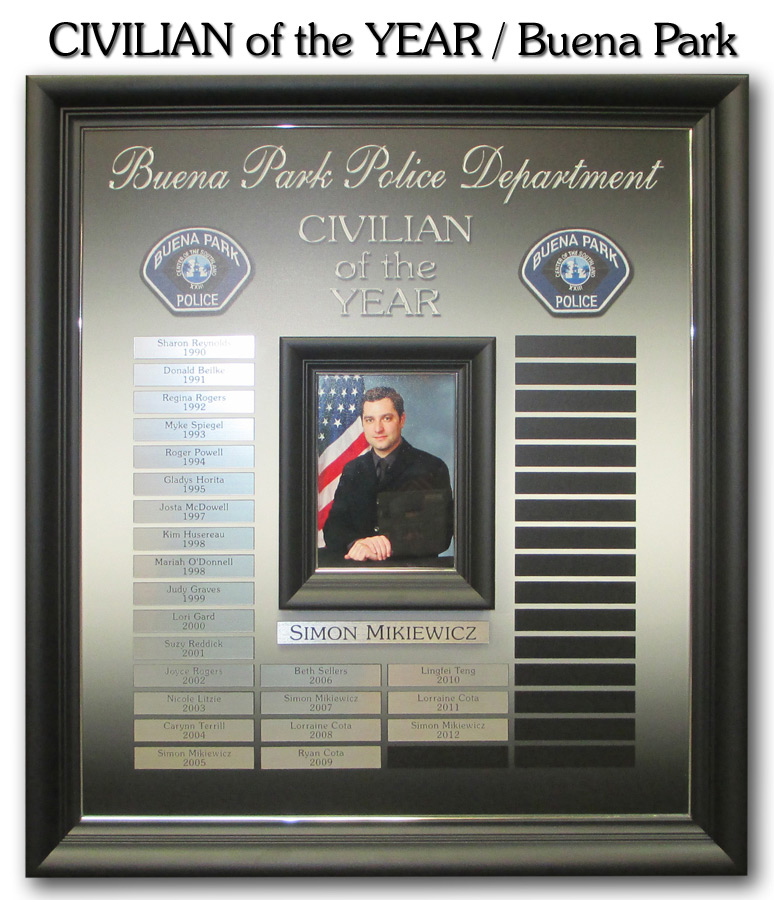
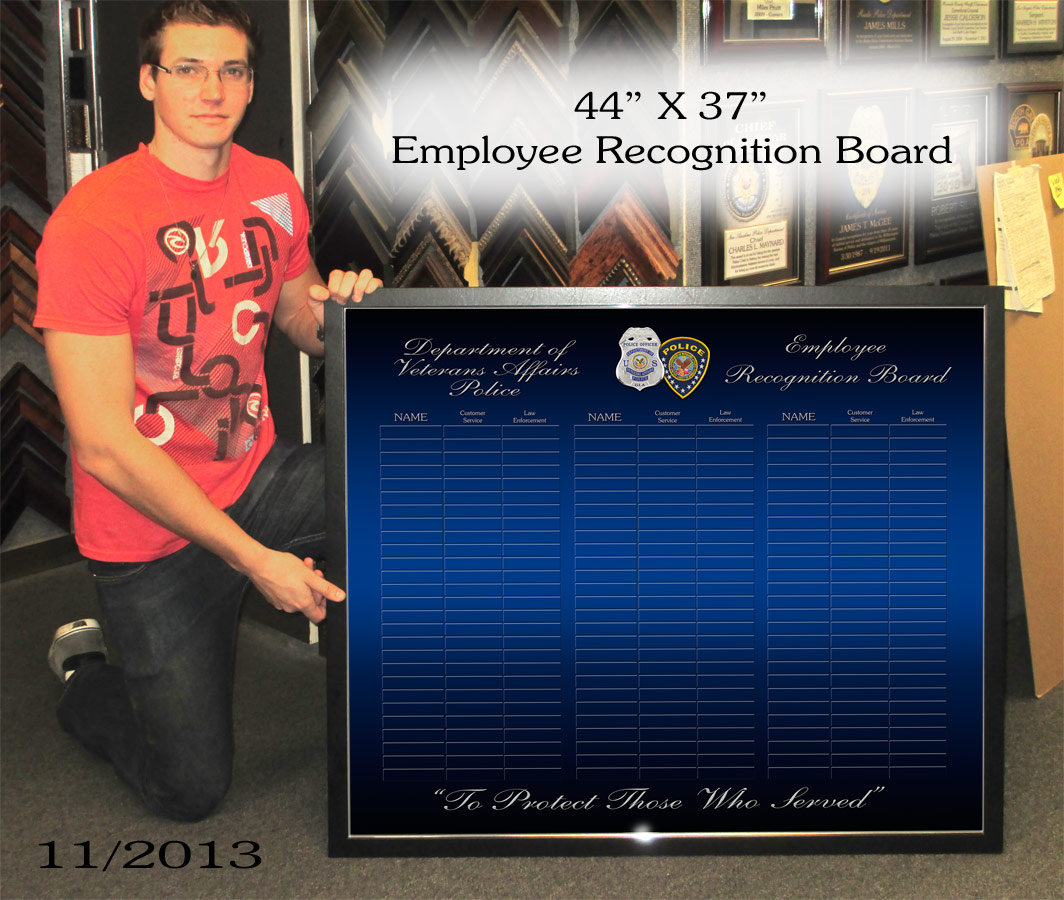
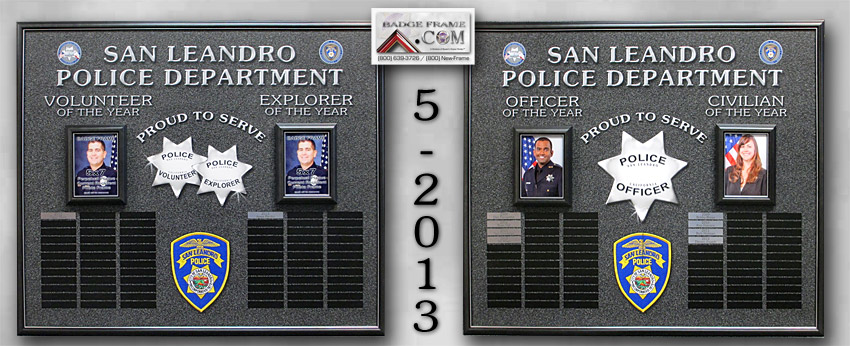
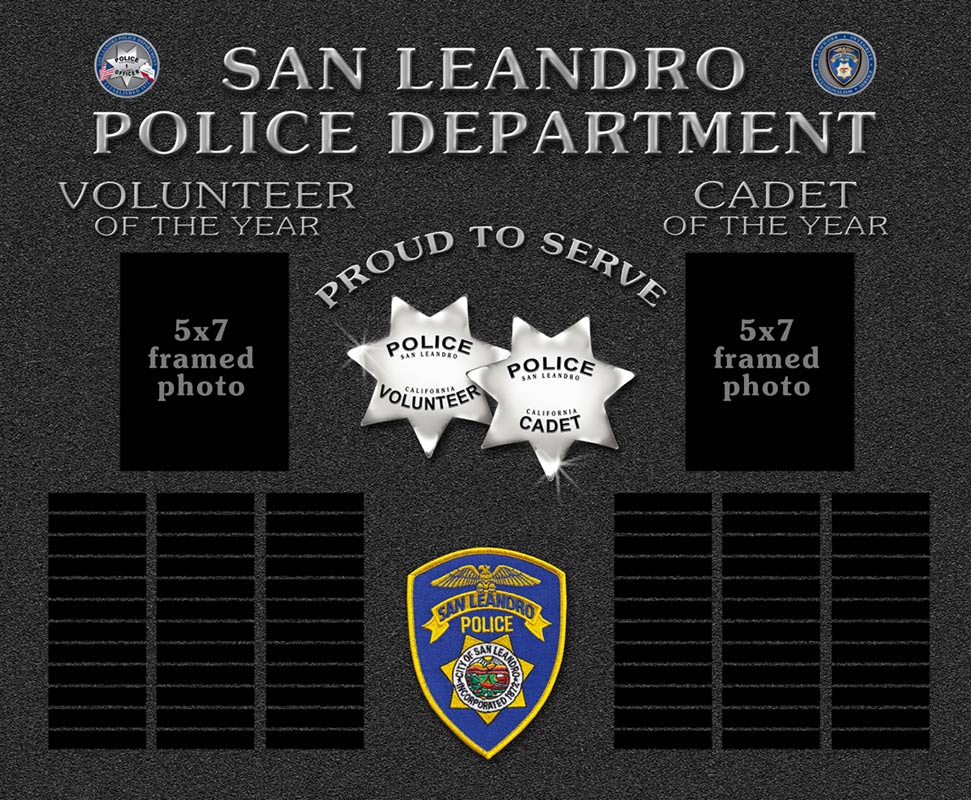
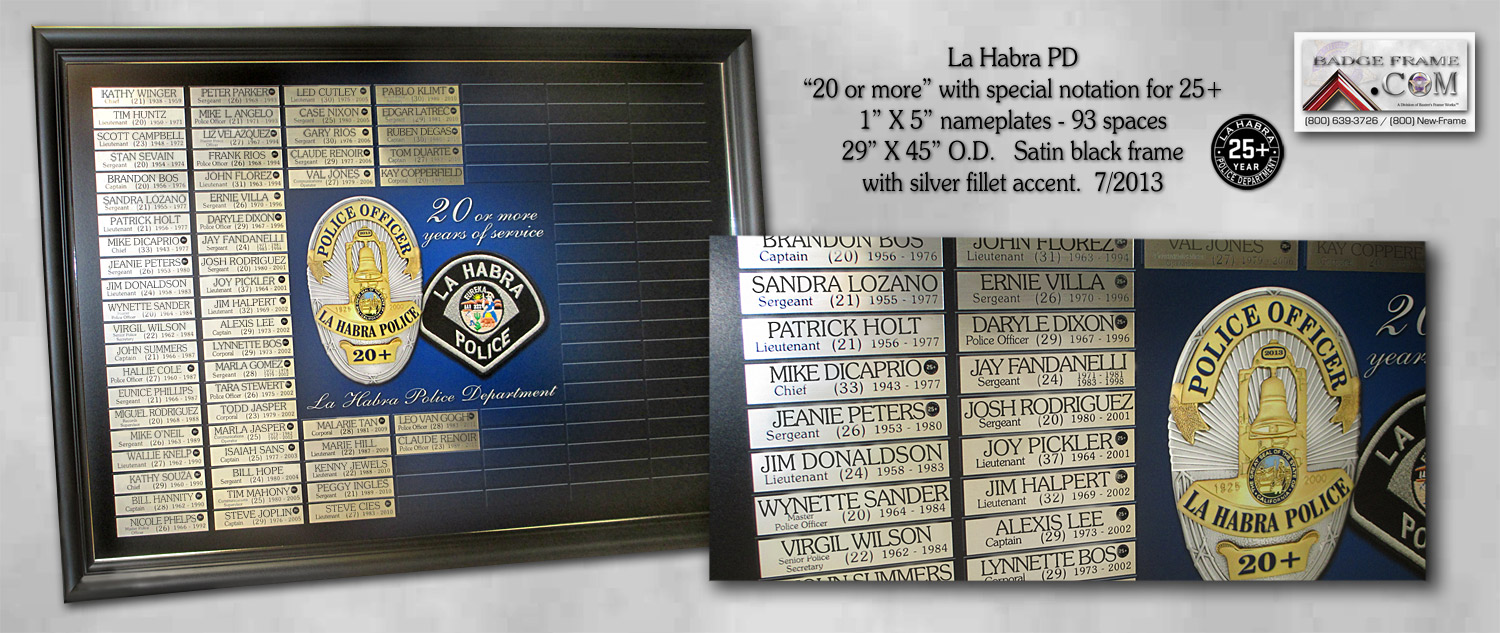
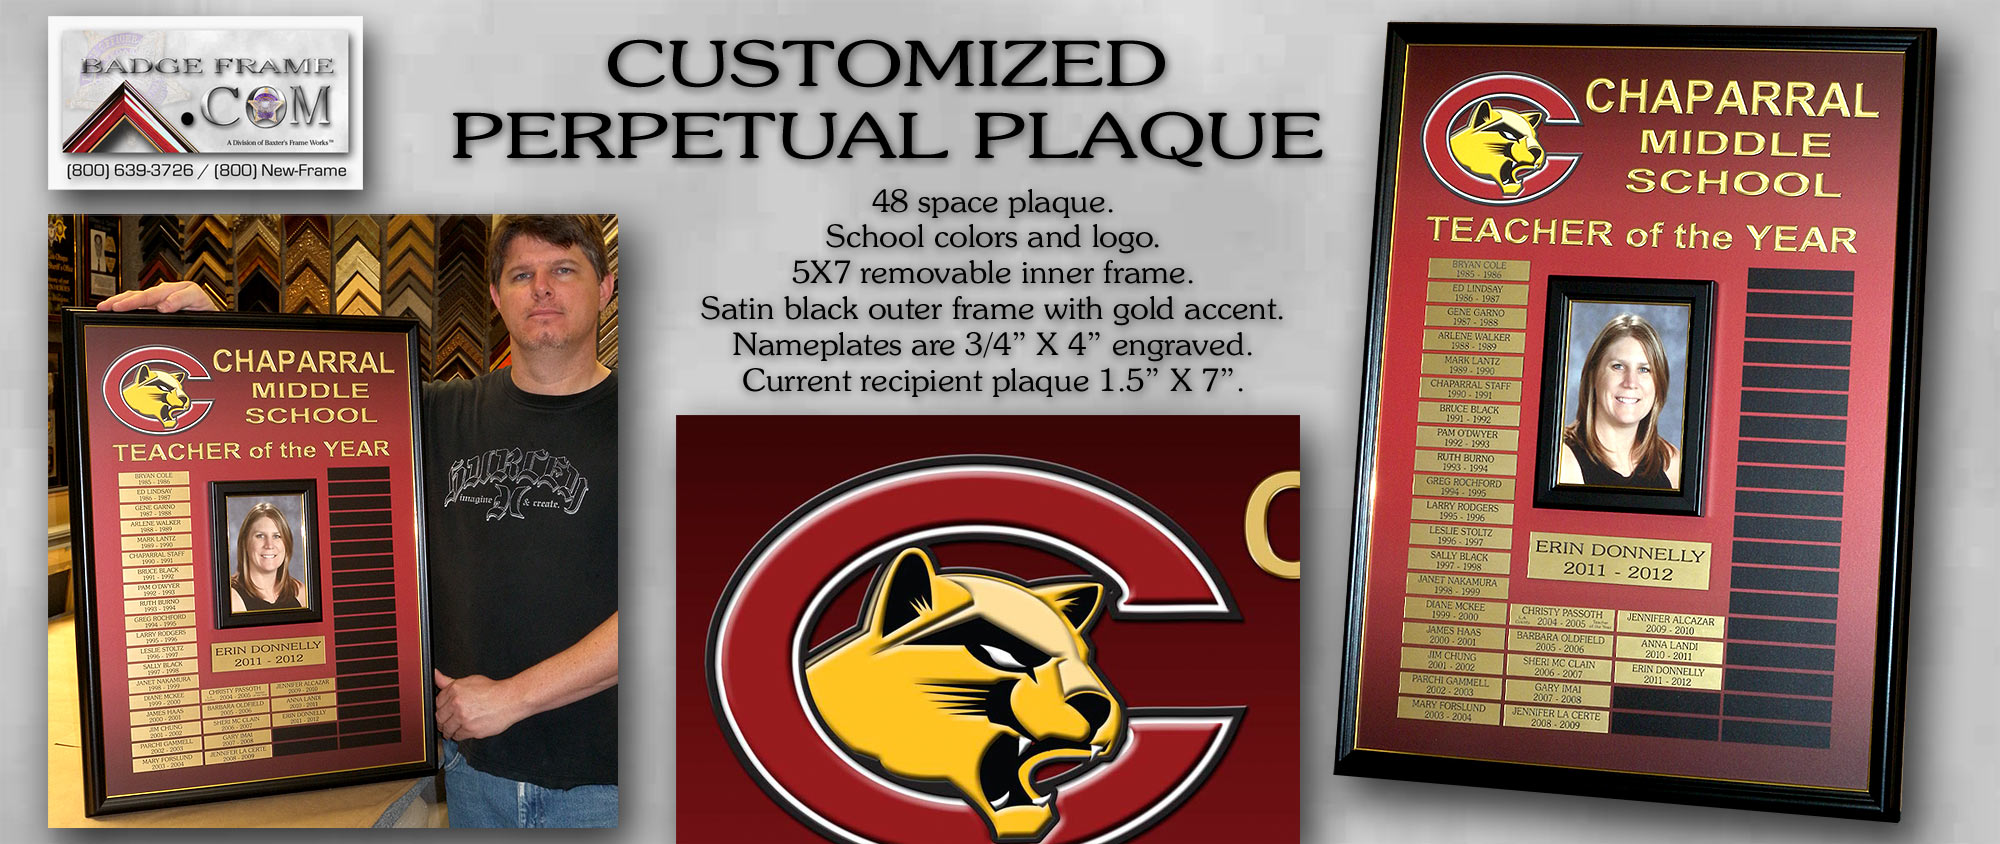
The plaque set-up above can be framed or un-framed. The
nameplates can be gold with black letters or black with gold
letters.
Nameplate size is 3/4" X 4". Placeholders on backboard make
aligning the name-plates easy, and visually show the completed
product.
Name-plates can be taped on or screwed in.
info on REMOVING NAMEPLATES...
Hey All.
Sometimes mistakes happen in spelling or other information and it
is necessary to remove and replace one or more of your nameplates.
First you will need some solvent. You WILL NOT be able to
remove the nameplates without it. You WILL destroy your
backboard if you try.
We will send you some adhesive solvent if you need it. You
can also use "Goo Gone" that is available in most stores.
Follow these instructions EXACTLY.
Get a few paper towels handy to absorb solvent that runs.
Try to keep the solvent around the wrong plaque(s) only.
Don't freak out if it gets onto others, just try to keep that to
minimum.
You will need a small flat-head screwdriver also.
The goal here is to get the plaque off without lifting or marring
the backboard and lamination with it.
1). Take plaque off wall
and lay flat on table.
2). Put something about 1/2" tall under
the top so it tilts downward just a
little. This will let the solvent
only run downward if it runs.
3). Squeeze a SMALL AMOUNT of the solvent
so that it surrounds the wrong nameplate.
4). Removing the plaque will take a while
to accomplish (about 10 min).
5). You will need to VERY GENTLY lift the
plaque edge with the screwdriver to help
let the solvent go under the wrong plaque.
6). GENTLY work your way around the edges
while keeping the solvent present and
dripping as needed
(but not running onto the others if
possible).
7). Just keep this up until the
plaque releases. Clean up all
solvent and adhesive residue (with more
solvent on a clean paper towel).
You can wipe this entire piece with the solvent. It will not hurt
anything. Let us know if you have questions or problems.
Thanks, Bill


 WOW.
WOW.


